
Welcome to Paper Pumpkin Week here at Creative Chelsey. I love getting my Paper Pumpkin Kit every month and creating fun alternative projects using the supplies in the kit. Today I am sharing my first alternative idea using the June 2022 Paper Pumpkin Kit – Pick Of The Crop.

This kit comes with everything you need to make 9 Handmade Cards, 3 in three different designs. What I like to do is use the supplies in the kit along with some other products and create different or alternative cards. Today I am sharing two cards using one cardbase. I love creating alternative projects with Paper Pumpkin Kits so make sure to come back for more as I continue to create with this month’s kit.
If this project inspires you to create something, I would love for you to tag me in any social media post using @creativechelsey | #creativechelsey or email me at chelsey@creativechelsey.com.
If you would like to see written instructions or close up images of these cards please visit my blog -
It is Paper Pumpkin Week here on Creative Chelsey. This is the first alternative this week. If you would like to see all my alternatives check out the playlist here: https://youtube.com/playlist?list=PL40dV1oxpkNlOtITOGGFqs-HwbiuDCaLW
Want to see everything in this month’s kit? Watch me UNBOX this month’s Paper Pumpkin Kit here: https://youtu.be/ETm5JQk6uJk

Don't miss out on next month’s Paper Pumpkin Kit -
subscribe today!SUBSCRIBE to Paper Pumpkin - click here –
See my Customer Appreciation Products for this month: http://creativechelsey.blogspot.com/p/shop-stampin-up-products.html
Follow me on Instagram https://www.instagram.com/creativechelsey
Or join my Facebook group https://www.facebook.com/groups/2221750878097906
To purchase any of the products you need to create this project visit https://www.stampinup.com?demoid=2042902
———————— What You Need ————————
Sunset Cardbase
Envelope
(2) Basic White Thick Cardbase 5 ½” x 8 ½” scored at 4 ¼”
Large Berries Die Cut
Small Strawberry & Blueberry Die Cut
Long Label
(2) Linen Thread 6”
Large Vellum Die Cut
(2) Lavender Die Cut
Tag Label
———————— Supplies I used to Make These Cards ————————
• Basic White 8 1/2" X 11" Thick Cardstock
[159229] $8.75 —— https://bit.ly/3Pc9AwW
———————— My Favorite Supplies ————————
• Stampin' Seal+ [149699] $12.00 —— https://bit.ly/3Ibz8YK
• Multipurpose Liquid Glue [110755] $4.00 —— https://bit.ly/3IaGF9S
• Tear & Tape Adhesive [138995] $7.00 —— https://bit.ly/3ajQSo5
• Stampin' Dimensionals [104430] $4.25 —— https://bit.ly/3IbzezA
• Mini Glue Dots [103683] $5.25 —— https://bit.ly/3anAcw3
• Stampin' Pierce Mat [126199] $5.00 —— https://bit.ly/3IjEq4d
• Simply Shammy [147042] $8.50 —— https://bit.ly/3bQH7hE
• Paper Snips [103579] $11.00 —— https://bit.ly/3ulT6tV
• Take Your Pick [144107] $10.00 —— https://bit.ly/3IeYxR9
• Bone Folder [102300] $7.00 —— https://bit.ly/3uhErzZ
• Clear Block D [118485] $9.00 —— https://bit.ly/3uuabSs
• Paper Trimmer [152392] $25.00 —— https://bit.ly/3abvykH
• Stampin' Cut & Emboss Machine [149653] $125.00 —— https://bit.ly/3ujz8zU

Prep:
1- Trim 1/16” from the bottom edge of the Sunset Cardbase
to be 5 7/16”. Remove the scored line in the center by cutting each side at 4 3/16”.

2- Remove 1/16” from each side of the envelope. On the front cut off the bottom at 7/8” x 5 7/16” use the pink stripe side (card #1)
3- Trim around the address area creating a rectangle
about 2 ½” x 5 7/8” (card #1)
4- From the back piece cut a 2 ¾” x 3 ¼” green rectangle
(card #2)


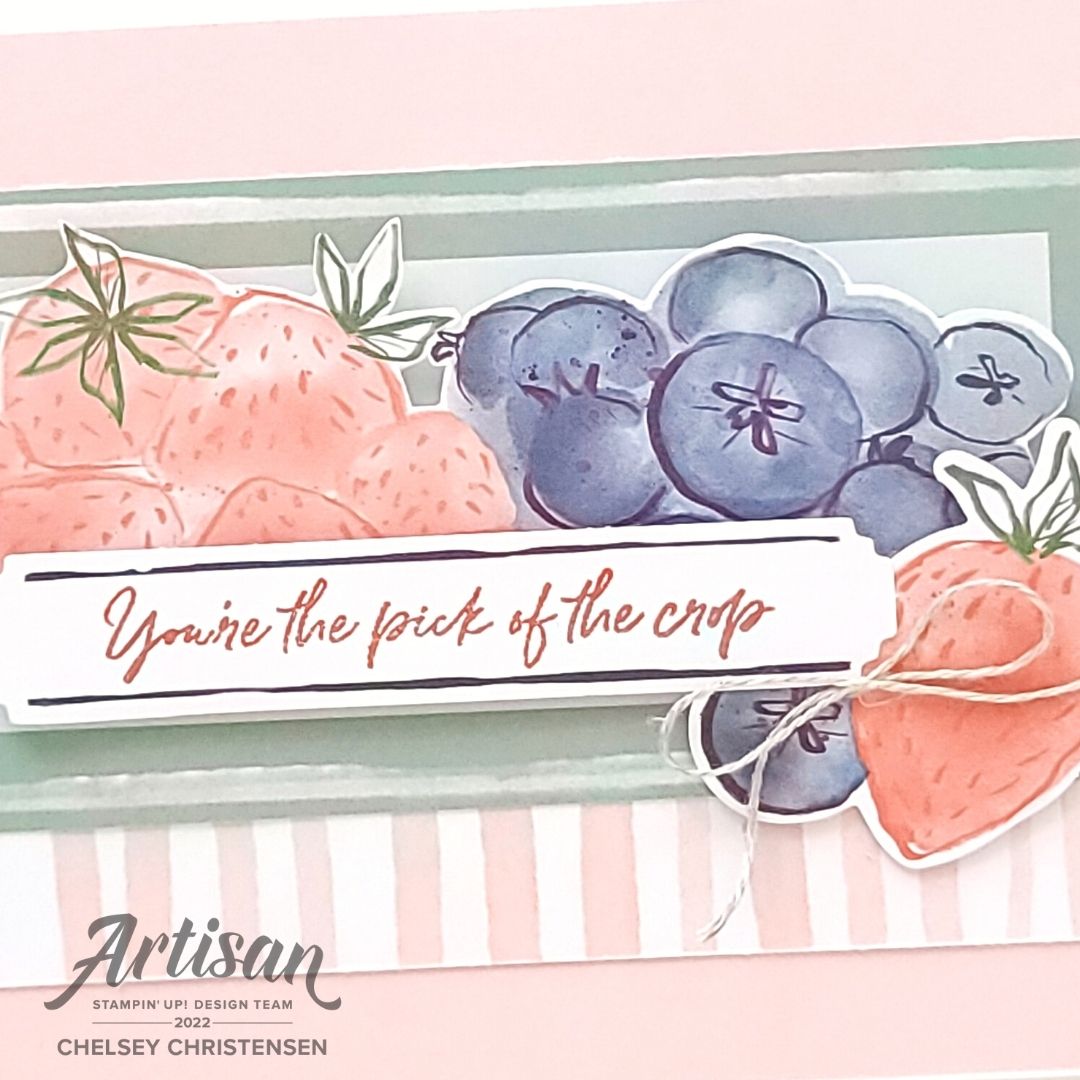
Card #1 – Berries
1- On the front of the cardbase layer the pink side from
the sunset cardbase so there is a tiny border. Add the pink stripe strip about ½”
from the bottom. Add the green address label to the center.

2- Adhere the berries dies cut with dimensionals at the top and adhesive at the bottom. Place in the center of the address area to the bottom edge touches the last line and the berries cover all the above lines.

3- Stamp “You’re the pick of the crop” in Calypso Coral ink on the long label. I used VersaMark under the ink to get a crisp image. Add this in the bottom left corner of the berries.

4- Tuck the single strawberry & blueberry with a dimensional under the greeting on the right side.
5- Tie a bow with 6” of Linen Thread and add with a glue
dot to the bottom right corner of the greeting.
All Done!


Card #2 – Lavender Bunch
1- Add one lavender die cut in the center of the vellum
with a dimensional.
2- Cut the second lavender in half and tuck each half under
the center bundle.

3- On the front of the cardbase add the sunset side with a tiny border.
4- Add the vellum to the center of the green rectangle
from the envelope. Add to the cardbase.

5- Stamp your greeting on the green tag in Calypso Coral. You can use the VersaMark trick again if needed. I stamped so the tag hole is on the left side. Add at the bottom of the bunch with a dimensional.
6- Tie a bow with 6” of Linen Thread and add with a glue
dot over the tag hole.
All Done!
I have also created a video walking you through each step
and some of the details from the other cards:
To purchase any Stampin’ Up! products please visit
https://www.stampinup.com?demoid=2042902
Have a creative day!
Chelsey
chelsey@creativechelsey.com
No comments:
Post a Comment