Today is another tutorial for the Global Stampin’ Video
Hop on YouTube. Each month on the fourth Friday Stampin’ Up Demonstrators from
around the world come together and share their projects based on a monthly
theme. October’s Theme is FAVORITE DESIGNER SERIES PAPER. I had such a hard
time choosing a favorite DSP. There are so many wonderful patterns and designs
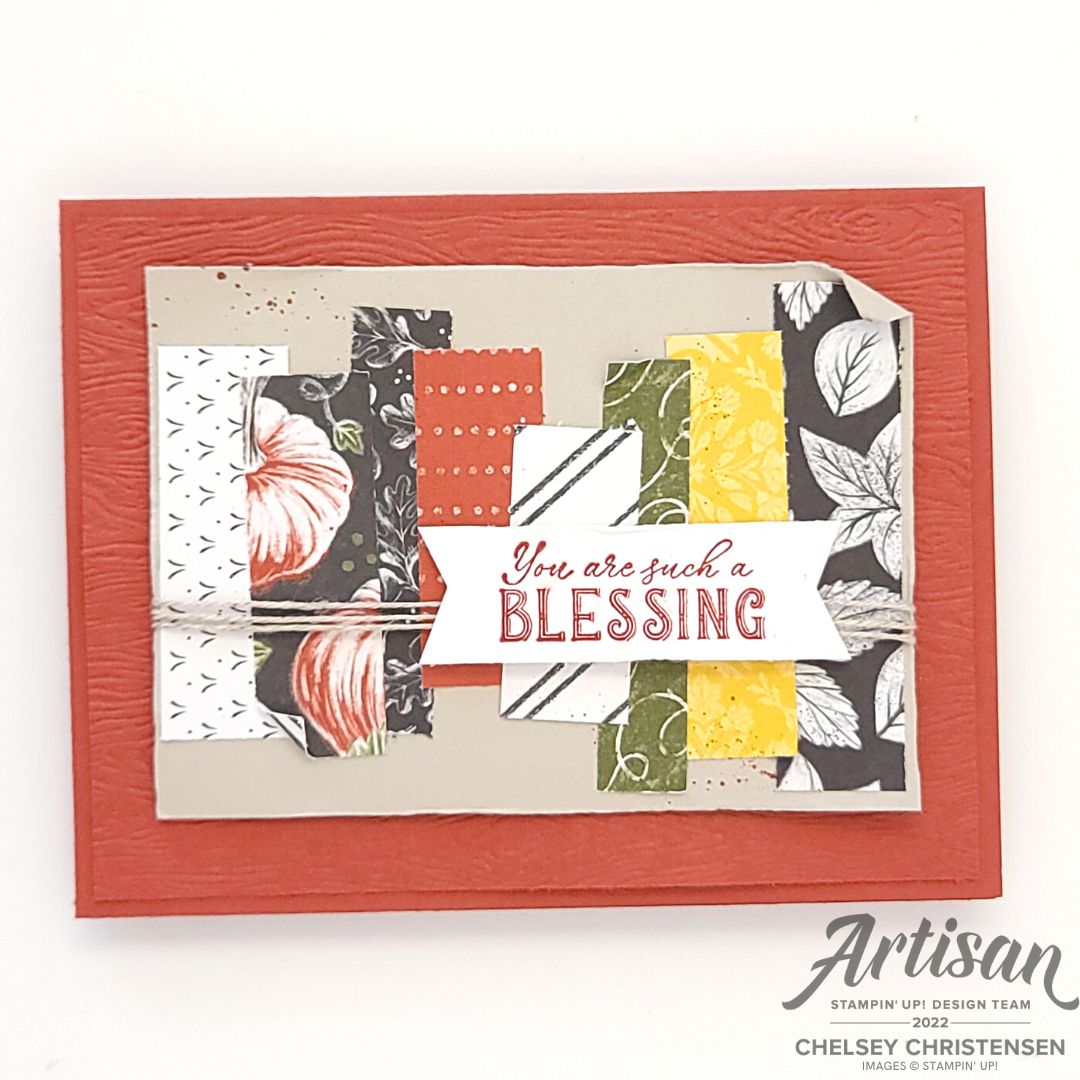
that Stampin’ Up! offers. So I decided to share with you an oldie, but goodie –
a scrap card! If you are like me, we have a hard time throwing away even the
smallest of scraps from our favorite papers. I hope this card gives you some
ideas on a new way to use up those scraps.
Make sure to check out what everyone makes for this
monthly Video Hop. You can start with my video, I have linked it below. You can
find the next video at the top of the video’s description on YouTube. Have fun!
1- Begin by gathering coordinating scraps either from one
DSP pack or make up your own combination of patterns and colors.
2- Cut the length down if too long. Any size up to 2 ½” will
work for this card.
3- Begin adding them to the smaller cardstock. I like to
start with the sides first and then work my way to the center.
4- On the 4” x 5 ¼” piece of cardstock add texture with
stamps, splatter, or embossing folder. Layer this piece on the cardbase.
5- Add the small piece with the scraps in the center with
dimensionals. If you want to wrap ribbon or twine around this piece do it before
adding to the cardbase.
6- Stamp your greeting in a coordinating ink color and
cut out with a punch or die. Add to the card with dimensionals.
7- Add any embellishments: dots, rhinestones, ribbon,
twine.
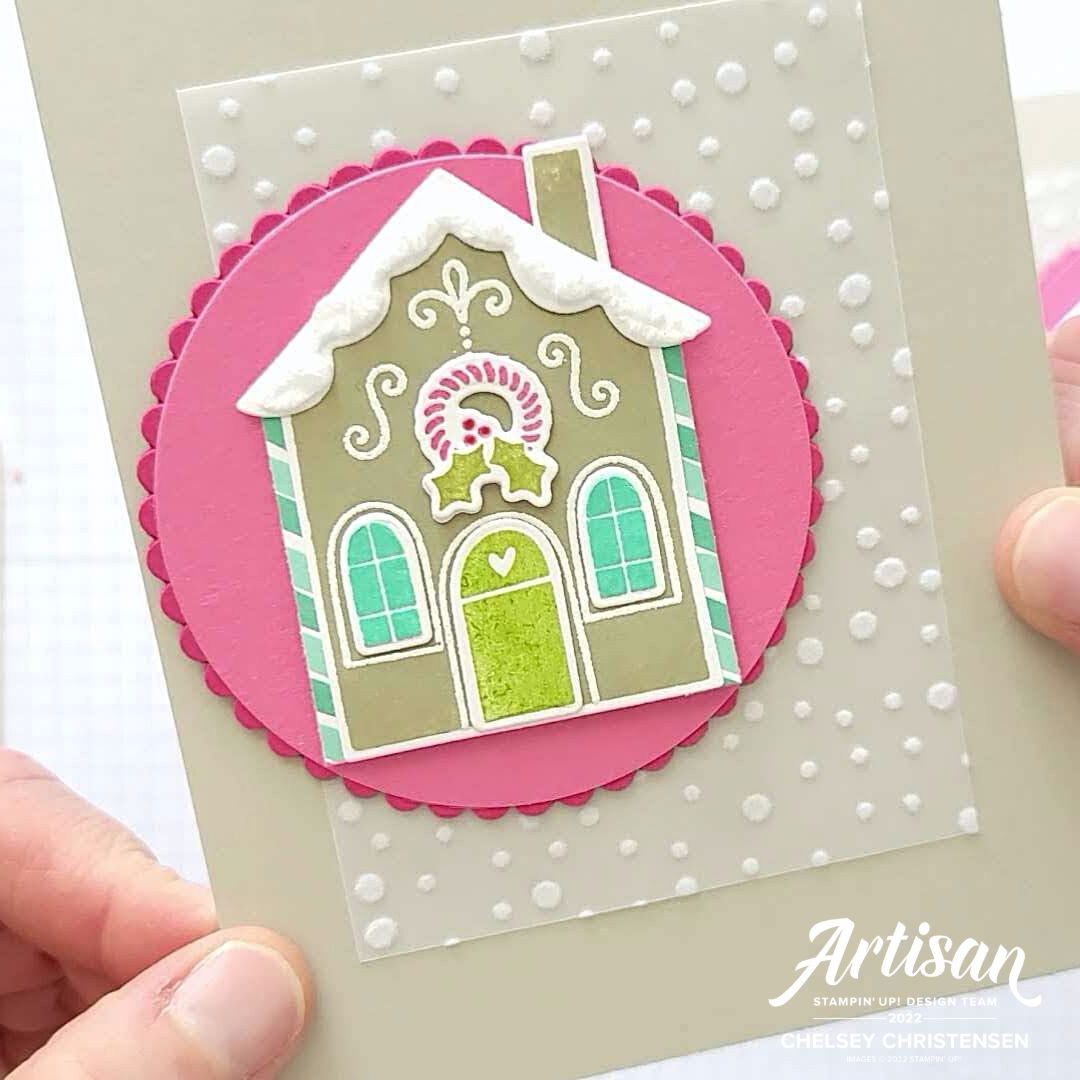
Today I would like to share with you these two beautiful winter/holiday
cards I created for Stampin’ Up!’s Artisan Design Team Showcase in October
2022. I was asked to use the Sweet Gingerbread Bundle in the July – December
2022 Mini Catalog. If you are interested in any of these products make sure to
purchase them before December as many are seasonal and will not be available
after the end of the year.
I love this cute stamp set and I share some tips to
getting great results with it. Check out the tutorial or my YouTube video
below. I also share with you how to use the new Snowfall Accent Puff Paint. I
love how it looks on the roof of these cute gingerbread houses.
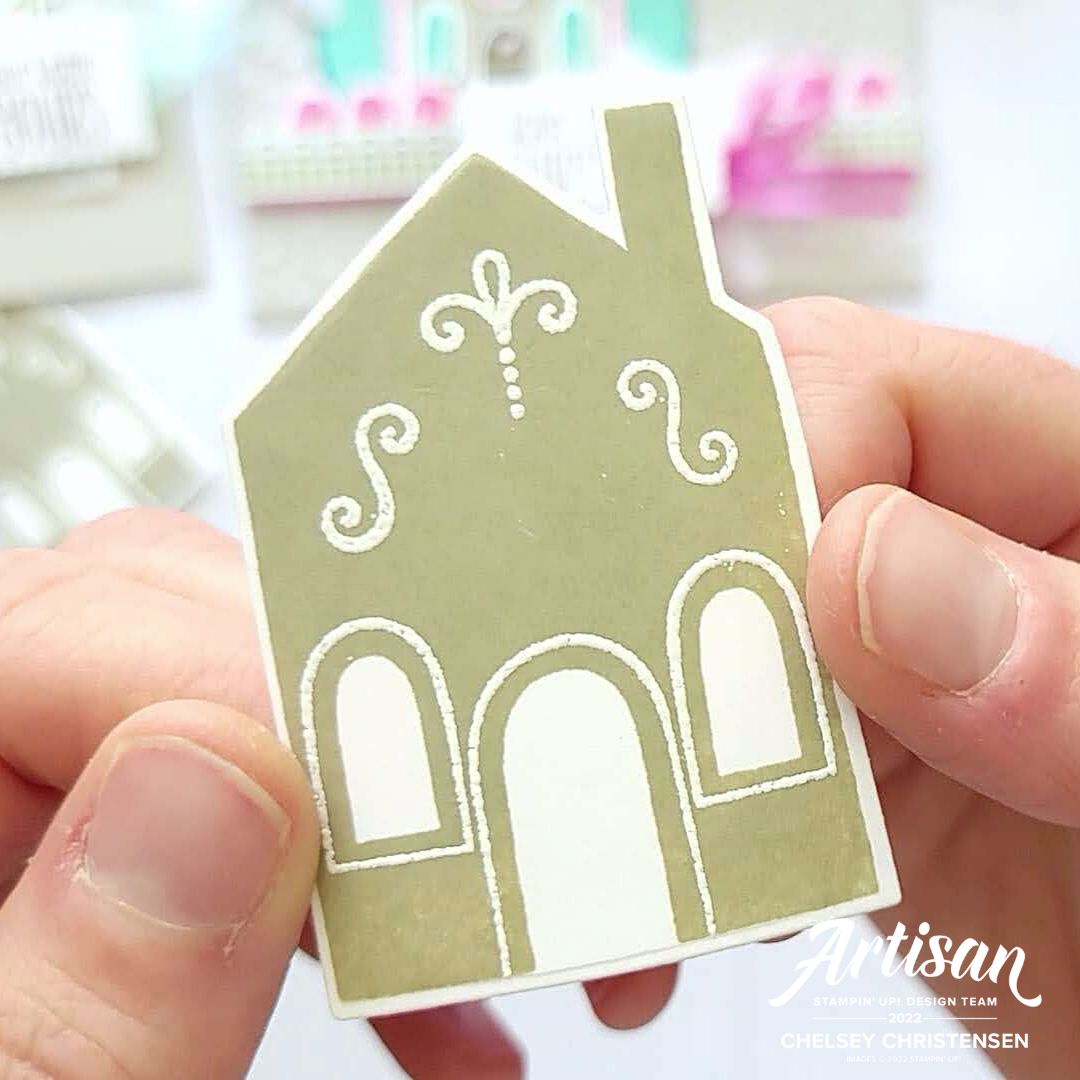
Stamping the Gingerbread House with White Heat Embossed
Details
1- Stamp your house in your base color, I used Crumb Cake
ink.
To get a nice crisp solid image use VersaMark ink first
before inking your base color ink. This sticky ink holds the color ink in
place. Also use a soft mat underneath, like the Stampin’ Piercing Mat.
2- Add white details around the windows & doors. Stamp with VersaMark, add white embossing powder, & heat.
Make sure you don’t get white embossing powder stuck to
your Gingerbread House by heavily using an Embossing Buddy before you stamp
with VersaMark.
3- Cut out with coordinating die.
4- Stamp & cut out details for your house; window
& doors in fun coordinating colors. I used Coastal Cabana, Soft Suede,
Granny Apple Green, Polished Pink, Pear Pizzazz.
5- Use the Snowfall Accent Puff Paint to get a fun roof. First cut out the roof die in Basic White Cardstock. Add the die cut to a sticky note on the sticky area. Shake the puff paint and add to the die. Then heat with your heat tool until it puffs up. Adhere to your gingerbread house.
6- Create a fun stripe detail for the sides of the
gingerbread house. I used the Dark & Lights Stampin’ Blend Markers. One in
Polished Pink & the other in Bermuda Bay. Draw angled lines on scratch
Basic White Cardstock then cut to ¼” and adhere to each side on the back of the
gingerbread house. Trim off any excess with your Paper Snips.
Your gingerbread houses are now ready for your cards.
1- Add 4” x 5 ½” tiny felt dot pattern from the Snowflake
Specialty Vellum centered on the cardbase. I added liquid glue dots behind the
dots on the vellum.
2- Use the largest sizes from the Layering Circle Dies
and cut out a Coastal Cabana (circle) and Bermuda Bay (scallop). Layer them
together. Add your gingerbread house to the top with dimensionals. Add the
circle to the left of center near the top on the card with liquid adhesive.
3- Cut out the fence die from Snowy White Velvet Sheet
with adhesive sheet on the back. Add this to a piece of Pear Pizzaz cardstock
so cardstock only goes to the top of the scallop and trim off the bottom. Trim
the strip to 5 ½”.
4- Adhere a piece of Polished Pink ribbon to the back of
the fence with just a little peeking out. Trim the edges to the cardstock.
5- Add the fence to the bottom of the gingerbread house
with dimensionals.
6- Fussy cut out two felt snowflakes from the Snowflake
Specialty Vellum. Add one to the top left corner of the card and the other near
the bottom right corner of the gingerbread house. Add them with mini
dimensionals or glue dots hiding behind the snowflake. Trim off any overhang.
7- Add any other details you want to your card. I added
Polished Pink gumdrops.
8- Stamp your greeting in Early Espresso ink and cut it
out with the scallop rectangle shape from the Mini Pocket Envelope Dies.
9- Tie a bow in Polished Pink and add it to the bottom
right corner behind the greeting. Add with dimensionals over the snowflake at
the bottom of the gingerbread house.
All Done!
Card #2:
1- Add 3” x 4” tiny dot pattern from the Snowflake
Specialty Vellum centered on the cardbase. I added liquid glue dots behind the
dots on the vellum.
2- Use the largest sizes from the Layering Circle Dies
and cut out a Polished Pink (circle) and Melon Mambo (scallop). Layer them
together. Add your gingerbread house to the top with dimensionals.
Add the circle to the left edge on the card with liquid
adhesive.
3- Add some fun details. I used three trees and stamped
them in two different colors – Pear Pizzaz & Granny Apple Green.
4- Fussy cut out one felt snowflakes from the Snowflake
Specialty Vellum. Add to the upper right area with dimensionals.
5- Stamp your greeting in Early Espresso ink and cut it
out with the scallop rectangle shape from the Mini Pocket Envelope Dies.
6- Tie a bow from the Pool Party Sheer Ribbon and add it
to the center behind the greeting. Add with dimensionals to the bottom right
area of the cardbase.
All Done!
If you would like to watch me create these cards with
step by step tips and directions please watch this video:


 Designer Series Paper")
")


 Designer Series Paper")
")


 Specialty Designer Series Paper")


 Designer Series Paper")


")


")


 Specialty Vellum")
 Velvet Sheets")


 Open Weave Ribbon")
 Sheer Ribbon")