Thursday, January 28, 2021

Fun Watercolor Technique Using The Back to Back Blooms Stamp Set & How To Create A Bevel Edge

Today I would like to share with you how to use the Back to Back Blooms Stamp Set along with a Fun Watercolor technique. Plus, how I create a emboss bevel edge to my die cuts. I hope you enjoy this handmade card tutorial and come back for more. I would love to see your finished creations that are inspired by this tutorial! You can tag me in any social media post using @creativechelsey | #creativechelsey or email me at chelsey@creativechelsey.com


See my Customer Appreciation Products for this month: http://creativechelsey.blogspot.com/p/shop-stampin-up-products.html

Follow me on Instagram https://www.instagram.com/creativechelsey

Or join my Facebook group https://www.facebook.com/groups/2221750878097906


To purchase any of the products you need to create this project visit https://www.stampinup.com?demoid=2042902

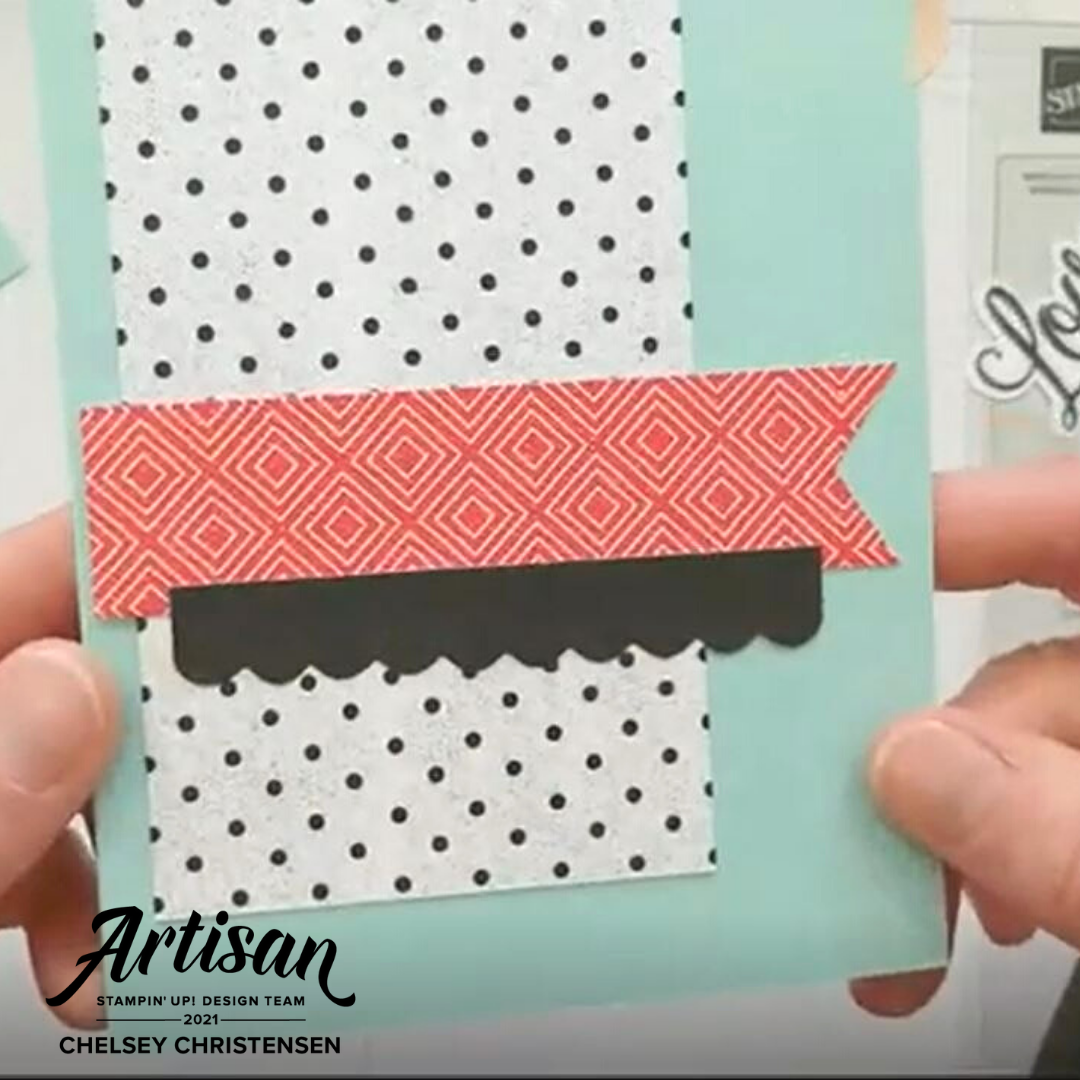
Here are the dimensions and pieces you will need to create this card:

Thick Basic White Cardbase 5 ½” x 8 ½” scored at 4 ¼”

Basic White Cardstock scraps for stamping

Fluid 100 Watercolor Paper 3 ¾” x 5”


Here is a list of the supplies I used to make the cards:

Fluid 100 Watercolor Paper 149612 $9.00

Basic White Cardstock 159276 $9.75

Thick Basic White Cardstock 159229 $8.25

Back to Back Blooms Stamp Set 152597 $20.00

Happy Thoughts Stamp Set 154507 $21.00

Bumblebee Ink Pad 153116 $7.50

Calypso Coral Ink Pad 147101 $7.50

Old Olive Ink Pad 147090 $7.50

Bermuda Bay Ink Pad 147096 $7.50

Jet Black StazOn Ink Pad 101406 $10.00

Water Painters 151298 $12.00

Sponge Dauber 133773 $5.00

Tasteful Labels Dies 152886 $31.00

Pearls Basic Jewels 144219 $5.00

Paper Trimmer 152392 $25.00

Clear Block D 118485 $8.50

Clear Block E 118484 $12.00

Simply Shammy 147042 $8.00

Stampin’ Seal Adhesive 152813 $8.00

Tear & Tape Adhesive 138995 $7.00

Multipurpose Liquid Glue 110755 $4.00

Dimensionals 104430 $4.00

Mini Dimensionals 144108 $4.00

Fine Tip Glue Pen 138309 $7.00

Paper Snips 103579 $10.00

Bone Folder 102300 $7.00

Take Your Pick Tool 144107 $10.00

Stampin’ Cut & Emboss Machine 149653 $120.00


1- With the Water Painter - wide brush tip, spread clean water all over the watercolor paper. Make sure the paper is well saturated with water, but not too much. When stamping, make sure the area you are stamping is wet, but not soaking.


2- Ink up the solid side of the large flower in Bumblebee ink, then add Calypso Coral with a sponge dauber to the center area. Stamp this in the top left corner. Then repeat with the small flower in the bottom right corner. Add more water if you want more bleeding effect.


3- Add water to wet the areas on the paper where you will be stamping the leaves. Ink up the solid side of the leaf image in Old Olive and stamp two on each side of each flower. Add more water if you want more bleeding effect.


4- With the Bermuda Bay ink and a Water Painter – regular brush tip, add the ink to the open white spaces of the paper. Don’t forget about areas in between the flowers & leaves and in corners. Make sure there are light and dark areas. Let dry. If you need to speed up the drying process you can use a heat tool.


5- Stamp the greeting on the scrap White Cardstock in StazOn ink. Cut out with a label from the Tasteful Labels with the Stampin’ Cut & Emboss Machine.


6- Leaving the paper in the die, turn over and use either small or large stylus from the Take Your Pick Tool run it around the inside edge of the die.


7- After the watercolor paper is dry, stamp the front side of the images over the coordinating areas with StazOn ink. Add to the cardbase with strong adhesive. 


8- Add the greeting with dimensionals in the center of the card. Add some Pearls around the greeting.

All Done!


Here is the same project as a video tutorial.

To purchase any of the products you see in this video visit https://www.stampinup.com?demoid=2042902

Have a creative day,

Chelsey

chelsey@creativechelsey.com 

Tuesday, January 26, 2021

Fun Fold - Easel Style - Alternative Card using the January 2021 Paper Pumpkin Kit - Sending Hearts


Welcome to Paper Pumpkin Week here at Creative Chelsey. Today is my fourth alternative card idea using the January 2021 Paper Pumpkin Kit – Sending Hearts. I wanted to create a fun fold card today and came up with these two Easel Style Cards. These cards are a perfect way to use the rest of the supplies I have leftover from my Paper Pumpkin Box. I hope you enjoy them and give something like it a try.

I love creating alternative cards with Paper Pumpkin Kits so make sure to come back for more videos as I continue to create with this month’s kit. I would love to see your finished creations that are inspired by this tutorial! You can tag me in any social media post using @creativechelsey | #creativechelsey or email me at chelsey@creativechelsey.com

It is Paper Pumpkin Week here on Creative Chelsey. This is the fourth tutorial this week. If you would like to see all my alternatives check out the playlist here:

https://youtube.com/playlist?list=PL40dV1oxpkNmH2wN-HmwoEz0l_jnLk1ty

Watch me UNBOX this month’s Paper Pumpkin Kit here: https://youtu.be/2Bw3U4Ynof8


Don't miss out on next months Paper Pumpkin Kit - subscribe today!
SUBSCRIBE to Paper Pumpkin - click here –

Follow me on Instagram https://www.instagram.com/creativechelsey/

Or join my Facebook group https://www.facebook.com/groups/2221750878097906


To purchase any of the products you need to create this project visit https://www.stampinup.com?demoid=2042902

Here are the dimensions and pieces you will need to create these cards:

From the Kit:

Card #1

Poppy Parade Cardbase 4 ¼” x 5 ½”

Petal Pink Cardbase 3 ¼” x 4 ¼” – leftover from previous alternative

Petal Pink Label

Snail Die Cut from Add-on Kit or stamp and color from stamp set

12” Ribbon

Enamel Hearts

Card #2

Petal Pink Cardbase 4 ¼” x 5 ½”

Poppy Parade Cardbase 3 ¼” x 3 ½” – leftover from previous alternative

Petal Pink Label

Corner from Heart Piece

5” Ribbon

Enamel Hearts


Extra Cardstock:

Card #1

Basic White Cardstock 3 ¼” x 8 ½” & scraps for stamping

Basic Black Cardstock 3 3/8” x 4 3/8”

Card #2

Pool Party Cardstock 3” x 8 ½”

Basic White Cardstock 2 ½” x 2 ½” & scraps for stamping


Here is a list of the supplies I used to make the cards:

Basic White Cardstock 159276 $9.75

Basic Black Cardstock 121045 $8.75

Pool Party Cardstock 122924 $8.75

Little Love Boxes Add-On Kit 156842 $8.00

Rectangular Postage Stamp Punch 152709 $18.00

Small Bloom Punch 152316 $1300

Poppy Parade Stampin’ Blend Markers 154958 $9.00

Petal Pink Stampin’ Blend Markers 154893 $9.00

Pool Party Stampin’ Blend Markers 154894 $9.00

Memento Black Ink Pad 132708 $6.00

Paper Trimmer 152392 $25.00

Simply Shammy 147042 $8.00

Stampin’ Seal Adhesive 152813 $8.00

Multipurpose Liquid Glue 110755 $4.00

Tear & Tape Adhesive 138995 $7.00

Dimensionals 104430 $4.00

Clear Block D 118485 $8.50

Paper Snips 103579 $10.00

Bone Folder 102300 $7.00

Stampin' Pierce Mat 126199 $5.00

Take Your Pick Tool 144107 $10.00


Card #1


1- Stamp the heart image in Poppy Parade ink and fussy cut out, repeat to get a second heart. Stamp the greeting on the white side of the Petal Pink label in Black ink.


2- On the White cardstock strip, score in half at 4 ¼” and then at 2 1/8”. Fold the smaller area so the edge meets the middle score line, then open and fold the middle score line so the cardstock is in half.


3- Adhere the Petal Pink cardstock to the Black cardstock. Then on the back of the Black cardstock adhere just the bottom half of the white cardstock (under the 2 1/8” score line) centering it when folded in half to the black cardstock.


4- Add adhesive to the back of the White cardstock and center everything over the Poppy Parade Cardbase.


5- Add one heart on the right side of the card front. With the 12” of ribbon, cut down each side to create two slim pieces of ribbon, don’t cut the center area so everything stays together. Add the ribbon to the back of the greeting in a faux bow. Add the greeting to the left and over the heart with dimensionals.


6- Either stamp, color & cut out a snail or use a die cut from the add-on kit. Add to the card with a dimensional over the heart to the right of the greeting. Color three enamel shapes with the dark Poppy Parade blend marker and place on your card.


7- Add the second heart directly behind the first one with dimensionals. This will give the front of the card something to hold it in the easel shape. If you want stamp the "XOXO" in the bottom right corner in black ink.

All Done!


Card #2


1- Stamp the snail image on scrap White cardstock and punch out with the postage punch. Color with the Petal Pink and Pool Party Blend Markers. Stamp the greeting on the Petal Pink side of the label.


2- Score the Pool Party cardstock strip at 3 ¾” & 1 7/8”. Fold the smaller side to the 3 ¾” score line, then open and fold on the 3 ¾” score line, there should be 1” not covered at the bottom.


3- Add the Poppy Parade cardstock with the 3 ¼” side at the top over the pool part strip so the bottom edge lines up with the edge of the flap. Adhere only to the bottom half of the flap. Cut a banner shape from the 1” section at the bottom. Adhere everything to the center of the Petal Pink Cardbase.


4- Add the snail to the bottom right corner with dimensionals. Fold the 5” of ribbon in half and adhere to the back on the right side of the greeting and adhere this to the left of the snail with dimensionals.


5- Punch out the corner of the heart piece with the Small Bloom Punch and add it above the greeting with a dimensional. Place three enamel hearts on your card.


6- Open the easel and place the 2 ½” square inside with dimensionals about ¾” from the top to give the easel something to hold it open.

All Done!


I have also created a video walking you through each step:

To purchase any of the products you see in this video visit

https://www.stampinup.com?demoid=2042902


Have a creative day!


Chelsey

chelsey@creativechelsey.com

Monday, January 25, 2021

Heart & Love Alternative Card using January 2021 Paper Pumpkin Sending Hearts Kit from Stampin' Up!

Welcome to Paper Pumpkin Week here at Creative Chelsey. Today is my third alternative card idea using the January 2021 Paper Pumpkin Kit – Sending Hearts. I have also incorporated parts of the Little Love Boxes Add-On Kit. The card I am sharing with you today is a quick and easy card to put together and uses no stamping. I hope you enjoy it.


I love creating alternative cards with Paper Pumpkin Kits so make sure to come back for more videos as I continue to create with this month’s kit. I would love to see your finished creations that are inspired by this tutorial! You can tag me in any social media post using @creativechelsey | #creativechelsey or email me at chelsey@creativechelsey.com


It is Paper Pumpkin Week here on Creative Chelsey. This is the third tutorial this week. If you would like to see all my alternatives check out the playlist here:

https://youtube.com/playlist?list=PL40dV1oxpkNmH2wN-HmwoEz0l_jnLk1ty

Watch me UNBOX this month’s Paper Pumpkin Kit here: https://youtu.be/2Bw3U4Ynof8

Follow me on Instagram https://www.instagram.com/creativechelsey/

Or join my Facebook group https://www.facebook.com/groups/2221750878097906 


Don't miss out on next months Paper Pumpkin Kit - subscribe today!
SUBSCRIBE to Paper Pumpkin - click here –


To purchase any of the products you need to create this project visit https://www.stampinup.com?demoid=2042902

Here are the dimensions and pieces you will need to create these cards:

From the Kit:

Poppy Parade Cardbase 1” x 5 ½”

Petal Pink Cardbase scraps

Small Black Scallop piece

Love Die Cut

9” of Black Ribbon

Enamel Hearts

*Black Polka Dot Box – from the add-on kit


Extra Cardstock:

Pool Party card base 5 ½” x 8 ½” scored at 4 ¼”

Gold Foil Sheet


Here is a list of the supplies I used to make the cards:

Pool Party Cardstock 122924 $8.75

Heart Punch Pack 151292 $34.00

Triple Banner Punch 138292 $23.00

Gold Foil Sheet 132622 $5.00

Little Love Boxes Add-On Kit 156842 $8.00

True Love Designer Series Paper 154281 $11.50

Paper Trimmer 152392 $25.00

Simply Shammy 147042 $8.00

Stampin’ Seal Adhesive 152813 $8.00

Multipurpose Liquid Glue 110755 $4.00

Tear & Tape Adhesive 138995 $7.00

Dimensionals 104430 $4.00

Clear Block D 118485 $8.50

Paper Snips 103579 $10.00

Bone Folder 102300 $7.00

Stampin' Pierce Mat 126199 $5.00

Take Your Pick Tool 144107 $10.00


1- Trim off the flaps from a polka dot printed box from the add-on kit, or use a piece from the True Love Designer Series Paper. Finished Size should be around 4 ½” x 2 ¾”.


2- Punch a banner from one end of the Poppy Parade strip using the Triple Banner Punch. Then trim from the other end about 1” (This piece is leftover from my alternative card #2- )

3- Layer the polka dot pattern first on the left side of the card front with about ¼” gap on the left and even on top and bottom. Add the Poppy Parade strip over the score lines with the banner on the right. Place the small black scallop piece in the center under the  Poppy Parade strip.


4- Punch the solid heart from the Petal Pink cardbase, and a scallop heart from the gold foil. Layer together and add to the card with dimensionals.

5- Add the Love die cut  with dimensionals on the right side of the heart.


6- Tie a bow with 9” of black ribbon from the kit and adhere with a glue dot under the “e”. Place three enamel hearts on your card.

All Done!


I have also created a video walking you through each step:

To purchase any of the products you see in this video visit

https://www.stampinup.com?demoid=2042902


Have a creative day!


Chelsey

chelsey@creativechelsey.com

Saturday, January 23, 2021

Artisan Design Team - January 2021 Monthly Project

Hello My Crafting Friends,

Today I am so excited to share with you my first monthly showcase projects for the Stampin’ Up 2021 Artisan Design Team!


When designing these projects we are given product guidelines we need to design within. For this month I was asked to use the Sale-a-bration Paper Blooms Designer Series Paper (155222 FREE with a $50 order from Jan-Feb 2021) and the new In Bloom Bundle (156208) which includes the In Bloom Stamp Set (154380) & Pierced Blooms Dies (154312). I hope you enjoy these projects and that they inspire you to create something new.


In this blog post I am just sharing the initial projects. Details and step by step instructions along with videos will be shared next week. I will link those posts here when they are live.

Here are the first two tutorials for these projects -
Card #3 - http://creativechelsey.blogspot.com/2021/02/in-bloom-bundle-quick-tip-how-i-add.html


To place an order visit my Stampin’ Up Online Store - https://www.stampinup.com?demoid=2042902

*Sale-a-bration is going on now! January 5th thru February 28th 2021. Don’t miss out on this great promotion. Check out all the Sale-a-bration items here: https://www.stampinup.com/categories/sales-specials/sale-a-bration?demoid=2042902

See my Customer Appreciation Products for this month: http://creativechelsey.blogspot.com/p/shop-stampin-up-products.html


Follow me on Instagram https://www.instagram.com/creativechelsey

Or join my Facebook group https://www.facebook.com/groups/2221750878097906


Be sure to check out the rest of the team’s wonderful creative on the Stampin’ Up! Corporate Facebook Page at -  http://www.facebook.com/stampinup

For more inspiration, tips & tricks from the 2021 Artisan Design Team also check out Stampin’ Up! on Instagram – http://www.instagram.com/stampinup

Have a creative day,

Chelsey

chelsey@creativechelsey.com

Friday, January 22, 2021

Stampin Up January 2021 Paper Pumpkin Alternative Quick & Easy Handmade Card - Sending Love

Don't miss out on next months Paper Pumpkin Kit - subscribe today!

SUBSCRIBE to Paper Pumpkin - click here –

https://www.paperpumpkin.com/en-us/sign-up/?demoid=2042902


Welcome to Paper Pumpkin Week here at Creative Chelsey. For the next couple days I will share a new alternative idea using the January 2021 Paper Pumpkin Kit – Sending Hearts. The card I am sharing with you today is a quick and easy card to put together. There is a fun new tip I share for the ribbon behind the greeting.


I love creating alternative cards with Paper Pumpkin Kits so make sure to come back for more videos as I continue to create with this month’s kit. I would love to see your finished creations that are inspired by this tutorial! You can tag me in any social media post using @creativechelsey | #creativechelsey or email me at chelsey@creativechelsey.com


It is Paper Pumpkin Week here on Creative Chelsey. This is the second tutorial this week. If you would like to see all my alternatives check out the playlist here:

https://youtube.com/playlist?list=PL40dV1oxpkNmH2wN-HmwoEz0l_jnLk1ty

Watch me UNBOX this month’s Paper Pumpkin Kit here: https://youtu.be/2Bw3U4Ynof8


Don't miss out on next months Paper Pumpkin Kit - subscribe today!
SUBSCRIBE to Paper Pumpkin - click here –

Follow me on Instagram https://www.instagram.com/creativechelsey/

Or join my Facebook group https://www.facebook.com/groups/2221750878097906


To purchase any of the products you need to create this project visit https://www.stampinup.com?demoid=2042902


Here are the dimensions and pieces you will need to create these cards:

From the Kit:

Poppy Parade Cardbase 4 ¼” x 5 ½”

Mailbox Printed Piece

Petal Pink Label

12” of Black Ribbon

Enamel Hearts

Sending Hearts Stamp Set

Poppy Parade Ink Spot


Extra Cardstock:

Petal Pink card bases 5 ½” x 8 ½” scored at 4 ¼”


Here is a list of the supplies I used to make the cards:

Petal Pink Cardstock 146985 $8.75

Paper Trimmer 152392 $25.00

Simply Shammy 147042 $8.00

Stampin’ Seal Adhesive 152813 $8.00

Multipurpose Liquid Glue 110755 $4.00

Tear & Tape Adhesive 138995 $7.00

Dimensionals 104430 $4.00

Clear Block D 118485 $8.50

Paper Snips 103579 $10.00

Bone Folder 102300 $7.00

Stampin' Pierce Mat 126199 $5.00

Take Your Pick Tool 144107 $10.00


1- Cut the 4 ¼” x 5 ½” Poppy Parade Cardbase to 3 ¼” x 5 ½”. Then rotate and cut 2 – 1” x 3 ¼” strips. Add these strips to the top and bottom of the Mailbox Piece to equal 5 ½” so about ½” on both sides.


2- Stamp the Heart & Flower Confetti image in Poppy Parade ink on the Mailbox piece above the mailbox near the gold foil elements and in the bottom right corner coming up and over the mailbox post.


3- Stamp the same image on the cardbase in the top left corner and bottom right corner.


4- Add the Mailbox piece to the card front with about 3/8” on the left side.


5- Stamp the greeting on the label in Poppy Parade ink. Add adhesive to the back and place the middle of the 12” of black ribbon. Take a good pair of scissors and cut down the ribbon so you have 2 very thin ribbon on each side of the label. Wrap the ribbon into a faux bow shape.


6- Adhere the greeting under the mailbox with dimensionals. Add some Heart & Flower Enamel Embellishments around the confetti image.

All Done!


I have also created a video walking you through each step:

To purchase any of the products you see in this video visit

https://www.stampinup.com?demoid=2042902


Have a creative day!

Chelsey

chelsey@creativechelsey.com