Tuesday, September 24, 2019

September 2019 Paper Pumpkin - Bone Appetit - Simple Stamping - Make More Handmade Cards!

In this post I walk you through the steps to make these cute and simple handmade cards using only the Bone Appetit stamp set from the September 2019 Paper Pumpkin Kit. You can make these cards using any colors you have on hand and a couple sheets of cardstock. I love the simple design - it is so versatile and can be used with any stamp set.


All my Paper Pumpkin Customers who received the September 2019 Paper Pumpkin Kit get the cardstock and accessories to make these extra cards for FREE from me!
Don't miss out on next months Kit - subscribe today - by clicking this link!
https://www.paperpumpkin.com/en-us/sign-up/?demoid=2042902

I hope you enjoy this tutorial!

Make sure to look for my other tutorials showing alternate cards ideas for this Paper Pumpkin Kit:
https://creativechelsey.blogspot.com/2019/09/september-2019-paper-pumpkin-kit-from_19.html
https://creativechelsey.blogspot.com/2019/09/september-2019-paper-pumpkin-kit-from.html

Don't miss out on next months Paper Pumpkin Kit - subscribe today!
SUBSCRIBE to Paper Pumpkin - click here -
https://www.paperpumpkin.com/en-us/sign-up/?demoid=2042902

Here are the measurements for the cardstock needed to make these cards:
2- Whisper White Thick Cardstock card bases 5.5" x 8.5" scored at 4.25"
2- Whisper White Cardstock 4" x 5.25" & 1" circle
2- Pumpkin Pie Cardstock 1" x 3"
2- Gorgeous Grape Cardstock 1.25" x 1.25"
2- 16" White Bakers Twine

Here is a list of the supplies I used to make the 2 cards:
Whisper White Thick Cardstock 140272 $8.25
Whisper White Cardstock 100730 $9.75
Pumpkin Pie Cardstock 105117 $8.75
Gorgeous Grape Cardstock 146987 $8.75
Whisper White Baker's Twine 124262 $3.50
Simply Shammy 147042 $8.00
Snail Adhesive 104332 $7.00
Dimensionals 104430 $4.00
Clear Block D 118485 $8.50
Paper Snips 103579 $10.00
Bone Folder 102300 $7.00
Stampin' Pierce Mat 126199 $5.00

Card #1

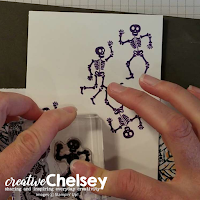
1- On your card front (not your card base) figure out where you want your greeting and then randomly stamp both skeletons in Gorgeous Grape around it.
2- Stamp in a 1" circle the greeting you would like. I used the Trick or Treat.
3- Punch or cut out a flag shape from one side of the Pumpkin Pie cardstock strip
4- Add it to your card using snail or glue dots so the flag is going to the left.
5- Use 16" of white backers twine and wrap it around your hand a couple times, find the middle and twist the twine. Add snail to the back of a 1.25" square of Gorgeous Grape cardstock and adhere the middle of the twine.
6- Add dimensionals in the corners and place it in the middle of the pumpkin pie strip.
7- Add dimensionals to the back of the circle and place in the middle of the square.
8- Add to your card base.


Card #2

1- On your card front (not your card base) randomly stamp both skeletons in Gorgeous Grape along the left side of your cardstock.
2- Using the skull and crossbones stamp and the gorgeous grape ink. Stamp off and then on your cardstock to give a lighter shade of purple.

Stamp in a 1" circle the greeting you would like. I used Happy Halloween.
3- Punch or cut out a flag shape from one side of the Pumpkin Pie cardstock strip

4- Add it to your card using snail or glue dots. Place it in the middle of your cardstock with the flag going to the right.
5- Use 16" of white backers twine and wrap it around your hand a couple times, find the middle and twist the twine. Add snail to the back of a 1.25" square of Gorgeous Grape cardstock and adhere the middle of the twine.
6- Add dimensionals in the corners and place it in the middle of the pumpkin pie strip.

7- Add dimensionals to the back of the circle and place in the middle of the square.

8- Add to your card base.


I have created a video walking you through each of these cards. Check it out now!


To purchase any of the products you see in this video visit
https://www.stampinup.com/ECWeb/default.aspx?culture=en-us&dbwsdemoid=2042902

Have a creative day!
Chelsey

Thursday, September 19, 2019

September 2019 Paper Pumpkin Kit from Stampin Up - More Alternate / Alternative Handmade Card Ideas

Welcome to Creative Chelsey!


This is my second tutorial showing alternative card ideas for the September 2019 Paper Pumpkin Kit from Stampin Up. Take a look at my first tutorial on my blog here -
http://creativechelsey.blogspot.com/2019/09/september-2019-paper-pumpkin-kit-from.html

In today's tutorial I use the elements and stamp set from the Bone Appetit Paper Pumpkin Kit in a whole new way. We are cutting up the cute treat boxes and stamping the fun skeletons to make them look like they are having a party!

I hope you give these cards a try! They are so cute!

Don't miss out on next months Paper Pumpkin Kit - subscribe today!
SUBSCRIBE to Paper Pumpkin - click here -
https://www.paperpumpkin.com/en-us/sign-up/?demoid=2042902

Here are the measurements for the cardstock needed to make these cards:
3 - Whisper White Thick Cardstock card bases 5.5" x 8.5" scored at 4.25"
Whisper White Cardstock 2" x 4" / 0.5" x 2"
Pumpkin Pie Cardstock 0.75" x 4"
Basic Black Cardstock 5.25" x 2.25" / 3/8" x 2"
Gorgeous Grape Cardstock 0.5" x 4" / 0.75" x 4"
Basic Gray Cardstock 7/8" x 4" / 4.25" x 3.25"

Here is a list of the supplies I used to make the 3 cards:
Whisper White Thick Cardstock 140272 $8.25
Whisper White Cardstock 100730 $9.75
Pumpkin Pie Cardstock 105117 $8.75
Basic Black Cardstock 121045 $8.75
Gorgeous Grape Cardstock 146987 $8.75
Basic Gray Cardstock 121044 $8.75
Whisper White Baker's Twine 124262 $3.50
Black Memento Ink Pad 132708 $6.00
Simply Shammy 147042 $8.00
Snail Adhesive 104332 $7.00
Dimensionals 104430 $4.00
Clear Block D 118485 $8.50
Paper Snips 103579 $10.00
Bone Folder 102300 $7.00
Stampin' Pierce Mat 126199 $5.00
Take Your Pick Tool 144107 $10.00

To purchase any of the products you see in this video visit
https://www.stampinup.com/ECWeb/default.aspx?culture=en-us&dbwsdemoid=2042902

Prepping the Treat Boxes
1- Cut along the seam of 2 treat boxes (one in each pattern).
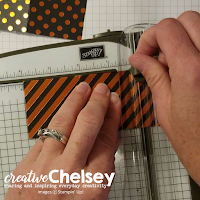
2- Trim off the flaps using a paper trimmer
3- Cut the stripes strip to 5.25" x 2"
     On the extra pieces cut off the flap so you have a 2" x 2" square
     and then cut this into 2 - 1" x 2"
4- Cut the polka dots in half so you get 2 - 2" x 4" rectangles.
     Then cut one vertically so you get 2 - 1" x 4" pieces
     Cut the other in half so you get 2 - 2" x 2" and then in half again
     so you get 4 - 1" x 2" pieces

Card #1

1- Adhere the 5.25" x 2" stripe paper centered on top of the black 5.25" x 2.25" of cardstock. Add this to your card base on the right side leaving about .25" of space and about 1/8" on top and bottom.
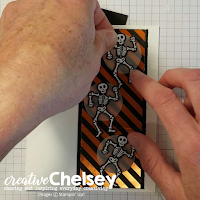
2- Using glue dotes add 3 skeletons to 3 small vellum circles from the kit. Place dimensionals on the back making sure they are behind the skeletons so they don't show. Add these skeletons to the stripe paper vertically on top of each other so they look like they are standing on top of each other.
3- Stamp your greeting on one of the labels in the kit using black ink. Adhere this to the center of the small strip of black cardstock. Then place dimensionals on the back and add to the left of the bottom skeleton.
4- Tie a bow with about 8" of white bakers twine and using a glue dot adhere it to the bottom left of the greeting.

All done!


Card #2

1- Stamp both skeletons on the 2" x 4" white cardstock in black ink.
2- Stamp the greeting on the 0.5" x 2" white cardstock in black ink.
3- Stamp the "eat if you dare" on a headstone piece from the kit.
4- Begin assembling by adhering the polka dot strips 1" x 4" to the top and bottom of your skeleton piece. I placed it to there were about 2.5 rows of polka dots showing. Adhere to the top part of your card with some snail.
5- Take the 3 1" strips of pumpkin pie, gorgeous grape, and basic gray and cut out a flag shape from one side of each one.
6- Arrange these strips below the skeletons on your card however you would like so the flag shape is on the right side.
7- Trim off any strips that are hanging off the card on the left with some scissors.
8- Glue a little scrap of cardstock to the back of the black tag over the circle in the hole of the tag. So the circle doesn't pop out.
9- Add the black tag from the kit with some snail over the strips on the left side.
10- Trim the white strip with the greeting and flag both ends.
11- With dimensionals pop up the headstone greeting and place it centered over the black tag. Also add the greeting with dimensionals and place this near the headstone.
12- Tie a bow with 8" of white bakers twine and place it over the circle in the tag.

All done!


Card #3

1- On the gray cardstock place the 1" x 2" strips in a pattern. See picture.
2- Adhere the gorgeous grape strip over the center seam. Add to the center of the white cardbase.
3- Get the purple tag and adhere with some dimensionals in to the left & center at an angle.
4- Glue the spiderweb over the purple tag in the center.
5- Use snail to adhere 2 bony hands to your card. One to the left and under the tag over the gorgeous grape strip. The other to the right under the tag and under the strip of gorgeous grape cardstock.
6- Stamp a greeting in one of the labels from the kit in black ink. Place it with dimensionals on the right of the spiderweb and between the hand and the strip of cardstock.
7- Use 8" of white bakers twine and tie a bow through the top of the tag.

All done!


To purchase any of the products you see in this video visit
https://www.stampinup.com/ECWeb/default.aspx?culture=en-us&dbwsdemoid=2042902

I have created a video walking you through each of these cards. Check it out now!


Have a creative day!
Chelsey

Tuesday, September 17, 2019

September 2019 Paper Pumpkin Kit from Stampin Up - How to Turn the Treat Boxes into Halloween Cards!

I am so excited to share with you today how I turned the cute treat boxes from the September 2019 Paper Pumpkin Kit - Bone Appetit into Handmade Halloween Cards! I love creating alternative cards and projects with Paper Pumpkin Kits so make sure to come back for more tutorials as I continue to create with this kit.


I hope you enjoy this tutorial!

Don't miss out on next months Paper Pumpkin Kit - subscribe today!
SUBSCRIBE to Paper Pumpkin - click here - https://www.paperpumpkin.com/en-us/sign-up/?demoid=2042902

Here are the measurements for the cardstock needed to make these cards:
3 - Pumpkin Pie Cardstock card bases 5.5" x 8.5" scored at 4.25"
2- Pumpkin Pie Cardstock card fronts 5.25" x 4"
1- Basic Black Cardstock card front 5.25" x 4"
1- Basic Black Cardstock 2.75" x 4.25"
1- Basic Black Cardstock 1" x 4"
1- Basic Black Cardstock 1/4" x 4.25"
1- Gorgeous Grape Cardstock 1" x 4"
1- Gorgeous Grape Cardstock 1/2" x 2"
2- 2 5/8" Vellum Circles
24" Blackberry Bliss Twine (part of the Nature's Twine pack)

Here is a list of the supplies I used to make the 3 cards:
Pumpkin Pie Cardstock 105117 $8.75
Basic Black Cardstock 121045 $8.75
Gorgeous Grape Cardstock 146987 $8.75
Vellum Cardstock 101856 $10.00
Nature's Twine 146342 $9.00
Rhinestone Basic Jewels 144220 $5.00
Versamark Ink Pad 102283 $9.50
Pumpkin Pie Ink Pad 147086 $7.50
Black Stampin' Emboss Powder 146956 $6.00
Layering Circles Dies 141705 $35.00
Simply Shammy 147042 $8.00
Snail Adhesive 104332 $7.00
Dimensionals 104430 $4.00
Clear Block D 118485 $8.50
Paper Snips 103579 $10.00
Bone Folder 102300 $7.00
Stampin' Pierce Mat 126199 $5.00
Take Your Pick Tool 144107 $10.00

To purchase any of the products you see in this video visit
https://www.stampinup.com/ECWeb/default.aspx?culture=en-us&dbwsdemoid=2042902


1- Take 2 treat boxes (1 of each design) Cut along the seam
2- Trim off the extra flaps so you have a long rectangular shape. It should be about 2" wide
3- Cut the strips in half at about 4" long. The final size is 2" x 4"


Card #1

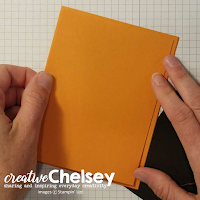
1- Fold the Pumpkin Pie card base in half and add the card front centered on top adhered with some snail adhesive
2- Place the Basic Black 4.25" x 2.75" piece of cardstock in the center at an angle. Adhere this with snail or glue dots
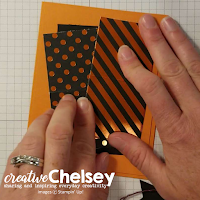
3- Take the poka dot treat box paper and add this to the left of the black piece at an angle
4- Then add the stripe piece on the right at and angle
5- Add the Vellum circle in the center. Make sure to add minimal glue as you can see it through the vellum.
6- Cut out a flag shape from each end of the 1" strip of black cardstock. Add this to the center of the the vellum circle running horizontal across the card.
7- Take the purple tag from the kit place it so the hole is on the left. Add a small vellum circle from the kit to the right square side. Add a skeleton cut out on top of the small circle with dimensionals.
Then use the hand cut out and adhere it over the hole of the tag with snail or glue dots.
8- Cut 24" of Blackberry Bliss Twine and separate the three strands. With one of the strands create a circle inside the larger vellum circle on the card and adhere it to the black strip with some snail.
9- Stamp a greeting on the little labels in the kit. I used Happy Halloween in Gorgeous Grape ink from the kit.
10- Use dimensionals to add the greeting on top of the tag between the hand and the skeleton. Use dimensionals to add the "tag" at an angle on top of the circle of twine.

11- Attach the clothes pin on the hand and place some rhinestones around the central elements to add some shine.


Card #2

1- Take the Pumpkin Pie card front and ink pad and stamp both of the cute skeletons on the left side of the card front.
2- Adhere the card front to the card base with some snail adhesive.
3- Add the polka dot 2" x 4" strip of paper at the bottom of the card.
4- Adhere the thin strip of basic black cardstock to the top of the polka dot paper
5- Then add the Gorgeous Grape cardstock on top of the strip of black cardstock. Make sure to flag the ends before adhering it.
6- Turn over the black tag from the kit and reinforce the circle so it doesn't come out. I just used some glue dotes and placed them on 2 side of the hole.
7- With the hole at the top - place a small vellum piece from the kit to the right and center on the tag. Then add a skeleton spider web on top of the vellum. I used a little snail as adhesive.
8- Wrap a strand of Blackberry Bliss twine around your hand and then give it a little twist and adhere it to the back of the tag.
9- Add the tag a little to the left of the Gorgeous Grape 1" strip.
10- Tuck a bony hand underneath and to the right of the tag.
11- Stamp a greeting on one of the tiny labels I used Bone Appetit. I thought it was cute with all the bones on the card. Use dimensionals to and add it under the hand and a little on top of the web.
12- Finish the card with some rhinestones.


Card #3

1- On the black card front with versamark ink stamp both skeletons randomly all over the cardstock.
2- Apply black embossing powder all over the images. It should stick to where you stamped.
3- Look for any areas you want to remove the powder. Use a small paint brush to remove any unwanted powder
4- Use a heat tool and from the back heat up the powder. This should make it smooth and shiny.
5- Add the striped paper centered and a little to the right with some snail adhesive.
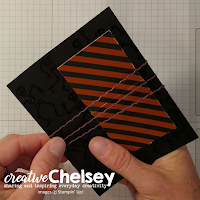
6- Wrap the remaining strand of Blackberry Bliss twine around the black cardstock running horizontally. It should warp around 3 times and adhere the ends on the back with some adhesive.
7- Add the black cardstock to your Pumpkin Pie card base.
8- Add the large vellum circle in the center and a little to the left of the card.
9- Add 2 skeletons from the kit with dimensionals on to the vellum circle. One should be a little higher than the other.
10- Stamp Trick or Treat on top of one of the gravestone white cut outs from the kit.
11- Using dimensionals add the small strip of Gorgeous Grape cardstock behind the greeting and then adhere it to your card on the right side of the vellum and at the base of the twine.
12- Add some rhinestones!


To purchase any of the products needed to make these cards visit my website:
https://www.stampinup.com/ECWeb/default.aspx?culture=en-us&dbwsdemoid=2042902


I have created a video walking you through each of these cards. Check it out now!

Have a creative day!
Chelsey