Showing posts with label Watercolor Techniques. Show all posts

Tuesday, January 30, 2024

Easy Watercolor Technique - Alternative Card Idea - January 2024 Paper Pumpkin Kit - Stampin' Up!

Welcome to Paper Pumpkin Week here on Creative Chelsey.

Today I am sharing with you my second alternative card using the January 2024 Paper Pumpkin Kit called Lovely Lavender. The projects from this kit are really beautiful, it creates a total of 8 greeting card 4 in two different designs, and 4 tags. If you would like to watch me unbox the kit and create these cards click on the playlist link below.


Each month I take the contents from the paper pumpkin kits and make alternative projects. My cards are easy to follow and can be made by both experienced or new paper crafter. You may need just a couple other products to complete them a full supply list is below. You can follow along with me using supplies you already have or purchase any products you see me use from my online store.

This card uses the tag on a watercolor background. It is both simple and elegant with the soft purple colors.


If you are interested in getting your own paper pumpkin subscription, please use this link to subscribe -  https://www.paperpumpkin.com/en-us/sign-up/?demoid=2042902

If this project inspires you to create something, I would love for you to tag me in any social media post using @creativechelsey | #creativechelsey or email me at chelsey@creativechelsey.com.


It is Paper Pumpkin Week here on Creative Chelsey. This is the second alternative this week. If you would like to see all my alternatives check out the playlist here: https://www.youtube.com/playlist?list=PL40dV1oxpkNnTNpOXTSMPQYRc4hQNHluJ

Want to see everything in this month’s kit? Watch me UNBOX this month’s Paper Pumpkin Kit here: https://youtube.com/live/IKjRfu3XZU8?feature=share


Don't miss out on next month’s Paper Pumpkin Kit - subscribe today!
SUBSCRIBE to Paper Pumpkin - click here –


Product List


See my Customer Appreciation Products for this month: http://creativechelsey.blogspot.com/p/shop-stampin-up-products.html

Follow me on Instagram https://www.instagram.com/creativechelsey

Or join my Facebook group https://www.facebook.com/groups/2221750878097906

To purchase any of the products you need to create this project visit https://www.stampinup.com?demoid=2042902


———————— What You Need ————————

Fresh Freesia Cardbase – 5 ½” x 8 ½” scored at 4 ¼”

Fresh Freesia Cardstock – 4” x 5 ¼”

Tag – kit

Lost Lagoon Leaf Die Cut – kit

Love Die Cut - kit

Long Rectangle Label – kit

Stamp Set & Gorgeous Grape Ink Spot – kit

Above supplies


———————— My Favorite Supplies ————————

• Stampin' Seal+ [149699] $12.00 —— https://bit.ly/3Ibz8YK

• Multipurpose Liquid Glue [110755] $4.00 —— https://bit.ly/3IaGF9S

• Tear & Tape Adhesive [138995] $7.00 —— https://bit.ly/3ajQSo5

• Stampin' Dimensionals [104430] $4.25 —— https://bit.ly/3IbzezA

• Mini Glue Dots [103683] $5.25 —— https://bit.ly/3anAcw3

• Stampin' Pierce Mat [126199] $5.00 —— https://bit.ly/3IjEq4d

• Simply Shammy [147042] $8.50 —— https://bit.ly/3bQH7hE

• Paper Snips [103579] $11.00 —— https://bit.ly/3ulT6tV

• Take Your Pick [144107] $10.00 —— https://bit.ly/3IeYxR9

• Bone Folder [102300] $7.00 —— https://bit.ly/3uhErzZ

• Clear Block D [118485] $9.00 —— https://bit.ly/3uuabSs

• Paper Trimmer [152392] $25.00 —— https://bit.ly/3abvykH

• Stampin' Cut & Emboss Machine [149653] $125.00 —— https://bit.ly/3ujz8zU


1- Begin by creating a watercolor wash over the 4” x 5 ¼” Fresh Freesia piece. I like to add clean water first and then mix the water with a little ink from the Gorgeous Grape Ink Spot. You can press the ink pad on a clear block and then mix the water there. Let dry.

2- Once dry, distress the edges of the same piece and add to the center with adhesive.


3- Trim the ends of the Long Rectangle Label into a fish tail banner shape. 


4- Stamp “YOU” from the “Just a little something for you” to the bottom right area. You can do this by only adding ink to “YOU”. See video for detail instructions. Add at the bottom of the tag with

5- Add the Love die cut over the label to the left of “YOU”. 


6- Add the leaf to the right of the tag with adhesive on the branches that will overlap the tag.

Add the label to the bottom of the Tag in the so about 1/4" hangs off the tag on the left side. It will not be centered on the tag.


7- Add it to the center of the cardbase with dimensionals. The tag will be slightly to the left.


8- Splatter the card with White Craft Ink & a Water Painter. On a clear block add a small drop of ink, mix with water and splatter across the card. Let dry or use a heat tool to speed up the process.

You can cover the "YOU" with a little washi tape if you are worried about it getting wet. It might bleed if it does.


9- Add a couple Loose Silver Sequins or other embellishment randomly on the card.

All Done!


I have also created a video walking you through each step:

To purchase any Stampin’ Up! products please visit

https://www.stampinup.com?demoid=2042902


Have a creative day!

Chelsey

chelsey@creativechelsey.com

Friday, January 27, 2023

Global Stampin' Video Hop January 2023 - SALE-A-BRATION & MINI CATALOGS - Mash Up! & How To Add White Details To Color Cardstock Technique

It is time for another tutorial for the Global Stampin’ Video Hop on YouTube. Each month on the fourth Friday Stampin’ Up Demonstrators from around the world come together and share their projects based on a monthly theme. January’s Theme is - SALE-A-BRATION & MINI CATALOGS - Mash Up!


Sale-a-bration at Stampin’ Up is such a fun time. With every qualifying order between January 5 and February 28 2023 you can get a free product. There are two different qualifying levels the first is a $50 order and the second is $100 order. If you live in the United States and would like a copy of your own Sale-a-bration catalog please click on the link below and I will send one to you.

https://forms.gle/oiCUtjj6YGjUXwLi9


I am also sharing with you a new to my tutorials Technique - How To Add White Details To Color Cardstock. I love how easy this technique is and the result is perfect every time. I hope you give it a try.


Make sure to check out what everyone makes for this monthly Video Hop. You can start with my video, I have linked it below. You can find the next video at the top of the video’s description on YouTube. Have fun!


See my Customer Appreciation Products for this month: http://creativechelsey.blogspot.com/p/shop-stampin-up-products.html

Follow me on Instagram https://www.instagram.com/creativechelsey

Or join my Facebook group https://www.facebook.com/groups/2221750878097906

To purchase any of the products you need to create this project visit

https://www.stampinup.com?demoid=2042902

Here are the dimensions and pieces you will need to create this set of cards:

Thick Basic White Cardbase – 5 ½” x 8 ½” scored at 4 ¼”

By The Bay Specialty Designer Series Paper – 4 ¼” x 5 ½”

Coordinating Color Cardstock – 3 ½” x 4 ¾” & large scrap

Basic White Cardstock – scrap for greeting & die cuts

Garden Green Cardstock – scrap for die cuts

Coordinating Ribbon – 13”


Product List


1- Cut and adhere the pattern paper to the front of the cardbase.

2- Stamp one of the scenes from the In The Country Sale-a-bration Stamp Set in Stazon Ink a little above center on 3 ½” x 4 ¾” coordinating color cardstock

3- Wrap the bottom of the color cardstock with 13” of ribbon and tie a knot on the left side about ½” from the bottom of the stamped scene. Add this to the card front on the right side with dimensionals.


4- Stamp the floral image from the Queen Bee Stamp Set (Mini Catalog) in Stazon Ink on matching color cardstock scrap.

5- Color with Watercolor Pencils. I used White, Daffodil Delight, Garden Green. To get a more vibrant color you can dip the tip of the pencil in water. Then color as normal. This activates the watercolor element of the pencils making the color bolder. I only used this technique with the White Pencil. Let dry & cut out with coordinating dies. Add it to the left side of the stamped scene with dimensionals.


6- Stamp the greeting “HELLO” from the Happy Labels Stamp Set (Mini Catalog) in Stazon on White Cardstock and cut out with the label die from the Queen Bee Die Set (Mini Catalog & Bundled with Stamp Set). Add the greeting with dimensionals above the ribbon in the center of the color cardstock rectangle piece.


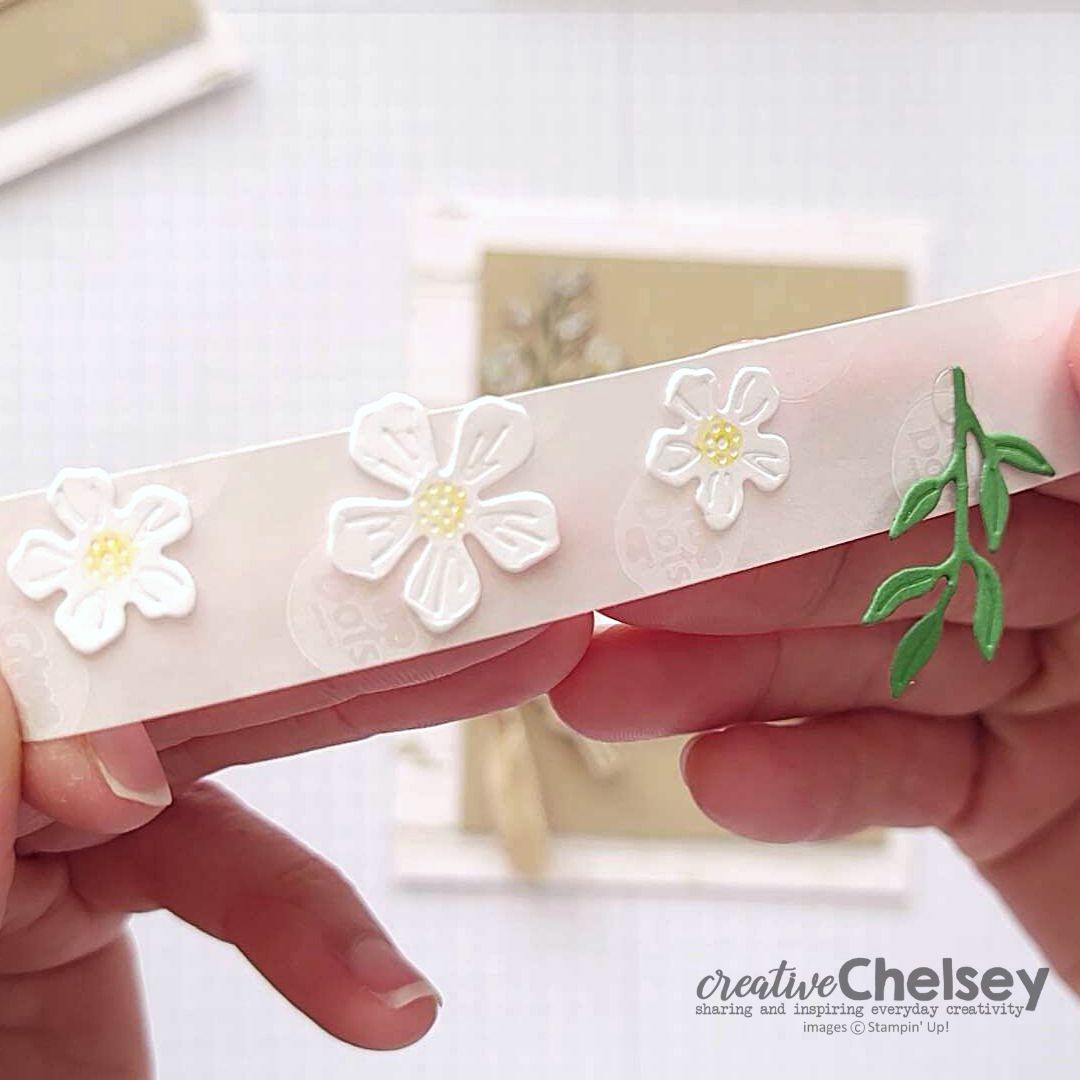
7- Cut out three flowers and two leaves with the Queen Bee cut and emboss dies. Tuck the leaves underneath the stamped flowers near the greeting. Color the white flowers in the center with a little Daffodil Delight pencil (no water). Add them near the leaves.


8- Splatter a little White Craft Ink on your card by mixing ink with a little water. Use a Water Painter to mix and then tap over the card.

All Done!


If you would like to watch me create this card with step by step tips and directions please watch this video:

If you need any product to make these cards, please visit my online store: http://www.stampinup.com?demoid=2042902


Have a creative day,

Chelsey

chelsey@creativechelsey.com

Tuesday, December 27, 2022

Paradise Palms Bundle - April 2022 Stampin' Up! Artisan Showcase - Create Your Own Unique Shapes

Hello my crafting friends,

Today I am excited to share with you my April 2022 Artisan Design Team Project. I was asked to use the Paradise Palms Bundle from Stampin’ Up!, This bundle includes the Paradise Palms Stamp Set and Palms Dies. These products are no longer available as a bundle, but you can still purchase them separately from the 2022-2023 Annual Catalog or Online. To purchase any of these products, please visit my online store. The link is below in the description.


Today’s cards have some fun techniques that really make the images pop. I also share a unique way to use the Basic Border Dies to create different shapes.


See my Customer Appreciation Products for this month: http://creativechelsey.blogspot.com/p/shop-stampin-up-products.html

Follow me on Instagram https://www.instagram.com/creativechelsey

Or join my Facebook group https://www.facebook.com/groups/2221750878097906


Be sure to check out the rest of the team’s wonderful creations on the Stampin’ Up! Corporate Facebook Page at -  http://www.facebook.com/stampinup

For more inspiration, tips & tricks from the 2022 Artisan Design Team also check out Stampin’ Up! on Instagram – https://www.instagram.com/stampinupofficial


To purchase any of the products you need to create this project visit

https://www.stampinup.com?demoid=2042902


Here are the dimensions and pieces you will need to create this card:

Pool Party Cardbase – 5 ½” x 8 ½” scored at 4 ¼”

Pool Party Cardstock – 3 ½” x 4 ½”

Basic White Cardstock – scraps for watercolor & die cutting |

Misty Moonlight Cardstock – scraps for die cutting

Layering Vellum Designs – 4” x 5 ¼”

In Good Taste Designer Series Paper – 3 ½” x 4 ¼”


Product List


1- Create a watercolor background on the Pool Party Cardstock. Use both Coastal Cabana and Bermuda Bay ink with a Water Painter. Let dry. Then splatter with Bermuda Bay ink, let dry.


2- Create a watercolor background on Basic White Cardstock with Old Olive & Granny Apple Green ink. Let dry. Then cut out with the grassy die cut.


3- Stamp the group of three palm trees on Basic White Cardstock with Stampin’ Write Markers. I used Granny Apple Green on the top with a little Old Olive for shadows. For the trunks I used Crumb Cake and then Soft Suede for the shadows. Add “HOT” breath to moisten the ink and stamp. Cut out with coordinating die.


4- Stamp the larger palm tree using the same colors. I did use ink pads and sponge daubers since they are larger images. Ink the trunk with Crumb Cake and then use a Sponge Dauber and Soft Suede for some shadows. Stamp on Basic White Cardstock.

Stamp both top images (large & small). Ink the whole stamp in Granny Apple Green and add shadows with a Sponge Dauber and Old Olive. Cut with coordinating dies.


5- Create your unique shape with the Chevron Basic Border Die.

Steps 1 & 2: line up the bottom end of the border die with the bottom right corner along the right edge, to remove the top right corner. Repeat along the left edge with the end of the die meeting with the top left corner to remove the left bottom corner.


Steps 3 & 4: create the same stitching along the top and bottom with the straight edge of the same Chevron Basic Border Die by lining up the straight edge of the die with the edge of the top & bottom.


6- Add the White Map Layering Vellum piece in the center of the cardbase. Add a beachy texture DSP to the center, I used a piece from the In Good Taste Designer Series Paper Light/Blonde Wood Grain.


7- Add your unique shape to the center of the card. Cut the decorative die cut from Misty Moonlight Cardstock (retired now, but you can use a different dark blue color). Trim off three squares so it fits across the card. Add this to the bottom of the center shape.


8- Next add the watercolor grass above the decorative strip. Tuck the tree palm trees to the left behind the grass.


9- Put together the large palm tree with the larger top on the bottom and the smaller one on top. Add this with dimensionals to the right of the three palm trees. Stamp your greeting in Misty Moonlight on Basic White Cardstock and trim down to fit. The tear the left and right edges. Add between the grass and decorative strip with dimensionals.


10- Add 3-5 Iridescent Rhinestones.

All Done!


If you would like to watch me create this cards with step by step tips and directions please watch this video:

If you need any product to make these cards, please visit my online store: http://www.stampinup.com?demoid=2042902


Have a creative day,

Chelsey

chelsey@creativechelsey.com