
Welcome back to Paper Pumpkin Week here on Creative Chelsey! Today I’m sharing two more alternative card designs using the August 2026 Kindred Greetings Paper Pumpkin Kit from Stampin’ Up!

For these two cards, I’m using a leftover die-cut piece from the kit to create a beautiful, soft plaid background. I love finding creative ways to use those leftover pieces, and this masking technique is a fun way to transform a simple white background into something special!
Let’s get started!

Have You Joined the
Paper Pumpkin Cut Club Yet?
If you love
making alternatives each month and want exclusive perks, make sure you join my
Paper Pumpkin Cut Club on YouTube! For only $4.99/month, members receive:
✨ Loyalty badges & custom emojis
✨ Early access to all my Paper Pumpkin alternative
videos
✨ Member shout-outs
✨ The Exclusive
Monthly Cutting Guide
✨ Members-only livestreams & behind-the-scenes
sneak peeks
The Cutting Guide
is one of the most requested resources I create—it shows exactly how to cut
your cardbases/gift boxes to make all of my alternatives. Cut Club members get
it EVERY MONTH.
You can join here → https://www.youtube.com/channel/UCszCS397ptot3vJdvLCirTg/join

Want to Subscribe to
Paper Pumpkin?
If you’re not
already receiving Paper Pumpkin, now is a great time to join! My subscribers
receive:
🎁 A FREE
exclusive card kit designed by me each month
🎁 The
Exclusive Monthly Cutting Guide
🎁 A
monthly live crafting session
🎁 A
multi-demonstrator PDF tutorial packed with 7–10 alternate ideas
🎁 And of
course—my support, tips, and creative inspiration!
Subscribe here and select me as your
demonstrator (Chelsey Christensen–CO):
https://www.stampinup.com/products/paper-pumpkin-subscription/?demoid=2042902
Supplies

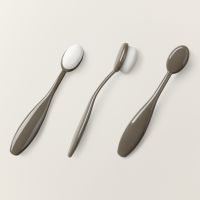

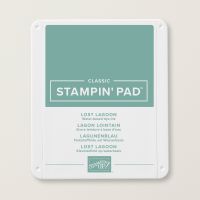



———————— My Favorite Supplies ————————
• Stampin' Seal+ [149699] —— https://bit.ly/3Ibz8YK
• Multipurpose Liquid Glue [110755] —— https://bit.ly/3IaGF9S
• Tear & Tape Adhesive [138995] —— https://bit.ly/3ajQSo5
• Stampin' Dimensionals [104430] —— https://bit.ly/3IbzezA
• Mini Glue Dots [103683] $7.25 —— https://bit.ly/3anAcw3
• Stampin' Pierce Mat [126199] —— https://bit.ly/3IjEq4d
• Simply Shammy [147042] —— https://bit.ly/3bQH7hE
• Paper Snips [103579] —— https://bit.ly/3ulT6tV
• Take Your Pick [144107] —— https://bit.ly/3IeYxR9
• Bone Folder [102300] —— https://bit.ly/3uhErzZ
• Clear Block D [118485] —— https://bit.ly/3uuabSs
• Paper Trimmer [152392] —— https://bit.ly/3abvykH
• Stampin' Cut & Emboss Machine
[149653] —— https://bit.ly/3ujz8zU
Technique: Creating a Soft Plaid Background
You’ll use the leftover rectangular
die-cut piece from the kit as your mask. This is the piece with five long
rectangular openings. Instead of throwing it away, we’re going to use it to
create our plaid pattern!
The key to this technique is building the
color in layers. Start with a light blend, reposition the mask, and blend again
to create the overlapping lines. Keeping the ink light allows each layer to
show through and gives the plaid a soft, delicate appearance.
Blending Techniques Supplies
●
White Cardbase* - 4-1/4” x
5-1/2"
●
Large Rectangle*
●
5 Rectangle Masks* (leftover piece
from the kit)
●
Lost Lagoon ink
●
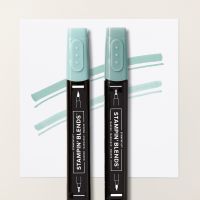
Lost Lagoon Stampin’ Blend Markers
- Light & Dark
●
Blending Brushes
Step 1: Prepare Your Mask and Cardstock

Position the 5
rectangular mask horizontally across the cardstock.
Adjust the mask so
there is an even amount of space at the top and bottom, with three full
rectangular openings visible through the center.
Use magnets to hold everything in place. If
your cardstock is smaller than the mask, move the magnets as needed while
keeping the paper from shifting.
Step 2: Blend the First Set of Lines

Work across the left
side first, then move the magnets and blend the right side.
Keep the color soft. You only want a light
layer of ink to begin building the pattern.
Step 3:
Reposition the Mask

Blend lightly over
the left side and then the right side again.
Be careful not to completely cover the lighter
lines you created in the first step.
This creates a second layer of color and
creates smaller horizontal lines.
Step 4: Rotate the Mask and Repeat

Position it evenly
over the cardstock, keeping the spacing balanced.
Blend lightly across
the left side and then the right side.
Reposition the mask once more to cover the
center of the sections and add another light layer of ink - again creating
smaller lines.
You’ll begin to see a beautiful, soft
plaid pattern emerge!
Tip: For a
more defined plaid, concentrate a little more ink along the edges of the
covered areas. Remember to keep your layers light so the different lines remain
visible.
Create a Larger Plaid Background
For the second card, use the same
technique on a larger piece of cardstock.

Lightly blend Lost
Lagoon ink across the entire exposed area.
Move the mask if
needed to continue the lines across the cardbase piece.
Rotate the mask 90 degrees and repeat the
blending process. Move the mask if needed to continue the lines across the
cardbase piece.
For this larger background, you don’t
need to cover every edge perfectly because you’ll be trimming the piece later.
Add Extra Plaid Details
For the first card, I added two more
layers of lines to make the plaid pattern more interesting.

Rotate the cardstock
and repeat the lines in the opposite direction. These lines can be a little
imperfect—the hand-drawn look adds to the design!
Using a Dark Lost
Lagoon Stampin’ Blend and the fine tip, draw a straight line down the middle of
each hand-drawn line.
Use a piece of chipboard from the Paper
Pumpkin kit as a straight edge. This helps keep the lines straight without
getting ink on a ruler.
You now have a layered plaid pattern with
blended lines, hand-drawn lines, and fine accent lines!
Card #4: Sending My Whole Heart

For this card, I combined the Large plaid background with a banner, stamped branches, small hearts, and a layered leaf greeting.
Card #4 Supplies
●
Thick Basic White Cardbase -
5-1/2" x 8-1/2" scored at 4-1/4" vertical
●
Soft Sea Foam - scrap for die cut
leaves
●
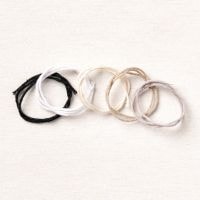
Gray & White Twine* - 12"
●
Long Rectangle*
●
Calypso Coral Circle & Leaves
Label*
●
Leftover Long Rectangles Frame*
●
Large Plaid background created
with the masking technique
Step 1: Trim the Plaid Background

This evens out the
edges and gives the pattern a cleaner finish.
In the center of one
short edge, cut a slit approximately ½" deep.
Cut diagonally from each corner of the slit to
create a banner point.
Your plaid background is now ready to
decorate!
Step 2: Stamp the Branches and Hearts

Stamp the branch in
one direction, then rotate the stamp and add another going the opposite
direction.
Using Gray Granite
ink, stamp the small heart image in a few places around the branches. I stamped
three hearts, but you can add more if you like.
With Pool Party ink, stamp the splatter image
around the banner. This adds texture and helps disguise any small marks
you don’t want to show.
Step 3: Distress the Edges
This is an optional technique, but I love
the extra detail it adds!
Take the plaid
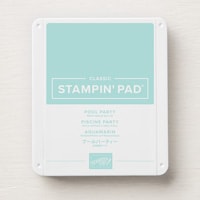
banner and gently rub its edges against the Pool Party ink pad.
Hold the cardstock
flatter against the ink pad for a deeper distressed edge, or tilt it at an
angle for a softer line of color.
Be sure to ink the edges around the banner
point, too.
Tip: The ink
on the blended background may smear if you rub it too much. Use a light touch
and handle the cardstock gently.
Step 4: Attach the Background
Place the plaid
banner toward the top of a Thick Basic White card base, leaving extra space at
the bottom for the greeting.
Attach it with
Dimensionals.
Press gently to avoid smearing the ink.
Step 5: Add Color to the Long Label

Blend until you like
the variation in color. It doesn’t need to be perfectly even.
Cut a small slit in
the center of each end and trim diagonally from the corners to create a banner
shape.
Attach this narrow banner across the plaid
background, between the stamped branches. Let the right end extend slightly
beyond the plaid panel.
Step 6: Prepare the Greeting

Rotate it so the
leaves run diagonally from the upper-right corner to the lower-left corner.
Using Gray Granite
ink, stamp the greeting “Sending my whole heart at a time when words fall
short” in the center.
Give the ink a moment to dry before handling
the greeting.
Step 7: Add a Faux Bow with Linen Thread & Die Cut Leaves

Add adhesive to the
back of the circular greeting.
Create a small bow
on one side, leaving a tail, then create a second bow on the other side with
another tail.
Adjust the loops and
trim the ends if needed.
Die cut two leaves from Soft Sea Foam
Cardstock, I used the Hugs Abloom past coordinating dies. Adhere them behind
the Linen Thread loops.
Step 8: Assemble the Card

Position the
greeting over the lower portion of the plaid background, following the diagonal
direction of the stamped branches.
Press everything into place.
Your first alternative card is complete!
The soft plaid pattern adds a beautiful background, while the branches, hearts,
and linen thread give the card lots of texture.
Card #5: Always Here for You

For the second card, I wanted to bring in the warmth of Very Vanilla cardstock to coordinate with the die-cut from the kit. The plaid background is softer here, allowing the large leaf die-cut and double bow to take center stage.
Card #5 Supplies
●
Very Vanilla Cardbase -
5-1/2" x 8-1/2" scored at 4-1/4" vertical
●
Gray Granite - 4" x
5-1/4"
●
Vanilla Twine - 20"
●
Large Rectangle*
●
Long Label*
●
Gray Branch Die Cut*
●
Smaller plaid background created
with the masking technique
Step 1: Stamp the Plaid Background

Let part of the
branch extend slightly beyond the edge of the panel.
Using Pool Party
ink, stamp the splatter image around the background.
Rotate the stamp as you go to create different
images..
The gray branches and soft blue splatter
add interest without competing with the plaid.
Step 2: Assemble the Card Base

Attach the plaid
background on top of the Gray Granite panel.
If you have a subtle embossing folder, you
could emboss the Gray Granite cardstock before assembling the card for added
texture.
Step 3: Attach the Large Leaf Die-Cut

You don’t need a
Dimensional on every leaf. Add them where they will provide enough support.
Position the die-cut so you can still see the
stamped branches behind it, and keep the bottom of the stem within the plaid
panel.
Step 4: Add the Double Bow

Secure the bottom of
the leaf die-cut with a small piece of adhesive or tape.
Find the center of
the Very Vanilla card base and decide which direction you want the twine to
run. I placed mine from right to left.
Create a small bow
with two loops, adjusting the size until you like the look.
Trim any excess twine.
Step 5: Add the Greeting

Position it across
the lower portion of the card, covering the adhesive and twine ends. Adhere
with dimensionals.
Align the greeting with the edge of the
rectangular background panel.
Your second alternative card is finished!
I love how the Very Vanilla cardstock warms up the design and how the large
leaf die-cut stands out against the plaid background.
Which Card Is Your Favorite?
I love how one leftover die-cut piece can
become a mask for creating such a unique background. By changing the ink color,
layering the lines, and adding a few extra details, you can create your own
plaid pattern to coordinate with just about any card design.
Video Tutorial
I’ve also created a step-by-step video
tutorial showing exactly how these cards come together. If you’d like to
craft along with me, be sure to watch the video!
Thanks so much for stopping by Creative
Chelsey! I hope you enjoyed these two alternative card ideas and will give the
plaid masking technique a try. If this project inspires you to create
something, I would love for you to tag me on social media using @creativechelsey
| #creativechelsey or email me at chelsey@creativechelsey.com.
Have a creative day,
Chelsey
No comments:
Post a Comment