
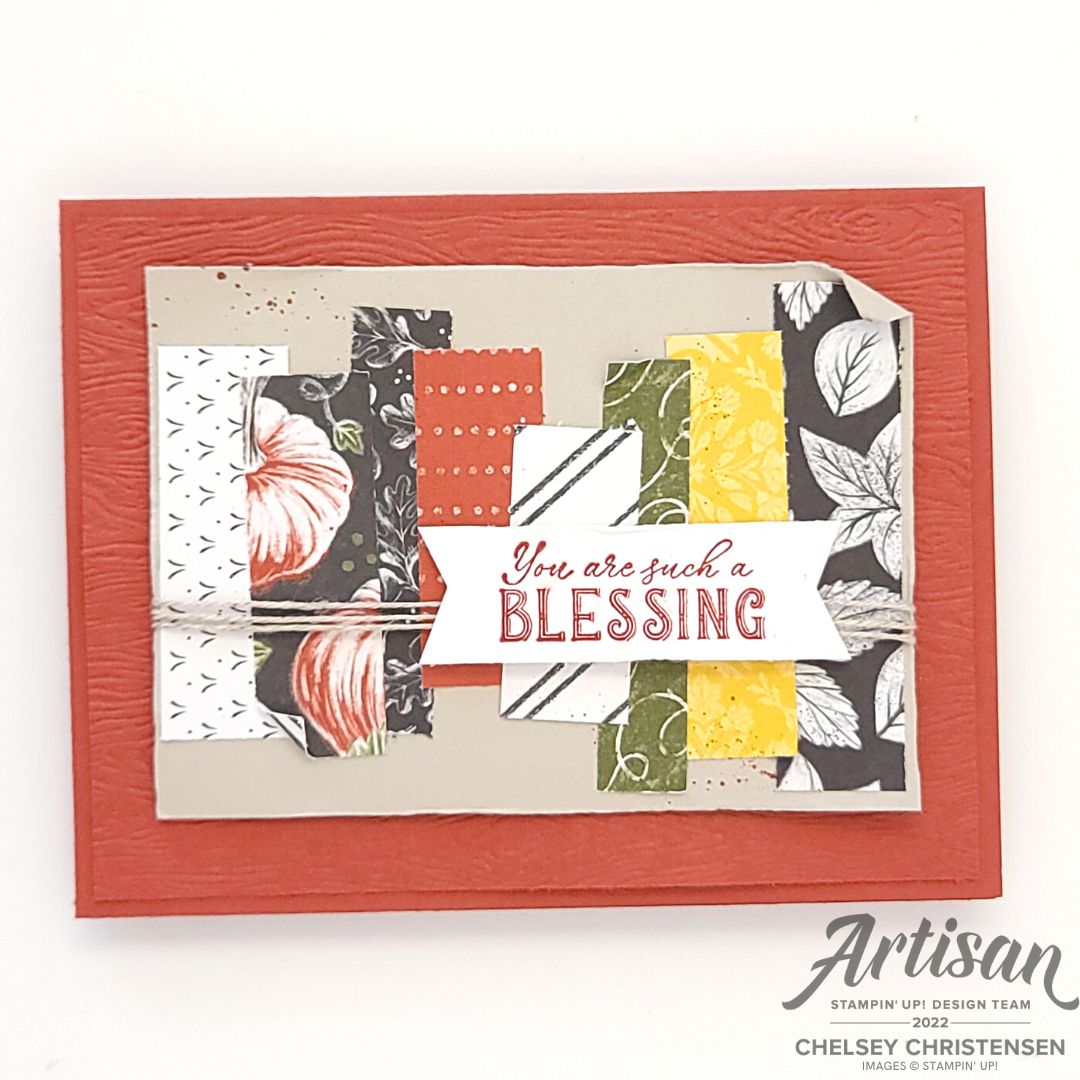
Today is another tutorial for the Global Stampin’ Video Hop on YouTube. Each month on the fourth Friday Stampin’ Up Demonstrators from around the world come together and share their projects based on a monthly theme. October’s Theme is FAVORITE DESIGNER SERIES PAPER. I had such a hard time choosing a favorite DSP. There are so many wonderful patterns and designs that Stampin’ Up! offers. So I decided to share with you an oldie, but goodie – a scrap card! If you are like me, we have a hard time throwing away even the smallest of scraps from our favorite papers. I hope this card gives you some ideas on a new way to use up those scraps.

Make sure to check out what everyone makes for this monthly Video Hop. You can start with my video, I have linked it below. You can find the next video at the top of the video’s description on YouTube. Have fun!

 Designer Series Paper")
")


See my Customer Appreciation Products for this month: http://creativechelsey.blogspot.com/p/shop-stampin-up-products.html
Follow me on Instagram https://www.instagram.com/creativechelsey
Or join my Facebook group https://www.facebook.com/groups/2221750878097906


 Designer Series Paper")
")


To purchase any of the products you need to create this project visit
https://www.stampinup.com?demoid=2042902
Here are the dimensions and pieces you will need to create this card:
Coordinating Cardbase – 5 ½” x 8 ½” scored at 4 ¼” &
4” x 5 ¼”
Another Coordinating Cardstock – 3 ¼” x 4 ½” (use a
lighter color like white or vanilla)
Scrap piece for greeting


 Specialty Designer Series Paper")


1- Begin by gathering coordinating scraps either from one DSP pack or make up your own combination of patterns and colors.
2- Cut the length down if too long. Any size up to 2 ½” will
work for this card.
3- Begin adding them to the smaller cardstock. I like to
start with the sides first and then work my way to the center.

4- On the 4” x 5 ¼” piece of cardstock add texture with stamps, splatter, or embossing folder. Layer this piece on the cardbase.

5- Add the small piece with the scraps in the center with dimensionals. If you want to wrap ribbon or twine around this piece do it before adding to the cardbase.
6- Stamp your greeting in a coordinating ink color and
cut out with a punch or die. Add to the card with dimensionals.

7- Add any embellishments: dots, rhinestones, ribbon, twine.
All Done!


 Designer Series Paper")


If you would like to watch me create this card with step by step tips and directions please watch this video:
If you need any product to make these cards, please visit my online store: http://www.stampinup.com?demoid=2042902
Have a creative day,
Chelsey
chelsey@creativechelsey.com
No comments:
Post a Comment