
Hello my crafting friends,

Today I am excited to share my project made for the Stampin’ Fancy Friday Design Team. This group of amazing designers create fun challenges each month. We each then design a project around the challenge. Everyone is invited to participate in the challenge each month. Share your project on IG or FB then tag #stampinfancyfriday when you post it. They will share in their stories to inspire others as well!

The challenge for March 2022 was all about products in the January – June Mini Catalog. Make sure to check out all 26 projects. This is the card I made using the Garden Greenhouse Bundle. I was really drawn to the images in this set because of the play between the geometric structure of the greenhouse with the organic shapes of the plants. I also loved that the coordinating dies cut out this beautiful detailed greenhouse image. By layering all my favorite things together, I was able to create this beautiful card.

I hope you are inspired by this card and create something with the Garden Greenhouse or another fun product from the January – June Catalog for the challenge this last month. Even thought I am late in posting my project you can be inspired or participate in the challenges any time.

See my Customer Appreciation Products for this month: http://creativechelsey.blogspot.com/p/shop-stampin-up-products.html
Follow me on Instagram https://www.instagram.com/creativechelsey
Or join my Facebook group https://www.facebook.com/groups/2221750878097906

Be sure to check out the rest of the Stampin’ Fancy Friday team’s wonderful creations on Facebook - https://www.facebook.com/stampinfancyfriday/ or Instagram - https://www.instagram.com/stampinfancyfriday/

To purchase any of the products you need to create this project visit
https://www.stampinup.com?demoid=2042902
Here are the dimensions and pieces you will need to
create this card:
Balmy Blue Cardbase 5 ½” x 8 ½” scored at 4 ¼”
Balmy Blue Cardstock 4” x 5 ¼”
In Good Taste Designer Series Paper – Woodgrain Pattern
4” x 4”
Basic White Cardstock 4 ¼” x 5 ½” stamping
Vellum Cardstock 4” x 4”
Vellum Layering Designs 1 ½” x 1 ½”
Mossy Meadow Cardstock scraps for die cuts
Pear Pizzazz Cardstock scraps for die cuts
The products I used are:
Garden Greenhouse Bundle 157733 $50.25
Balmy Blue Cardstock 146982 $8.75
Basic White Cardstock 159276 $9.75
Mossy Meadow Cardstock 133676 $8.75
Pear Pizzazz Cardstock 131201 $8.75
Vellum Cardstock 101856 $10.00
In Good Taste Designer Series Paper 152494 $21.00
Layering Vellum Designs Pack 157764 $10.00
Pear Pizzazz Ink Pad 147104 $7.50
Mossy Meadow Ink Pad 147111 $7.50
Sponge Daubers 133773 $5.00
Melon Mambo Ink Pad 147051 $7.50
Crushed Curry Ink Pad 147087 $7.50
Polished Pink Ink Pad 155712 $7.50
Calypso Coral Ink Pad 147101 $7.50
Balmy Blue Ink Pad 147105 $7.50
Memento Black Ink Pad 132708 $6.00
Iridescent Rhinestone Basic Jewels 158130 $7.50
Adhesive Sheets 152334 $10.00
Paper Trimmer 152392 $25.00
Clear Block D 118485 $8.50
Simply Shammy 147042 $8.00
Stampin’ Seal Adhesive 152813 $8.00
Dimensionals 104430 $4.00
Adhesive Sheets 152334 $10.00
Paper Snips 103579 $10.00
Bone Folder 102300 $7.00
Take Your Pick Tool 144107 $10.00

1- Begin by inking the large plant image in Pear Pizzazz and adding Mossy Meadow ink with a Sponge Dauber. Stamp on Basic White Cardstock. Repeat. Cut out with coordinating dies.
2- Stamp the four single flower images in coordinating
colors. I used Melon Mambo, Crushed Curry, Polished Pink, and Calypso Coral.
Stamp 3-4 of each flower. Cut out with coordinating dies.
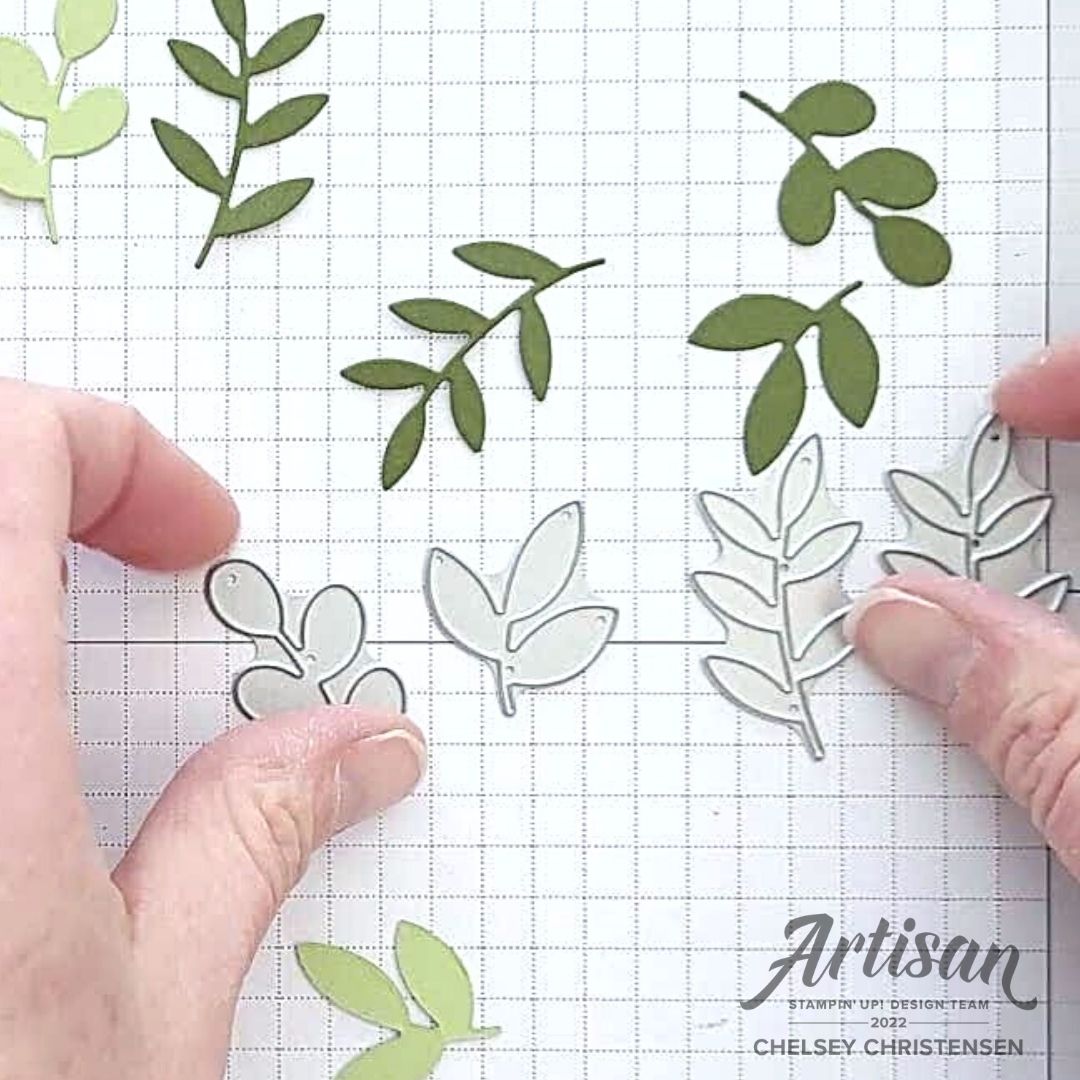
3- From Mossy Meadow & Pear Pizzazz Cardstock die cut each of the four different leaf shapes, for a total of 8.

4- From Vellum Cardstock cut out the solid Greenhouse die, from the Woodgrain Pattern cut out the detailed Greenhouse die (make sure to add Adhesive Sheets to the back before cutting). Add the detailed piece over the vellum piece.

5- On 4” x 5 ¼” Balmy Blue Cardstock drag a Balmy Blue ink pad across the paper in short little bursts and at different angles. Do multiple layers to build up color. Tip: this is done best with an older ink pad that has not been recently reinked.

6- Add the Greenhouse die to the top right side of the Balmy Blue distressed piece with adhesive along the bottom edge to hold in place.
7- Layer the large plant images along the bottom of the
same piece. Layer the solid leaf die cuts behind and in front of the stamped
images to give texture and interest. Trim off any overhanging pieces.

8- Add the single flowers to glue dots and place in and around the stamped & die cut leaves.

9- Next, bend down the top left corner to give it a distressed look. Place a piece of Layering Vellum Designs behind the folded corner to create a peekaboo look. The edges of the vellum piece should line up with the edges of the cardstock.

10- Stamp your greeting in the top left area of the Balmy Blue piece in Memento Black ink. Then add everything to the front of the Balmy Blue Cardbase. Add a couple Iridescent Rhinestone Basic Jewels around the card.
All Done!
If you would like to watch me create this card with step by step tips and directions please watch this video:
If you need any product to make these cards, please visit my online store: http://www.stampinup.com?demoid=2042902
Have a creative day,
Chelsey
chelsey@creativechelsey.com
No comments:
Post a Comment