
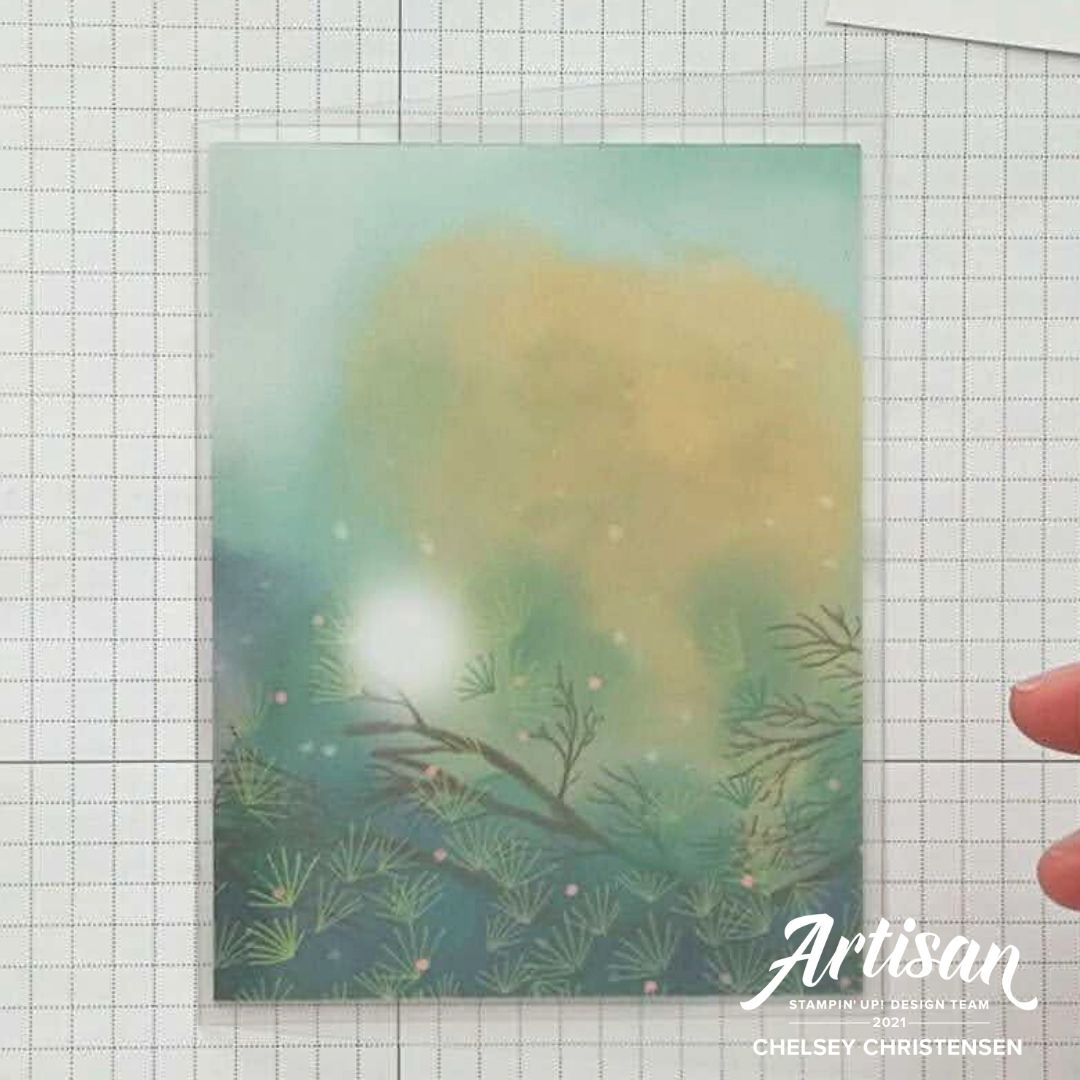
Welcome to Paper Pumpkin Week here at Creative Chelsey. I love getting my Paper Pumpkin Kit every month and creating fun alternative projects using the supplies in the kit. Today is my first alternative project using the July 2021 Paper Pumpkin Kit – The Adventure Begins. This kit comes with everything you need to make 12 fun outdoor / adventure themed handmade cards and even better they are trifold with a peekaboo window. Using the supplies in the kit I like to create alternative cards. Today I would like to share with you this Clear Alternative Card Idea. I hope you enjoy learning how to make this card.

I love creating alternative cards with Paper Pumpkin Kits so make sure to come back for more as I continue to create with this month’s kit. I would love to see your finished creations that are inspired by this tutorial! You can tag me in any social media post using @creativechelsey | #creativechelsey or email me at chelsey@creativechelsey.com

It is Paper Pumpkin Week here on Creative Chelsey. This is the first tutorial this week. If you would like to see all my alternatives check out the playlist here: https://youtube.com/playlist?list=PL40dV1oxpkNn5vdApR03XumTDzcyC0gc2
Watch me UNBOX this month’s Paper Pumpkin Kit here: https://youtu.be/M3_VlerdWxM

Don't miss out on next months Paper Pumpkin Kit - subscribe today!SUBSCRIBE to Paper
Pumpkin - click here –

See my Customer Appreciation Products for this month: http://creativechelsey.blogspot.com/p/shop-stampin-up-products.html
Follow me on Instagram https://www.instagram.com/creativechelsey/
Or join my
Facebook group https://www.facebook.com/groups/2221750878097906
To purchase any of the products you need to create this project visit https://www.stampinup.com?demoid=2042902
Here are the dimensions and pieces you will need to create this card:
From the Kit:
Lantern Cardbase
Circle Label
Banner Label
Sequins
Extra Cardstock:
Window Sheet / Clear Acetate Sheet - Cardbase 5 ½” x 8 ½”
scored at 4 ¼”
Basic White Cardstock – scraps for stamping
Here is a list of the supplies I used to make the card:
Window Sheets 142314 $5.00
Basic White Cardstock 159276 $9.75
Garden Green Ink Pad 147089 $7.50
Granny Apple Green Ink Pad 147095 $7.50
Baker’s Twine Essentials Pack 155475 $11.00
Shimmery Crystal Effects 150892 $5.00
Paper Trimmer 152392 $25.00
Simply Shammy 147042 $8.00
Stampin’ Seal PLUS Adhesive 149699 $12.00
Multipurpose Liquid Glue 110755 $4.00
Tear & Tape Adhesive 138995 $7.00
Dimensionals 104430 $4.00
Clear Block D 118485 $8.50
Paper Snips 103579 $10.00
Bone Folder 102300 $7.00
Stampin' Pierce Mat 126199 $5.00
Take Your Pick Tool 144107 $10.00

1- Score the Window Sheet Cardbase in half at 4 ¼” make sure to use a Bone Folder to create a good crease.
2- Trim the Lantern Front Flap from the cardbase at 4 ¼”. You should now have a regular cardbase if you rotate it so the branches are at the bottom. Trim the open side to 4” and remove 1/8” from top and bottom. Adhere to the inside of the Clear cardbase with Tear & Tape Adheisve.

3- From the Lantern Side trim off the bottom white strip and then cut a ¾” x 4” strip from the bottom area. Add this to the front of the Clear cardbase about 1” from the bottom with Tear & Tape Adhesive.
4- Remove the Lantern from the rest of the cardstock, if
you want remove the handle from the top. Add the Lantern to the center of the
Clear cardbase with dimensionals. You want it to touch the top of the strip.

5- Stamp two trees in Granny Apple Green & Garden Green Ink. Use the inside image to add texture. Then fussy cut out. Trim about ½” from the left side of the Granny Apple Green tree so it can be flush with the left side of the cardbase. Adhere it to the inside flap about ½” from the top left corner.
6- Add the Garden Green tree below and to the right with
dimensionals.

7- Cut the Banner Label in half so you have two ½” strips. Stamp “The World Awaits You” in Garden Green on one of the strips. Trim the flat side so it matches the angle of the other side. Add below the trees on the inside flap with dimensionals. It should be hidden behind the strip on the front when the card is closed.

8- Stamp “Let Your Light Shine” in Garden Green on the Circle Label. Add adhesive to the back and wrap 2 pieces of 10” each in a faux bow. Add to the front of the card in the bottom right corner with dimensionals.

9- Add some Sequins around the Lantern and a little Shimmery Crystal Effects to the flame. Let dry before placing inside an envelope.
All Done!
I have also created a video walking you through each step:
To purchase any of the products you see in this video visit
https://www.stampinup.com?demoid=2042902
Have a creative day!
Chelsey
chelsey@creativechelsey.com
Fabulous!! I can’t wait to make this. Thank you so much for sharing!
ReplyDeleteBeautiful card! I like the way you explain your steps as you do them. Very clear and understandable.
ReplyDelete