
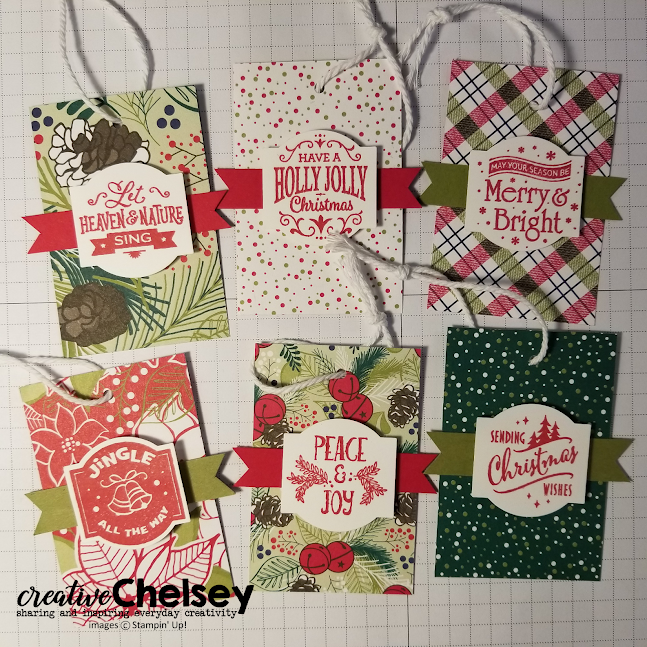
 Today I would like to share with you some quick and easy Christmas Tags. These would be so cute on wrapped presents under the tree or to add some festivity to neighbor or teacher gifts. They could also be put together in a set and given as a gift. And the best part is they are so fast to make. Watch the video below for step by step directions or scroll through the pictures to see each step.
Here is what you need to make these tags:
This Punch Box is ON SALE for only $27.00 - this is a great deal!
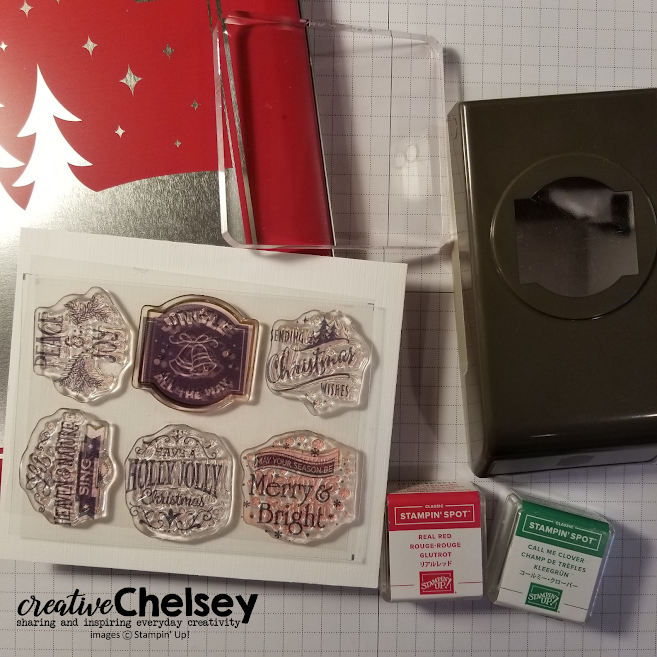
Christmas Traditions Punch Box (148030 $45.00) This box is full of great products, a Festive Stamp Set, a matching punch, 2 Stampin' Spot Ink Pads in Real Read and Call Me Clover, and a Clear Block all in a cute Christmas Tin Box. This would make a perfect gift for a new or experienced crafter.
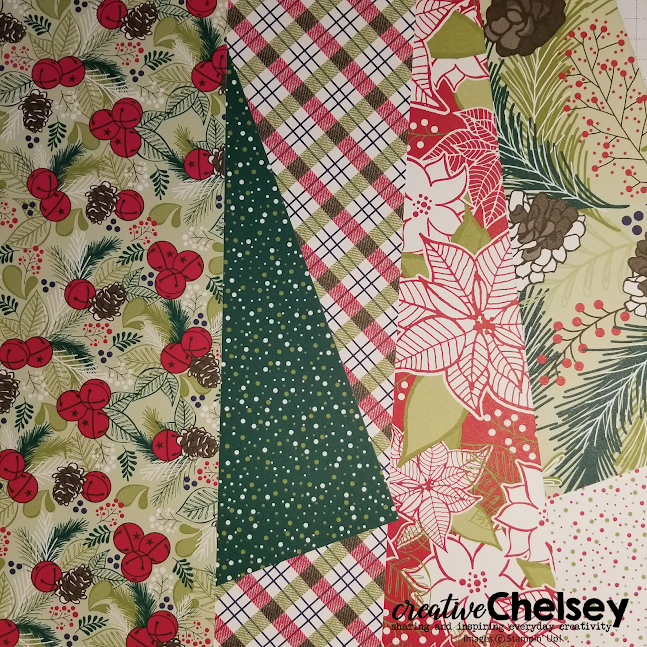
You will also need some Festive Christmas Paper. I am using Under the Mistletoe Designer Series Paper (146921 $11.00) I love the colors and patterns in this paper.
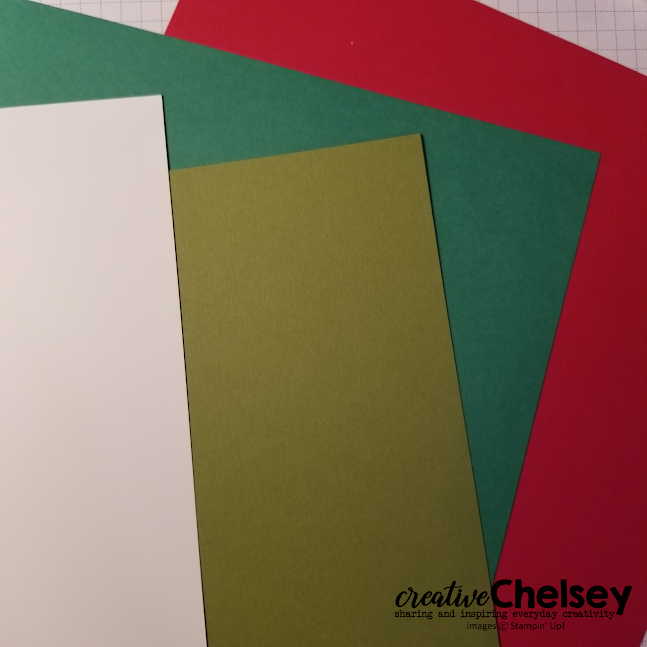
Grab some coordinating cardstock. I have a pack of Whisper White (100730 $9.75) and Under the mistletoe Cardstock Pack (146922 $8.50). This pack includes 8 sheets of each color - Old Olive, Shaded Spruce, and Real Red.
Here are the tools you will need: A pair of scissors. I like using Stampin' Up's Paper Snips (103579 $10.00) They are the perfect size and sharpness. Grab a hole punch, any will do. Stampin' Up sells a 1/8" circle punch if you don't have one (134365 $9.00). You will also want something to clean your stamps with. I LOVE the Simply Shammy (147042 $8.00) Just add water and wipe your stamps clean. Then get your adhesives - Snail (104332 $7.00) and Dimensionals (104430 $4.00). You might also want a paper cutter to help keep your cuts nice and straight. If you don't have one- Stampin' Trimmer (126889 $30.00)

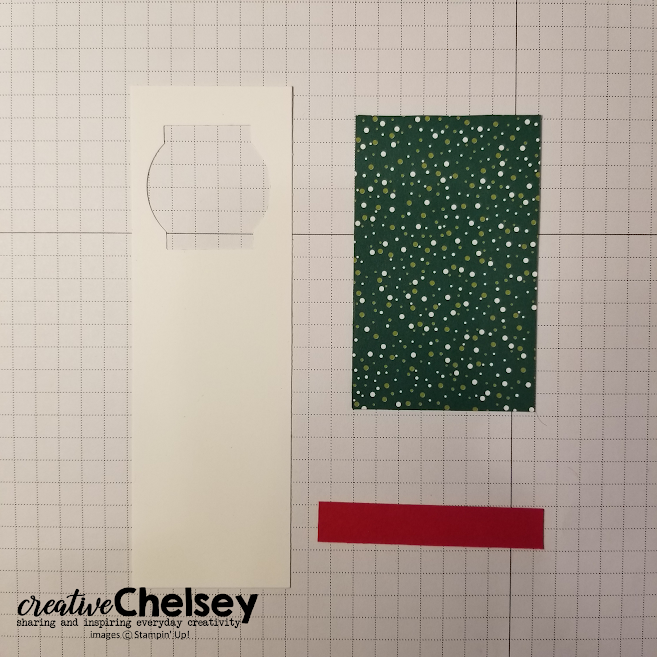
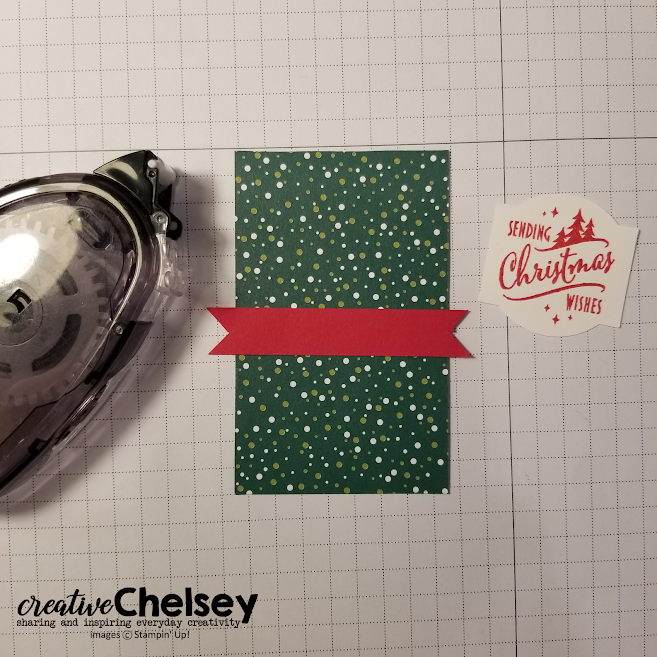
Okay! Now cut your paper:
Whisper White - 2"x11" strips
Pattern Paper - 2"x3" rectangle
Coordinating Cardstock - ***
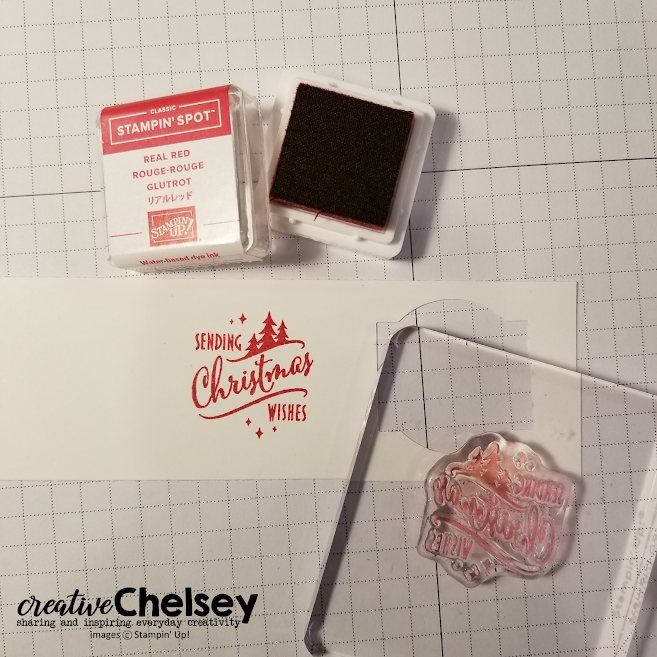
Next Stamp your image:
Choose which image you want and place it on the clear block. Ink it with the Real Red Stampin' Spot and stamp on the Whisper White strip of paper.
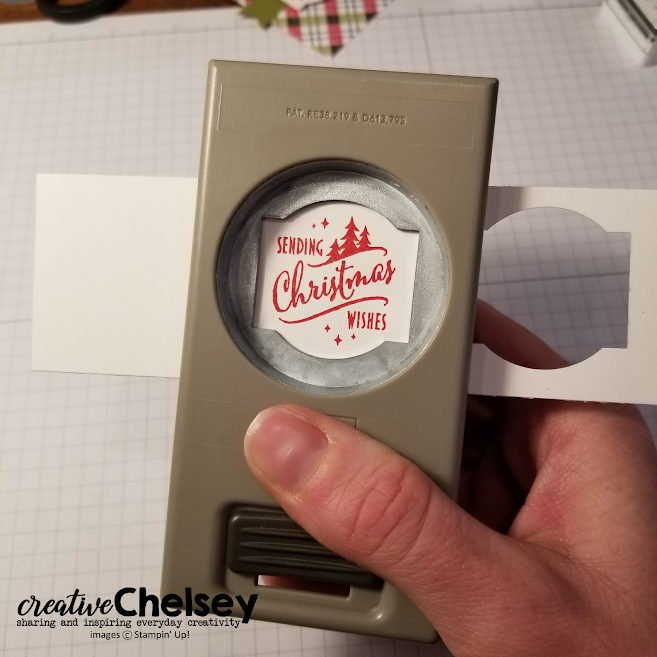
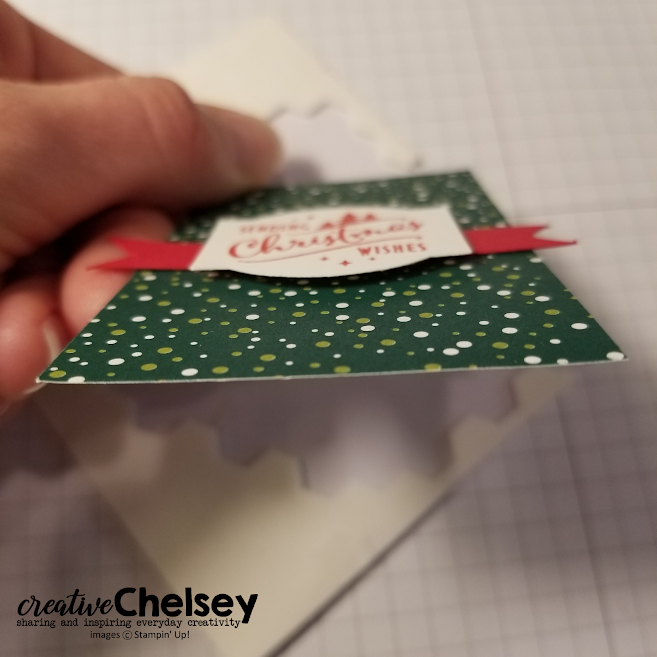
Punch it out!
I like using the punches upside down. This way I can see where my stamped image is and line it up exactly where I want it so I don't cut any part off.
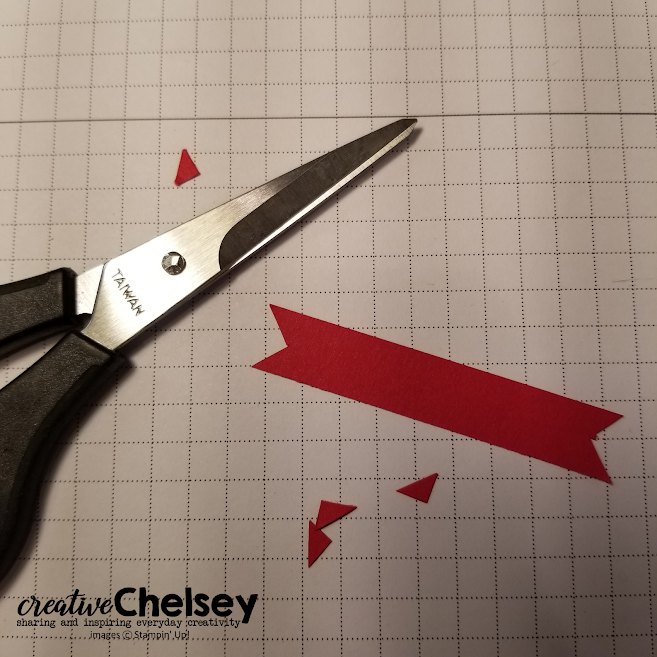
Make a Banner:
Use your scissors and cut a small triangle from the short ends of the small strip of coordinating cardstock. This will make a banner. If you are unsure how to do this watch my video below. I go into better detail and show you how.
Now for the fun part - Put it all together!
Adhere the banner using the snail or 2-sided tape to the middle of your pattern paper. Then use dimensionals on the back of your stamped image and center that over the banner. This adds depth to your tag.
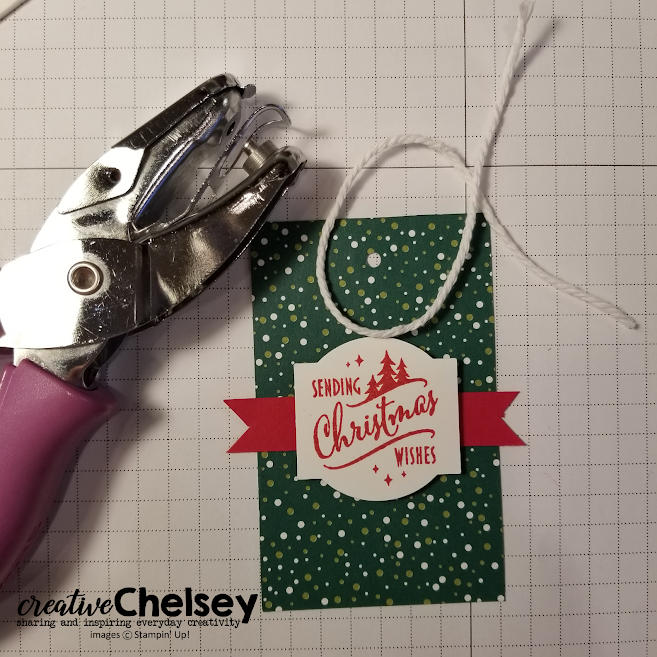
Lastly, Punch and Tie:
Punch a small circle/hole at the top of your tag and string 8" of twine, oops I forgot this item in the above list. I am using Solid Bakers Twine in Whisper White (124262 $3.00). Then tie the ends together!
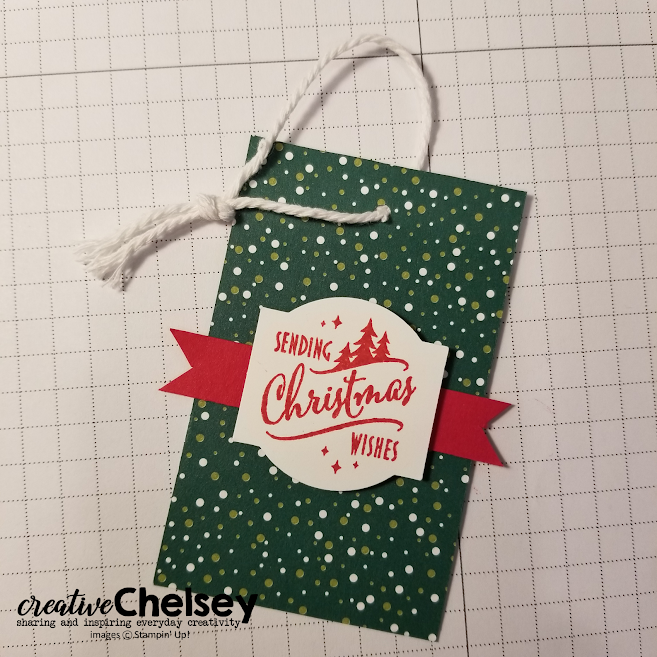
All done - It looks great!
If you would like to watch this project come together in real time, watch the video below.
Thanks for stopping by. Have a creative day!
No comments:
Post a Comment