The cards this month are so cute and really
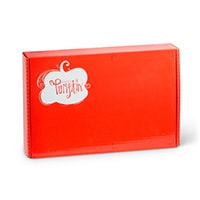
easy to make with beautiful textures and foil accents. If you would like to watch me unbox the kit
and make the original cards visit this playlist - https://www.youtube.com/playlist?list=PL40dV1oxpkNmWbQHZrcm9aXxWqpVvFSAC
This is the seventh and last alternative project I will be sharing with you this week. I love envelope treat pouches. They are simple and easy to make and when the envelope has a cute design they can be really fast to design. I love the idea of cutting out a little opening from the front to give a peek inside, however, my design changed a little and I decided to cover up the opening. But the technique and tips are included in this tutorial if you decide to add clear material instead.
Each month I take the contents from the paper pumpkin kits and make alternative projects. My cards are easy to follow and can be made by both experienced or new paper crafter. You may need just a couple other products to complete them. You can follow along with me using supplies you already have or purchase any products you see me use from my online store. A full supply list is below or on my blog – www.creativechelsey.com
I also want to mention the amazing perks you can receive when you subscribe to Paper Pumpkin with me as your demonstrator. With every Paper Pumpkin Stamp Set & Ink Spot sent, I design a card and mail out my very own card kit to my subscribers so they can make two of my exclusive card design. These cards so fun and show new ways to use stamps & ink. We also meet once each month to make the card together, chat & have fun. *PLUS I have joined with other Stampin’ Up! Demonstrators to design 8-10 more alternative ideas in a PDF Tutorial (includes photos & instructions). My subscribers receive this PDF Tutorial along with an Exclusively Designed Card Kit, all for FREE! If you would also like to receive this extra perk, sign up for paper pumpkin using the link below and make sure to select me as your demonstrator.
If you are
interested in getting your own paper pumpkin subscription, please use this link
to subscribe - https://www.paperpumpkin.com/en-us/sign-up/?demoid=2042902
If this project inspires you to create something, I would love for you to tag me in any social media post using @creativechelsey | #creativechelsey or email me at chelsey@creativechelsey.com.
It is Paper Pumpkin Week here on Creative Chelsey. This is my last alternative idea. If you would like to see all my alternatives this month check out the playlist here: https://www.youtube.com/playlist?list=PL40dV1oxpkNmWbQHZrcm9aXxWqpVvFSAC
Don't miss out on next month’s Paper Pumpkin Kit - subscribe
today!SUBSCRIBE to Paper Pumpkin - click here –
See my Customer Appreciation Products for this month: http://creativechelsey.blogspot.com/p/shop-stampin-up-products.html
Follow me on Instagram https://www.instagram.com/creativechelsey
Or join my Facebook group https://www.facebook.com/groups/2221750878097906
To purchase any of the products you need to create this
project visit https://www.stampinup.com?demoid=2042902
———————— My Favorite Supplies ————————
• Stampin' Seal+ [149699] $12.00 —— https://bit.ly/3Ibz8YK
• Multipurpose Liquid Glue [110755] $4.00 —— https://bit.ly/3IaGF9S
• Tear & Tape Adhesive [138995] $7.00 —— https://bit.ly/3ajQSo5
• Stampin' Dimensionals [104430] $4.25 —— https://bit.ly/3IbzezA
• Mini Glue Dots [103683] $5.25 —— https://bit.ly/3anAcw3
• Stampin' Pierce Mat [126199] $5.00 —— https://bit.ly/3IjEq4d
• Simply Shammy [147042] $8.50 —— https://bit.ly/3bQH7hE
• Paper Snips [103579] $11.00 —— https://bit.ly/3ulT6tV
• Take Your Pick [144107] $10.00 —— https://bit.ly/3IeYxR9
• Bone Folder [102300] $7.00 —— https://bit.ly/3uhErzZ
• Clear Block D [118485] $9.00 —— https://bit.ly/3uuabSs
• Paper Trimmer [152392] $25.00 —— https://bit.ly/3abvykH
• Stampin' Cut & Emboss Machine [149653] $125.00 —— https://bit.ly/3ujz8zU
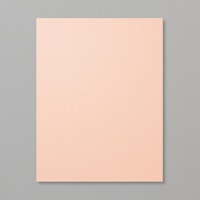
Petal Pink Cardstock – 3 ¼” x 3 ¼”
Chipboard – Kit
Envelope – Kit
Row of Hearts (at least 5 so you can have 3 full hearts) – Kit
White Cardbase Scraps (stamping) – Kit
Embossed Gold Sticker – Kit
1- Cut the piece of Chipboard from the Paper Pumpkin Kit to 5 ½” and tuck into one Envelope.
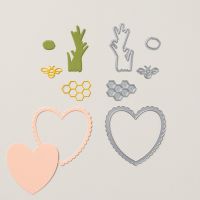
2- With the Scallop Heart Die from the Spring Is In The Air Dies cut a heart from the front. Use these platforms to get a snug fit in your Stampin’ Cut & Emboss Machine. Platform #1, then Gray #4, your Envelope with Chipboard and Die on top, last one Clear #3. It might be a little tight, but should work.
3- Slide a Petal Pink piece inside the Envelope to cover the opening and adhere to the backside behind the opening. You could also use a Clear Envelope if you want to see into the Treat Pouch.
4- Flip the Solid Heart Envelope piece to the Solid Red Side and add with dimensionals in the center of the Scallop Petal Pink Heart opening.
5- Cut from the Leftover White Cardbase piece a 5/8” x 4 ¼” piece and stamp your greeting in Real Red ink. Add over the center of the Hearts with dimensionals on the sides and glue dots in the center.
6- Add one Embossed Foil Heart Sticker to the front (or you
could use it on the back to hold the flap down).
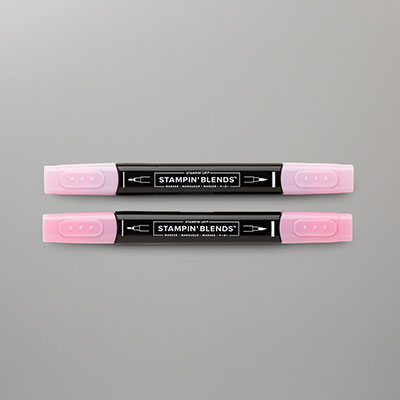
7- Separate 3 Full Hearts from the Row of White Hearts and color with pink ink. I used Flirty Flamingo Stampin’ Blend Markers. I did two Dark & one Light. Add to the front around the Large Heart. Use Dimensionals or Glue Dots as you wish.
8- Stamp a Solid Heart in Real Red ink on the Flap.
9- To create the Treat Pouch- Score ½” along all straight sides. Be careful when scoring the Flap the paper is very lightweight. Fold along all scored lines going both directions.
10- Open up the envelope and flatten the bottom. Create a triangle in the corners and adhere to the bottom with glue dots or liquid adhesive.
10- Fold the middle into the envelope creating a gusseted edge.
11- Adhere the sides of the Envelope Flap down to the back of the Envelope Flap.
12- Fill with treats and close by wetting the Envelope Flap or with a Foil Sticker.
All Done!
I have also created a video walking you through each step.
To purchase any Stampin’ Up! products please visit
https://www.stampinup.com?demoid=2042902
Have a creative day!
Chelsey
chelsey@creativechelsey.com


No comments:
Post a Comment