Tuesday, August 30, 2022

September 2022 Exclusive Online Handmade Card Class - Sweetest Christmas

Registration has closed - please contact me with any questions


Join me for exclusive Online Card Making Tutorials
from September 26 – October 1, 2022!
Class Fee - $35

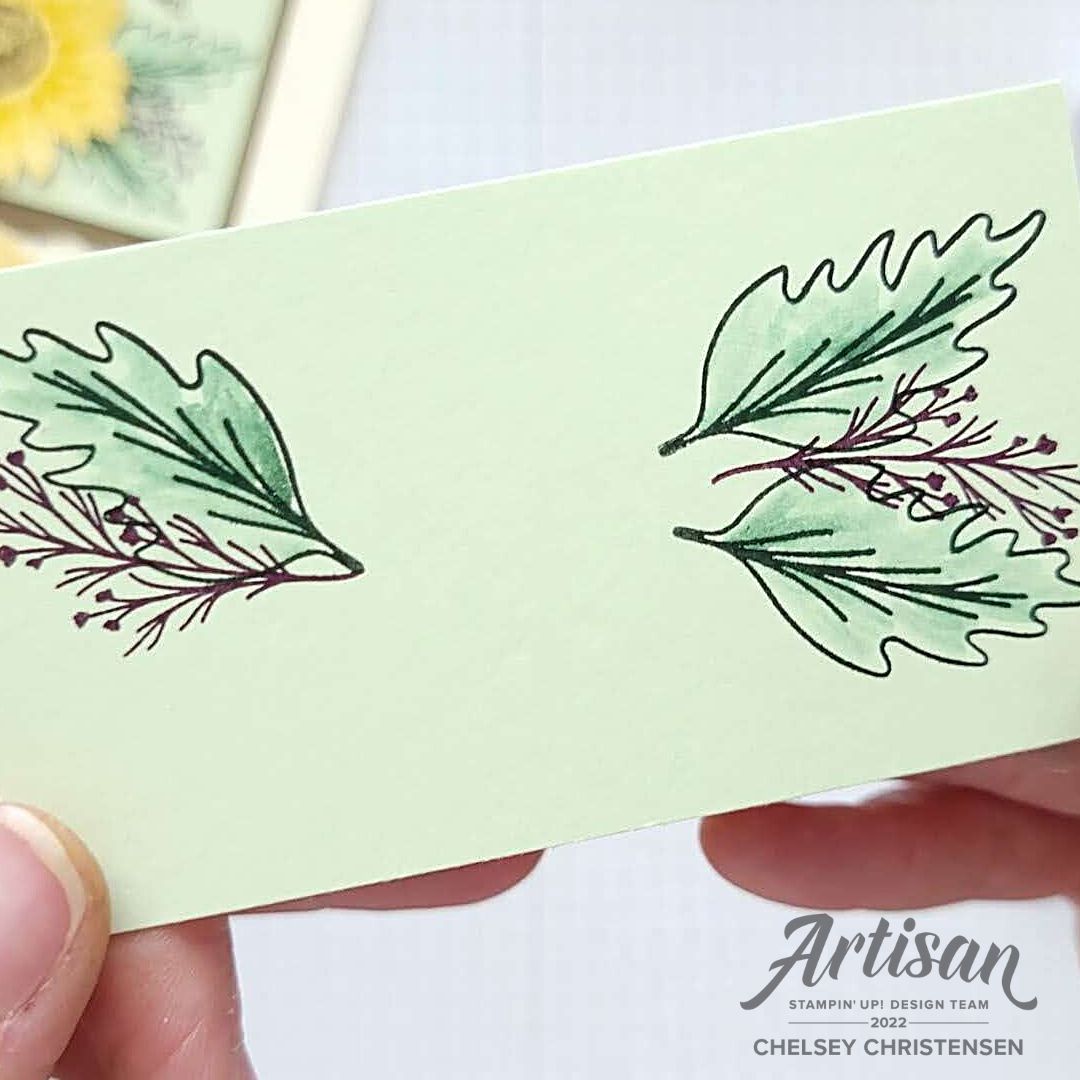
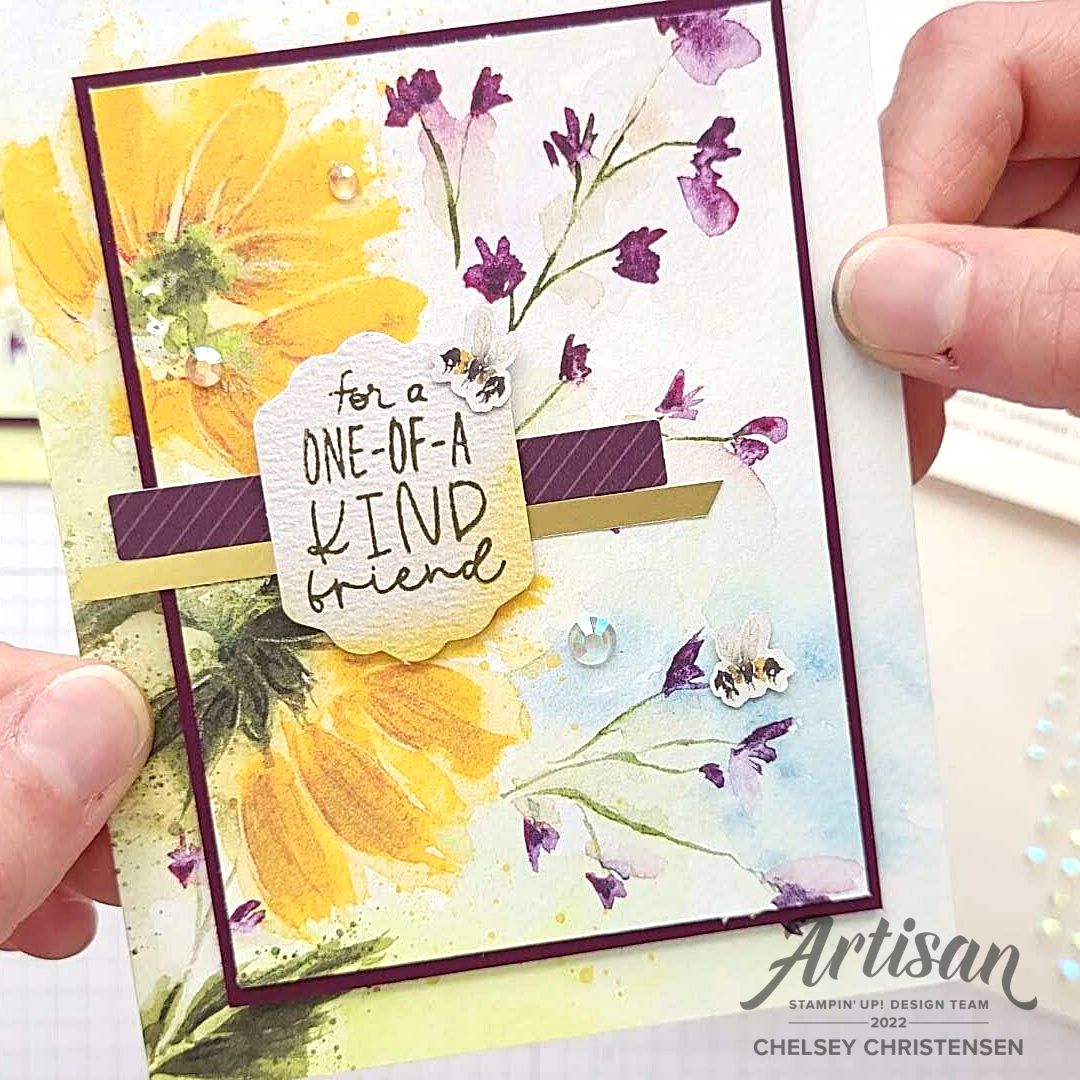
Today I would like to share with you my upcoming Online Class for September 2022. In this class we will be creating 6 Beautiful Handmade Christmas Cards with two bundles from Stampin’ Up!. They are the Sweet Candy Canes Bundle (161052) & Christmas Banners Bundle (159993). Both bundles can be found online or in the July – December Mini Catalog.

I am excited to share these cards with you today. I hope you decided to join me, it will be fun!


These cards have basic stamping techniques and are perfect for new crafters or experienced card makers. We will be having fun gathering together online, sharing what we make, learning from one another, and using Wink of Stella to add sparkle to the cards. I know I can’t resist a little more sparkle in my life.


To sign up for this class, please use the PayPal button below.

SWEETEST CHRISTMAS CLASS - $35 (US Only)

When you sign up you will receive a class kit. This kit is only available to participants in the United States. If you live outside of the US you can choose the tutorial only option below.

This kit will include:

• Pre-cut cardstock & cardbases

• Envelopes

• Adhesive-Backed Seasonal Sequins

• Wink Of Stella Clear Glitter Brush

• 6 – 6” x 6” Sheets of Sweetest Christmas Designer Series Paper

*Please note that I reserve the right to switch products based on availability. Substituted products will be of similar value and keep the integrity of the design.


This class will run from Monday September 26 thru Saturday October 1. We will meet each day during the week to create one of the six cards.

This class is open to everyone, customers and demonstrators. Participants can join me live at 10am Mountain Time for the sessions during the week or can watch the replay videos at their leisure.

This class will take place in a Private Facebook Group. In this group we will have 6 Facebook Live session scheduled at 10am Mountain Time each day during the week of September 26th. In each session I will walk you through how to make the card and show you the techniques needed.

If you are able to join me live, you can also ask questions and get personal help. These video sessions will be recorded and will stay in the group so you can watch the replay at any time. I will also be posting written PDF instructions for each card in the group.

Not on FACEBOOK? You can still participate through email. After each session I will send you a link to watch the replay along with a written PDF with step by step instructions. After you register/pay please email me - chelsey@creativechelsey.com - letting me know you are not on Facebook!

In this Facebook Group I will post:

• Written instructions for each card (PDF) with measurements so you can create more cards.

• Facebook Live Videos for each card where I will walk you through each step to create the cards. Watch live or when you have the time.


To participate in this class and complete these cards you will need to have these supplies. They will not be provided to you in your class kit. If you need to purchase any of these items please purchase them through my online store https://www.stampinup.com?demoid=2042902.

What is not included (you will need to have these supplies to complete the cards):

• Sweet Candy Canes Bundle (English) [161052] $51.25 —— https://bit.ly/3cuH63J

• Christmas Banners Bundle (English) [159993] $50.25 —— https://bit.ly/3cun5tV

• Layering Circles Dies [151770] $35.00 —— https://bit.ly/3Rkg1jf

• Sweet Sorbet Classic Stampin' Pad [159216] $8.00 —— https://bit.ly/3wGLLGA

• Real Red Classic Stampin' Pad [147084] $8.00 —— https://bit.ly/3TuNSa4

• Garden Green Classic Stampin' Pad [147089] $8.00 —— https://bit.ly/3yoTs4n

• Pool Party Classic Stampin' Pad [147107] $8.00 —— https://bit.ly/3TuQ4yD

• Crumb Cake Classic Stampin' Pad [147116] $8.00 —— https://bit.ly/3TuaVSE

• Granny Apple Green Stampin' Pad [147095] $8.00 —— https://bit.ly/3pRZczI

Here are the tools you will need:

• Paper Trimmer [152392] $25.00 —— https://bit.ly/3abvykH

• Stampin' Cut & Emboss Machine [149653] $125.00 —— https://bit.ly/3ujz8zU or  Mini Stampin' Cut & Emboss Machine [150673] $63.00 —— https://bit.ly/3b3UJWL

• Take Your Pick [144107] $10.00 —— https://bit.ly/3IeYxR9

• Paper Snips [103579] $11.00 —— https://bit.ly/3ulT6tV

• Bone Folder [102300] $7.00 —— https://bit.ly/3uhErzZ

• Ribbon/fabric scissors

• Your favorite adhesive

• Coordinating clear blocks

• Stamp cleaner

If you need any Stampin Up product to take this class you can visit my online store at https://www.stampinup.com?demoid=2042902

Please contact me if you have any questions chelsey@creativechelsey.com


FINE PRINT:

• Registration for this class closes on Wednesday September 14th.

• This class is available to both customers and Stampin’ Up demonstrators in the USA. If you live outside of the USA I do offer a TUTORIALS ONLY option for you (not available to those in USA). Please select the correct option when paying.

• I will ship the class kit to the address listed in PayPal. Please make any changes before you pay.

• I will contact you and send you class information using the email address you enter in PayPal. Please make sure it is your current email address.

• I reserve the right to switch products based on availability. Substituted products will be of similar value and keep the integrity of the design.

Registration has closed - please contact me with any questions


Please contact me with any questions

Have a creative day,

Chelsey

chelsey@creativechelsey.com

Saturday, August 27, 2022

Make More Handmade Cards Using August 2022 Paper Pumpkin Stamps - Sweet Sunflowers - Stampin' Up!

Welcome to Paper Pumpkin Week here at Creative Chelsey. I love getting my Paper Pumpkin Kit every month and creating fun alternative projects using the supplies in the kit. Today I am sharing my last alternative idea using the August 2022 Paper Pumpkin Kit – Sweet Sunflowers. This kit comes with everything you need to make 9 cards, three in 3 different designs.


Every month my Paper Pumpkin subscribers receive an exclusive card kit designed by me using the stamp set from that month’s Paper Pumpkin Kit. These are the cards they will be creating as an extra thank you for being my Paper Pumpkin Customer. If you would like to also receive this special perk, sign up today and select me as your demonstrator (Chelsey Christensen, CO) click here: https://www.paperpumpkin.com/en-us/sign-up/?demoid=2042902.


What I like to do is use the supplies in the kit and create different or alternative cards. Today I am sharing a quick and simple idea using just the stamp set from the kit to create a fun & simple card. I love creating alternative projects with Paper Pumpkin Kits so make sure to check out all the projects I have made with this month’s kit.

If this project inspires you to create something, I would love for you to tag me in any social media post using @creativechelsey | #creativechelsey or email me at chelsey@creativechelsey.com


It is Paper Pumpkin Week here on Creative Chelsey. This is my last alternative this week. If you would like to see all my alternatives check out the playlist here: https://youtube.com/playlist?list=PL40dV1oxpkNlJAI7jLwkTDXjfLz1TXXUk

Want to see everything in this month’s kit? Watch me UNBOX this month’s Paper Pumpkin Kit here: https://youtu.be/angLklG9fF0


Don't miss out on next month’s Paper Pumpkin Kit - subscribe today!
SUBSCRIBE to Paper Pumpkin - click here –

See my Customer Appreciation Products for this month: http://creativechelsey.blogspot.com/p/shop-stampin-up-products.html

Follow me on Instagram https://www.instagram.com/creativechelsey

Or join my Facebook group https://www.facebook.com/groups/2221750878097906


To purchase any of the products you need to create this project visit https://www.stampinup.com?demoid=2042902

———————— What You Need ————————

Very Vanilla Thick Cardbase – 5 ½” x 8 ½” scored at 4 ¼”

Soft Suede Cardstock – 2 ¾” x 4 ¼”

Soft Sea Foam Cardstock – 2 ¼” x 4”

Basic White Cardstock – 1 ¼” x 2 ¼”

So Saffron Cardstock – 2 ¾” x 2 ¾”

———————— Supplies I used to Make These Cards ————————

• Very Vanilla 8-1/2" X 11" Thick Cardstock [144237] $8.75 —— https://bit.ly/3PU7gdC

• Soft Suede 8-1/2" X 11" Cardstock [115318] $9.25 —— https://bit.ly/3Aju54Q

• Soft Sea Foam 8-1/2" X 11" Cardstock [146988] $9.25 —— https://bit.ly/3ccsGoq

• Basic White 8 1/2" X 11" Cardstock [159276] $10.25 —— https://bit.ly/3OUrF2w

• So Saffron 8-1/2" X 11" Cardstock [105118] $9.25 —— https://bit.ly/3RxHSN9

• Evening Evergreen Classic Stampin' Pad [155576] $8.00 —— https://bit.ly/3Aii3IT

• Blackberry Bliss Classic Stampin' Pad [147092] $8.00 —— https://bit.ly/3Ip1Oxi

• Neutrals Stampin' Write Markers [147158] $30.00 —— https://bit.ly/3PLnQN1

• Blender Pens [102845] $12.00 —— https://bit.ly/3ynbsfi

• Champagne Rhinestone Basic Jewels [151193] $6.00 —— https://bit.ly/3cnDyjw

———————— My Favorite Supplies ————————

• Stampin' Seal+ [149699] $12.00 —— https://bit.ly/3Ibz8YK

• Multipurpose Liquid Glue [110755] $4.00 —— https://bit.ly/3IaGF9S

• Tear & Tape Adhesive [138995] $7.00 —— https://bit.ly/3ajQSo5

• Stampin' Dimensionals [104430] $4.25 —— https://bit.ly/3IbzezA

• Mini Glue Dots [103683] $5.25 —— https://bit.ly/3anAcw3

• Stampin' Pierce Mat [126199] $5.00 —— https://bit.ly/3IjEq4d

• Simply Shammy [147042] $8.50 —— https://bit.ly/3bQH7hE

• Paper Snips [103579] $11.00 —— https://bit.ly/3ulT6tV

• Take Your Pick [144107] $10.00 —— https://bit.ly/3IeYxR9

• Bone Folder [102300] $7.00 —— https://bit.ly/3uhErzZ

• Clear Block D [118485] $9.00 —— https://bit.ly/3uuabSs

• Paper Trimmer [152392] $25.00 —— https://bit.ly/3abvykH

• Stampin' Cut & Emboss Machine [149653] $125.00 —— https://bit.ly/3ujz8zU


1- Stamp the flower once in Crushed Curry Ink on So Saffron Cardstock. Use a Blender Pen and add color to each petal. If you need more color, add a little ink to a clear block to pick up with your Blender Pen.

2- Stamp the center in Soft Suede Ink. Use a Blender Pen & a little ink to add a little brown color to the center.

3- Fussy cut the flower.


4- Stamp the leaf image in Evening Evergreen Ink three times on Soft Sea Foam Cardstock. Once on the left in the top corner and two on the right in a V shape near the bottom. Use a Blender Pen & a little ink to add color inside each leaf.

Stamp two of the Branch image in Blackberry Bliss near each group of leaves.

5- Tear the bottom of the Soft Suede Cardstock and add it to the back of the Soft Sea Foam Cardstock. Then add everything to the center of the cardbase.


6- Use a Soft Suede Stampin’ Write Marker and splatter across your cardbase. Do this by placing the brush tip inside the cap and flicking out & away. Add any stamped Bees if you want.


7- Adhere the Sunflower to the center of the Soft Sea Foam Cardstock.


8- Stamp the greeting in Soft Suede on Basic White Cardstock. Tear the bottom and add it with dimensionals to the left of the flower.

9- Add three Champagne Rhinestones around the flower.


I have also created a video walking you through each step and some of the details from the other cards:

To purchase any Stampin’ Up! products please visit

https://www.stampinup.com?demoid=2042902


Have a creative day!

Chelsey

chelsey@creativechelsey.com


Friday, August 26, 2022

Create Double Layered Flowers with the August 2022 Paper Pumpkin Kit -Stampin' Up!- Alternative Idea

Welcome to Paper Pumpkin Week here at Creative Chelsey. I love getting my Paper Pumpkin Kit every month and creating fun alternative projects using the supplies in the kit. Today I am sharing my third alternative idea using the August 2022 Paper Pumpkin Kit – Sweet Sunflowers.


This kit comes with everything you need to make 9 Handmade Cards, 3 in three different designs. This kit is beautiful with the watercolor images and delicate honeycomb details. I loved playing with this kit. What I like to do is use the supplies in the kit along with some other products and create different or alternative cards. Today I am sharing how you can make two cards from one cardbase & more fun ways to use the stamps & other images from the kit. I love creating alternative projects with Paper Pumpkin Kits so make sure to come back for more as I continue to create with this month’s kit.

If this project inspires you to create something, I would love for you to tag me in any social media post using @creativechelsey | #creativechelsey or email me at chelsey@creativechelsey.com.


It is Paper Pumpkin Week here on Creative Chelsey. This is the first alternative this week. If you would like to see all my alternatives check out the playlist here: https://youtube.com/playlist?list=PL40dV1oxpkNlJAI7jLwkTDXjfLz1TXXUk

Want to see everything in this month’s kit? Watch me UNBOX this month’s Paper Pumpkin Kit here: https://youtu.be/angLklG9fF0

Don't miss out on next month’s Paper Pumpkin Kit - subscribe today!
SUBSCRIBE to Paper Pumpkin - click here –


See my Customer Appreciation Products for this month: http://creativechelsey.blogspot.com/p/shop-stampin-up-products.html

Follow me on Instagram https://www.instagram.com/creativechelsey

Or join my Facebook group https://www.facebook.com/groups/2221750878097906

To purchase any of the products you need to create this project visit https://www.stampinup.com?demoid=2042902

———————— What You Need ————————

Green Cardbase

Honeycomb Floral Piece

Crushed Curry Cardstock 2 3/8” x 3 5/8”

Natural Finish Ribbon 5”

Sahara Sand Cardbase 5 ½” x 8 ½” scored at 4 ¼”

Thick Basic White Cardbase 5 ½” x 8 ½” scored at 4 ¼”

(2) Vellum Honeycomb Pieces

Envelope

Basic White Cardstock – scraps for stamping

2 Bee Cut Outs

One Greeting Label

Gold Trim 8”

Embellishments – Brushed Metallic Dots

Sunflower Die Cut

Red Tulips Die Cut


———————— Supplies I used to Make These Cards ————————

• Basic White 8 1/2" X 11" Thick Cardstock [159229] $8.75 —— https://bit.ly/3Pc9AwW

• Basic White 8 1/2" X 11" Cardstock [159276] $10.25 —— https://bit.ly/3OUrF2w

• Stampin' Spritzer [126185] $3.25 —— https://bit.ly/3PnUPae

• Natural Finish 7/8" (2.2 Cm) Ribbon [159051] $8.50 —— https://bit.ly/3KhVubT

• Neutrals Stampin' Write Markers [147158] $30.00 —— https://bit.ly/3PLnQN1

• Crushed Curry 8-1/2" X 11" Cardstock [131199] $9.25 —— https://bit.ly/3bO7R2s

• Sahara Sand 8-1/2" X 11" Cardstock [121043] $9.25 —— https://bit.ly/3a8OBMs

• Brushed Metallic Adhesive Backed Dots [156506] $9.00 —— https://bit.ly/3pKb1Yq

• Simply Elegant Trim [155766] $7.50 —— https://bit.ly/3pNUvXI


———————— My Favorite Supplies ————————

• Stampin' Seal+ [149699] $12.00 —— https://bit.ly/3Ibz8YK

• Multipurpose Liquid Glue [110755] $4.00 —— https://bit.ly/3IaGF9S

• Tear & Tape Adhesive [138995] $7.00 —— https://bit.ly/3ajQSo5

• Stampin' Dimensionals [104430] $4.25 —— https://bit.ly/3IbzezA

• Mini Glue Dots [103683] $5.25 —— https://bit.ly/3anAcw3

• Stampin' Pierce Mat [126199] $5.00 —— https://bit.ly/3IjEq4d

• Simply Shammy [147042] $8.50 —— https://bit.ly/3bQH7hE

• Paper Snips [103579] $11.00 —— https://bit.ly/3ulT6tV

• Take Your Pick [144107] $10.00 —— https://bit.ly/3IeYxR9

• Bone Folder [102300] $7.00 —— https://bit.ly/3uhErzZ

• Clear Block D [118485] $9.00 —— https://bit.ly/3uuabSs

• Paper Trimmer [152392] $25.00 —— https://bit.ly/3abvykH

• Stampin' Cut & Emboss Machine [149653] $125.00 —— https://bit.ly/3ujz8zU


Card #1

1- Separate the front from the back of the Green Cardbase at 4 ¼”. Use the front for this card and add it to the Thick Basic White Cardbase.


2- To create the raised panel, measure ¼” from all the inside solid panel edges. Start your cut in the center of the cardstock and move the blade up and down stopping ¼” from each edge about. Rotate and repeat. Continue cutting all 4 sides.

Add the frame to the cardbase.


3- Stamp your greeting on the right side of the center panel in Soft Suede ink. Add the Crushed Curry to the back of the center panel. 


4- Cut a “fishtail” banner from each end of the ribbon and add it to the center of the card.

Then add the center panel to the cardbase with dimensionals.


5- Add 3 or more embellishments I used the copper color from the Brushed Metallic Adhesive Dots.

All Done!


Card #2

1- Splatter some ink on the front of the cardbase. I used my Stampin’ Write Soft Suede Marker.

2- From the back side of the cardbase, cut two 2 ¼” x 3 ¾” pieces. Add them your cardbase with an even border on all sides.


3- Layer the two vellum honeycomb die cuts in the top right center and bottom left center.


4- From one of the envelopes, fussy cut the leaf and add to the left side of the card.


5- Create a Sunflower by following steps 4 & 5 from my first alternatives (card #1). http://creativechelsey.blogspot.com/2022/08/easy-watercolor-technique-alternative.html

This is the bottom layer.

On the Sunflower Die cut, stamp the Sunflower image twice in Crushed Curry Ink. Then stamp the center in Soft Suede Ink. Use a pair of Paper Snips and cut individual petals. Curl the petals with a bone folder and layer over the other Sunflower to create a double layered flower.


Add the Sunflower to the right leaf.


6- Add the Red Tulip Die Cut with dimensionals on the left side of the Sunflower.


7- Stamp your greeting a label in Soft Suede Ink. Create a faux bow with two glue dots and 8" of Gold Trim. Add it to the back of the label. Add to the bottom under the Sunflower with dimensionals.


8- Add two bees with glue dots & 3 or more embellishments, I used the gold color from the Brushed Metallic Adhesive Dots.

All Done!


I have also created a video walking you through each step and some of the details from the cards:

To purchase any Stampin’ Up! products please visit

https://www.stampinup.com?demoid=2042902


Have a creative day!

Chelsey

chelsey@creativechelsey.com


Thursday, August 25, 2022

How To Use Pretty Paper To Make A Raised Panel Card - August 2022 Paper Pumpkin Alternative Ideas

Welcome to Paper Pumpkin Week here at Creative Chelsey. I love getting my Paper Pumpkin Kit every month and creating fun alternative projects using the supplies in the kit. Today I am sharing my second alternative idea using the August 2022 Paper Pumpkin Kit – Sweet Sunflowers.


This kit comes with everything you need to make 9 Handmade Cards, 3 in three different designs. This kit is beautiful with the watercolor images and delicate honeycomb details. I loved playing with this kit. What I like to do is use the supplies in the kit along with some other products and create different or alternative cards. Today I am sharing how you can make two cards from one cardbase & a fun way to use beautiful paper like the front of this cardbase. I love creating alternative projects with Paper Pumpkin Kits so make sure to come back for more as I continue to create with this month’s kit.

If this project inspires you to create something, I would love for you to tag me in any social media post using @creativechelsey | #creativechelsey or email me at chelsey@creativechelsey.com.


It is Paper Pumpkin Week here on Creative Chelsey. This is the first alternative this week. If you would like to see all my alternatives check out the playlist here: https://youtube.com/playlist?list=PL40dV1oxpkNlJAI7jLwkTDXjfLz1TXXUk

Want to see everything in this month’s kit? Watch me UNBOX this month’s Paper Pumpkin Kit here: https://youtu.be/angLklG9fF0

Don't miss out on next month’s Paper Pumpkin Kit - subscribe today!
SUBSCRIBE to Paper Pumpkin - click here –


See my Customer Appreciation Products for this month: http://creativechelsey.blogspot.com/p/shop-stampin-up-products.html

Follow me on Instagram https://www.instagram.com/creativechelsey

Or join my Facebook group https://www.facebook.com/groups/2221750878097906

To purchase any of the products you need to create this project visit https://www.stampinup.com?demoid=2042902

———————— What You Need ————————

Large Flower Cardbase

Gold Foil Honeycomb Sheet – 3 ¾” x 3 ½”

Thick Basic White Cardbase 5 ½” x 8 ½” scored at 4 ¼”

Blackberry Bliss Cardbase 5 ½” x 8 ½” scored at 4 ¼” & 3 3/8” x 4 5/8”

Basic White Cardstock – scraps for stamping

Vellum – 4” x 2 ½”

Envelope

4 Bee Cut Outs

Two Greeting Labels

Embellishments – Iridescent Rhinestones

Blackberry Bliss Strip

———————— Supplies I used to Make These Cards ————————

• Basic White 8 1/2" X 11" Thick Cardstock [159229] $8.75 —— https://bit.ly/3Pc9AwW

• Blackberry Bliss 8-1/2" X 11" Cardstock [133675] $9.25 —— https://bit.ly/3QNOczh

• Basic White 8 1/2" X 11" Cardstock [159276] $10.25 —— https://bit.ly/3OUrF2w

• Vellum 8-1/2" X 11" Cardstock [101856] $10.00 —— https://bit.ly/3IDu939

• Stampin' Spritzer [126185] $3.25 —— https://bit.ly/3PnUPae

• Iridescent Rhinestones Basic Jewels [158130] $7.50 —— https://bit.ly/3TfOQXP


———————— My Favorite Supplies ————————

• Stampin' Seal+ [149699] $12.00 —— https://bit.ly/3Ibz8YK

• Multipurpose Liquid Glue [110755] $4.00 —— https://bit.ly/3IaGF9S

• Tear & Tape Adhesive [138995] $7.00 —— https://bit.ly/3ajQSo5

• Stampin' Dimensionals [104430] $4.25 —— https://bit.ly/3IbzezA

• Mini Glue Dots [103683] $5.25 —— https://bit.ly/3anAcw3

• Stampin' Pierce Mat [126199] $5.00 —— https://bit.ly/3IjEq4d

• Simply Shammy [147042] $8.50 —— https://bit.ly/3bQH7hE

• Paper Snips [103579] $11.00 —— https://bit.ly/3ulT6tV

• Take Your Pick [144107] $10.00 —— https://bit.ly/3IeYxR9

• Bone Folder [102300] $7.00 —— https://bit.ly/3uhErzZ

• Clear Block D [118485] $9.00 —— https://bit.ly/3uuabSs

• Paper Trimmer [152392] $25.00 —— https://bit.ly/3abvykH

• Stampin' Cut & Emboss Machine [149653] $125.00 —— https://bit.ly/3ujz8zU


Card #1

1- Separate the front from the back of the Large Flowers Watercolor Cardbase at 4 ¼”. Use the front for this card.

2- To create the raised panel, measure ½” from all the edges. Start your cut in the center of the cardstock and move the blade up and down stopping 1/2" from each edge about 1/2" & 5” if cutting the long edge. Rotate and repeat, stopping at ½” & 3 ¾” on the short edge. Continue cutting all 4 sides.

3- Adhere the “frame” to the white cardbase. Add the Blackberry Bliss to the back of the center panel. Then add to the cardbase with dimensionals.


4- Add the Blackberry Bliss strip to the left of the panel in between the large flowers. Remove the short edge of the Honeycomb Gold Foil and add under the Blackberry Bliss strip.


5- Stamp your greeting on one of the labels in Soft Suede and add with dimensionals to the center of the strips. Add two of the bees with glue dots. Add 3 or more embellishments I used the Iridescent Rhinestones.

All Done!


Card #2

1- From the back side of the cardbase, remove ½” from the bottom. Add to the center of the Blackberry Bliss Cardbase.

2- Cut a Honeycomb Gold Foil Sheet to 3 ½” x 3 ¾”. Flip to the white side and adhere in the center over the watercolor flowers.


3- Add the vellum piece to the center.


4- From one of the envelopes, fussy cut the large purple flower and add to the left side of the vellum with adhesive in the center and dimensionals under the flowers.


5- Create a Sunflower by following steps 4 & 5 from my first alternatives (card #1). http://creativechelsey.blogspot.com/2022/08/easy-watercolor-technique-alternative.html

You need one Sunflower.

Add the Sunflower to the right of the purple flower with dimensionals.


6- Stamp your greeting a label in Soft Suede Ink. Add to the right over the Sunflower with dimensionals or glue.

7- Add two bees with glue dots & 3 or more embellishments, I used the Iridescent Rhinestones.

All Done!


I have also created a video walking you through each step and some of the details from the cards:


To purchase any Stampin’ Up! products please visit

https://www.stampinup.com?demoid=2042902


Have a creative day!

Chelsey

chelsey@creativechelsey.com

Tuesday, August 23, 2022

Easy Watercolor Technique & Alternative Cards - August 2022 Paper Pumpkin Kit - Sweet Sunflowers

Welcome to Paper Pumpkin Week here at Creative Chelsey. I love getting my Paper Pumpkin Kit every month and creating fun alternative projects using the supplies in the kit. Today I am sharing my first alternative idea using the August 2022 Paper Pumpkin Kit – Sweet Sunflowers.


This kit comes with everything you need to make 9 Handmade Cards, 3 in three different designs. This kit is beautiful with the watercolor images and delicate honeycomb details. I loved playing with this kit. What I like to do is use the supplies in the kit along with some other products and create different or alternative cards. Today I am sharing how you can make two cards from one cardbase & a fun and easy watercolor technique to create more Sunflowers. I love creating alternative projects with Paper Pumpkin Kits so make sure to come back for more as I continue to create with this month’s kit.

If this project inspires you to create something, I would love for you to tag me in any social media post using @creativechelsey | #creativechelsey or email me at chelsey@creativechelsey.com.


It is Paper Pumpkin Week here on Creative Chelsey. This is the first alternative this week. If you would like to see all my alternatives check out the playlist here: https://youtube.com/playlist?list=PL40dV1oxpkNlJAI7jLwkTDXjfLz1TXXUk

Want to see everything in this month’s kit? Watch me UNBOX this month’s Paper Pumpkin Kit here: https://youtu.be/angLklG9fF0

Don't miss out on next month’s Paper Pumpkin Kit - subscribe today!

SUBSCRIBE to Paper Pumpkin - click here –

https://www.paperpumpkin.com/en-us/sign-up/?demoid=2042902


See my Customer Appreciation Products for this month: http://creativechelsey.blogspot.com/p/shop-stampin-up-products.html

Follow me on Instagram https://www.instagram.com/creativechelsey

Or join my Facebook group https://www.facebook.com/groups/2221750878097906

To purchase any of the products you need to create this project visit https://www.stampinup.com?demoid=2042902

———————— What You Need ————————

Small Flower Cardbase

Gold Foil Honeycomb Sheet

2 Crumb Cake Cardbases 5 ½” x 8 ½” scored at 4 ¼”

Basic White Cardstock – scraps for stamping & 1 ¼” x 2 ¼” greeting

2 Bee Cut Outs

Yellow & Pink Long Label

Natural Finish Ribbon 6”

———————— Supplies I used to Make These Cards ————————

• Crumb Cake 8-1/2" X 11" Cardstock [120953] $9.25 —— https://bit.ly/3IAzCaO

• Basic White 8 1/2" X 11" Cardstock [159276] $10.25 —— https://bit.ly/3OUrF2w

• Natural Finish 7/8" (2.2 Cm) Ribbon [159051] $8.50 —— https://bit.ly/3KhVubT

• Evening Evergreen Classic Stampin' Pad [155576] $8.00 —— https://bit.ly/3Aii3IT

• Mossy Meadow Classic Stampin' Pad [147111] $8.00 —— https://bit.ly/3OvxyT5

• Stampin' Spritzer [126185] $3.25 —— https://bit.ly/3PnUPae

• Neutrals Stampin' Write Markers [147158] $30.00 —— https://bit.ly/3PLnQN1

———————— My Favorite Supplies ————————

• Stampin' Seal+ [149699] $12.00 —— https://bit.ly/3Ibz8YK

• Multipurpose Liquid Glue [110755] $4.00 —— https://bit.ly/3IaGF9S

• Tear & Tape Adhesive [138995] $7.00 —— https://bit.ly/3ajQSo5

• Stampin' Dimensionals [104430] $4.25 —— https://bit.ly/3IbzezA

• Mini Glue Dots [103683] $5.25 —— https://bit.ly/3anAcw3

• Stampin' Pierce Mat [126199] $5.00 —— https://bit.ly/3IjEq4d

• Simply Shammy [147042] $8.50 —— https://bit.ly/3bQH7hE

• Paper Snips [103579] $11.00 —— https://bit.ly/3ulT6tV

• Take Your Pick [144107] $10.00 —— https://bit.ly/3IeYxR9

• Bone Folder [102300] $7.00 —— https://bit.ly/3uhErzZ

• Clear Block D [118485] $9.00 —— https://bit.ly/3uuabSs

• Paper Trimmer [152392] $25.00 —— https://bit.ly/3abvykH

• Stampin' Cut & Emboss Machine [149653] $125.00 —— https://bit.ly/3ujz8zU


Card #1

1- Cut the back watercolor wash of the cardbase to 4” x 5 ¼”

2- Cut an organic shape from the center of the Gold Foil Honeycomb Sheet. Adhere to the center of the watercolor wash piece from the back of the cardbase.


3- Wrap 6” of ribbon in the center and adhere to the back. Cut a long strip from the edge of the Gold Foil Honeycomb Sheet and add to the center of the ribbon.


4- Add the Sunflower Stamp backward to a clear block so you will be stamping using the flat side. Ink it up in Crushed Curry ink and spritz with a little water. Gently tap sections of the stamp on Basic White Cardstock to get a variation of color in the shape of the stamp. Add more ink or water as you want. Let dry.

Do the same process with the Leaf Stamp. I used Mossy Meadow ink. Do this three times.


5- Once it has dried you can stamp your image on top. I used Crushed Curry & Soft Suede for the Sunflower. I also stamped the Sunflower Stamp once and then inked and stamped again over the first image, rotating the stamp. Fussy cut.

Stamp the Leaf Stamp in Evening Evergreen. Fussy cut.


6- Add the Sunflower with dimensionals in the center of the card. Add the Leaves with a dimensionals, one on the upper left of the flower and two on the right in center.

Splatter over the card with a Soft Suede Stampin’ Write Marker. Use the large brush end, place it inside the cap and flick out over the area you want a fine splatter. Add everything to the cardbase.


7- Stamp your greeting in Soft Suede on the 1 ¼” strip. Create a banner by cutting up in the center from the bottom edge. Then from the bottom corners to the top of the cut. Add to the left of the Sunflower with dimensionals.

8- Stamp three bees in Soft Suede around the flower.

All Done!


Card #2

1- On the Crumb Cake Cardbase add a little splatter with the Soft Suede Stampin’ Write Marker – see above step 6

2- Cut the front of the cardbase from the kit to 3 ½” x 4”. Make sure to keep as much of the flowers as possible. Cut the Gold Foil Honeycomb Sheet into two strips that are about ¾” x 3”. Add them to the sides of the flower piece, by attaching them to the back. Add everything to the left of the cardbase with about ¼” from the top.


3- Trim a long edge of the Gold Foil Honeycomb Sheet and add in the center near the bottom of the flowers.

4- Create a Sunflower by following the above steps 4 & 5 from card #1. You need one Sunflower and two Leaves.

Add the Sunflower to the bottom left corner of the flowers with dimensionals.

Add the Leaves over the two leaves on the right of the Sunflower with dimensionals.


5- Stamp your greeting on the yellow & pink label in Soft Suede Ink. Add to the right of the leaves with dimensionals.

6- Add two bees with glue dots.

All Done!


I have also created a video walking you through each step and some of the details from the cards:

To purchase any Stampin’ Up! products please visit

https://www.stampinup.com?demoid=2042902

Have a creative day!

Chelsey

chelsey@creativechelsey.com