
It is time for another tutorial for the Global Stampin’ Video Hop on YouTube. Each month on the fourth Friday Stampin’ Up Demonstrators from around the world come together and share their projects based on a monthly theme. February’s Theme is – The New 2023-2025 In Colors from Stampin’ Up!. I am so excited to see what everyone creates.

The In Colors this year are (name each color). They are beautiful earth tones and are perfectly on trend. I am seeing these colors everywhere right now from fashion to home décor. However, when I see these colors I think of autumn and fall projects, not spring and summer. So today I wanted to get outside my comfort zone and share with you 5 color combinations that include each of the New In Colors that work perfectly for Spring and Summer projects. You can see all the Color Combinations below.


The tutorial I am sharing today is a quick and simple card layout. Don’t miss the crafting hacks I am sharing in the video below to make it even easier.


I hope you are inspired today as you see all the fun techniques from everyone while jumping from video to video. If you make a project using one or more of the New In Colors please share it with us, we would love to see what you come up with. You can tag me @creativechelsey in any social media post.


Make sure to check out what everyone makes for this monthly Video Hop. You can start with my video, I have linked it below. You can find the next video at the top of the video’s description on YouTube. Have fun!


See my Customer Appreciation Products for this month: http://creativechelsey.blogspot.com/p/shop-stampin-up-products.html
Follow me on Instagram https://www.instagram.com/creativechelsey
Or join my Facebook group https://www.facebook.com/groups/2221750878097906


To purchase any of the products you need to create this project visit
https://www.stampinup.com?demoid=2042902


Product List
 Designer Series Paper")


")
")


Here are the dimensions and pieces you will need to
create this set of cards:
Cardbases – 5 ½” x 8 ½” scored at 4 ¼”
Designer Series Paper – top 1 ½” x 5 ¼” | bottom 2 ½” x 5
¼”
Cardstock scraps – greeting & flowers
Cardstock strips – (2) ¾” x 5 ¼”

1- Cut DSP. Cut a fun border with a border punch or die from one of the cardstock strips.

2- Layer the decorative border strip on the bottom with the straight strip on top. Then add the top DSP piece so about 1/8” of the straight strip is showing.
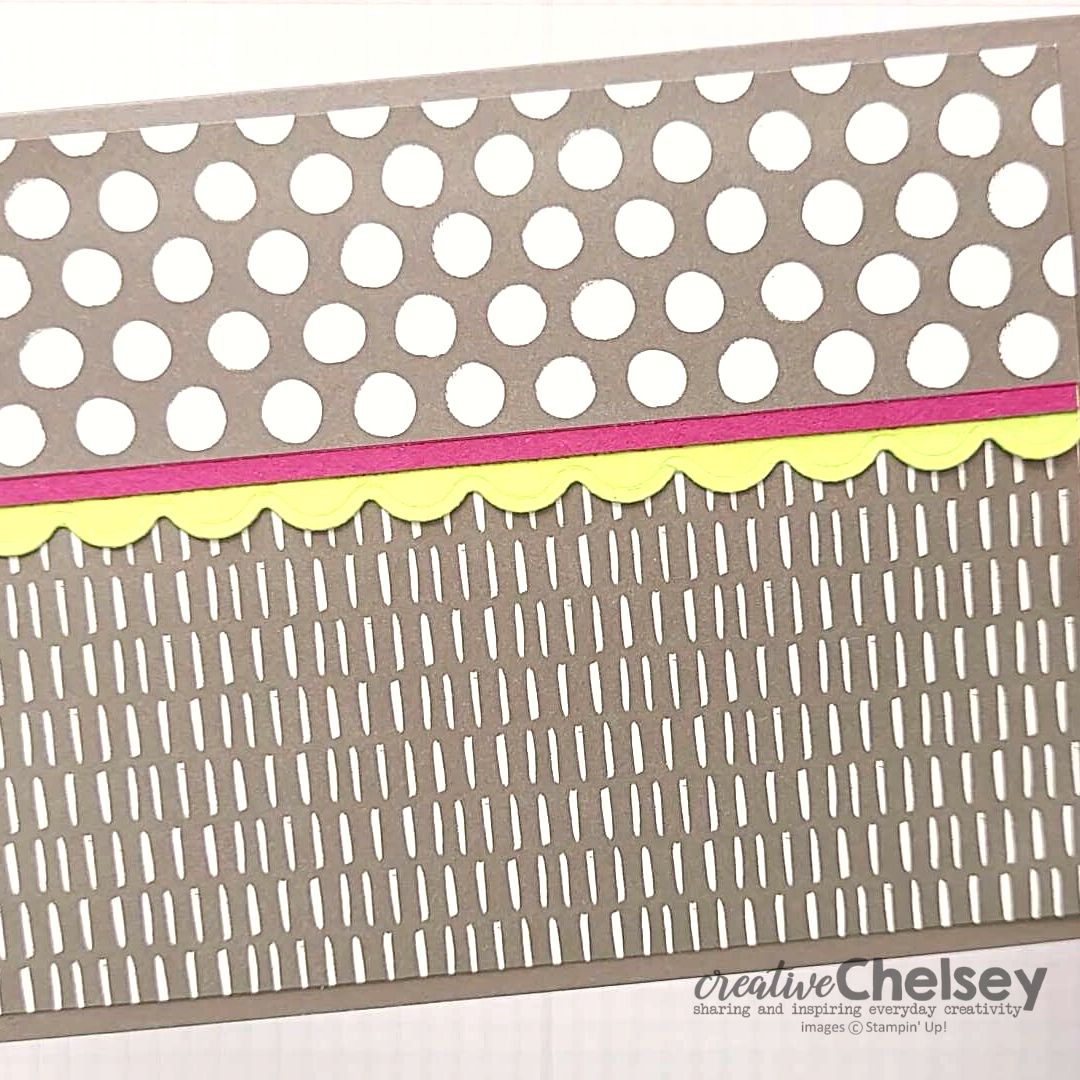
3- Add the bottom DSP to the cardbase, then add the top piece, with the cardstock strips acting as overhang.

4- Stamp your greeting in VersaMark on a scrap piece of coordinating color cardstock. Make sure to use an embossing buddy first. Then apply white embossing powder and heat until shiny.
5- Use a Blending Brush to add a little ink behind the
greeting to help it stand out. Cut out with a fun label die cut or punch. Add
this to the card with dimensionals over the cardstock strips a little to left
of center.

6- Stamp your images. I used the flowers from Petal Park Stamp Set. See the video for hacks to make stamping the flowers easier. Stamp the outline first, then stamp the inside using a stamp off, stamp on technique. Punch out the flowers. Add them around the greeting with dimensionals.

7- Stamp leaves from the same Petal Park Stamp Set. Stamp outline first, then inside with the stamp off, stamp on technique. Punch out and add near the flowers with dimensionals.
8- Add a rhinestone in the center of each flower.
All Done!
If you would like to watch me create this card with step-by-step tips and directions please watch this video:
If you need any product to make these cards, please visit my online store: http://www.stampinup.com?demoid=2042902
Have a creative day,
Chelsey
chelsey@creativechelsey.com