
Welcome to Paper Pumpkin Week here at Creative Chelsey. I love getting my Paper Pumpkin Kit every month and creating fun alternative projects using the supplies in the kit. Today I am sharing my fourth alternative idea using the January 2023 Paper Pumpkin Kit – Key To My Heart.

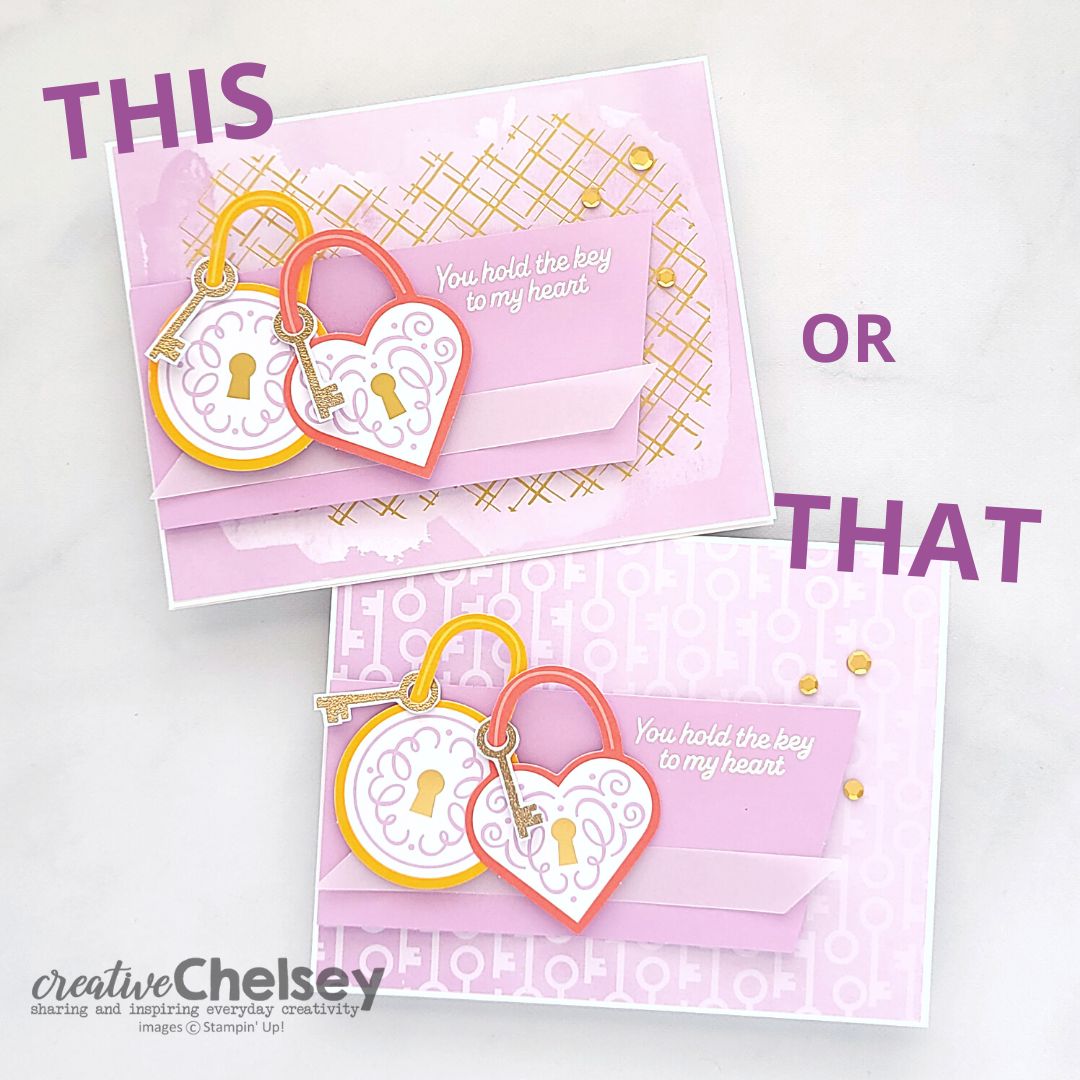
This kit comes with everything you need to make 9 Valentines Day Theme Greeting Cards, 3 in three different designs. This kit is filled with so many fun images & patterns. I like how the lock & key idea is unique and different than the typical Valentines Hearts.

What I like to do is use the supplies in the kit along with some other products and create different or alternative projects. Today I am sharing with you this quick monochromatic card. I love the little touches of gold mixed with the soft purple Fresh Freesia Color.
If this project inspires you to create something, I would
love for you to tag me in any social media post using @creativechelsey |
#creativechelsey or email me at chelsey@creativechelsey.com.

It is Paper Pumpkin Week here on Creative Chelsey. This is the first alternative this week. If you would like to see all my alternatives check out the playlist here: https://youtube.com/playlist?list=PL40dV1oxpkNmLe3LGMiRAXl4fVePLfSnp
Want to see everything in this month’s kit? Watch me UNBOX this month’s Paper Pumpkin Kit here: https://youtu.be/8Hq7uc5nTQo
Don't miss out on next month’s Paper Pumpkin Kit -
subscribe today!SUBSCRIBE to Paper Pumpkin - click here –

Make cloudy days a little brighter with the Sunshine & Smiles Paper Pumpkin Kit! This kit includes nine sweet and sunny cards—three each of three designs. If someone you know is weathering a storm, this kit is just what you’ll need to create cards that are sure to brighten their day!

AND for the first time ever, we’ve got a coordinating die add-on! (Stampin’ Cut & Emboss Machine sold separately). These dies pair perfectly with the stamp set in the Sunshine & Smiles Paper Pumpkin kit!
")


 Designer Series Paper")
See my Customer Appreciation Products for this month: http://creativechelsey.blogspot.com/p/shop-stampin-up-products.html
Follow me on Instagram https://www.instagram.com/creativechelsey
Or join my Facebook group https://www.facebook.com/groups/2221750878097906
To purchase any of the products you need to create this
project visit https://www.stampinup.com?demoid=2042902
———————— What You Need ————————
Fresh Freesia Cardbase 5 ½” x 8 ½” scored at 4 ¼”


———————— My Favorite Supplies ————————
• Stampin' Seal+ [149699] $12.00 —— https://bit.ly/3Ibz8YK
• Multipurpose Liquid Glue [110755] $4.00 —— https://bit.ly/3IaGF9S
• Tear & Tape Adhesive [138995] $7.00 —— https://bit.ly/3ajQSo5
• Stampin' Dimensionals [104430] $4.25 —— https://bit.ly/3IbzezA
• Mini Glue Dots [103683] $5.25 —— https://bit.ly/3anAcw3
• Stampin' Pierce Mat [126199] $5.00 —— https://bit.ly/3IjEq4d
• Simply Shammy [147042] $8.50 —— https://bit.ly/3bQH7hE
• Paper Snips [103579] $11.00 —— https://bit.ly/3ulT6tV
• Take Your Pick [144107] $10.00 —— https://bit.ly/3IeYxR9
• Bone Folder [102300] $7.00 —— https://bit.ly/3uhErzZ
• Clear Block D [118485] $9.00 —— https://bit.ly/3uuabSs
• Paper Trimmer [152392] $25.00 —— https://bit.ly/3abvykH
• Stampin' Cut & Emboss Machine [149653] $125.00 —— https://bit.ly/3ujz8zU

1- Cut an envelope to 4 1/8” x 5 3/8”. Use the pattern inside and add to the front of the cardbase.

2- Cut the watercolor piece from card #1 to 2 ¾” x 4” around the watercolor section. Stamp a greeting in Fresh Freesia randomly over the cardstock.

3- To add another layer of texture, stamp the hearts in Fresh Freesia. To get a lighter color Stamp OFF then Stamp ON near the greeting. Add this to the center of the cardbase with dimensionals.

4- Stamp your main greeting in Fresh Freesia on a banner from the kit. Add at the bottom of the watercolor piece with dimensionals.
5- Add the Gold Heart Lock above the greeting in the center
with dimensionals.

6- Use Multipurpose Liquid Glue and add dots to the top left and bottom right corners. Let the glue dry a little so it is a little tacky.

7- Add the Pink & Gold Sequins to the dots of glue.
All Done!
I have also created a video walking you through each step:
To purchase any Stampin’ Up! products please visit
https://www.stampinup.com?demoid=2042902
Have a creative day!
Chelsey
chelsey@creativechelsey.com


")


")
")
 Specialty Designer Series Paper")


.jpg)
