Hi Everyone and welcome to Paper Pumpkin Week here on Creative Chelsey. Thanks for joining me today as I continue to share some beautiful card ideas you can make with the October 2024 Paper Pumpkin Kit called Nest Of Christmas.
This is the second set of alternative cards I will be sharing with you this week. These two cards use the beautiful Navy & Green Foil Paper as beautiful backdrops to the bird die cuts. It gives these Christmas cards just the right amount of elegance.
If you are new to my channel and would like to continue to see all my paper pumpkin alternatives, make sure to subscribe using the link in the bottom right corner. I would love to be your Stampin’ Up Demonstrator. If you are interested in getting your own paper pumpkin subscription, please use the link in the description below to subscribe.
My subscribers receive an exclusive card kit designed by me with everything they need to make two more beautiful cards with the Stamp Set & Ink Spot from that month’s kit. We gather together once a month on Zoom to make the card and have fun together. I would love to have you join me, make sure to subscribe to Paper Pumpkin and list me as your demonstrator, or use the link below.
If you are interested in getting
your own paper pumpkin subscription, please use this link to subscribe - https://www.paperpumpkin.com/en-us/sign-up/?demoid=2042902
If this project inspires you to create something, I would
love for you to tag me in any social media post using @creativechelsey |
#creativechelsey or email me at chelsey@creativechelsey.com.
It is Paper Pumpkin Week here on Creative Chelsey. This is the second set of alternative cards this week. If you would like to see all my alternatives check out the playlist here: https://www.youtube.com/playlist?list=PL40dV1oxpkNnE996_dBTQsDULDZgm1jVj
Don't miss out on next month’s Paper Pumpkin Kit - subscribe
today!SUBSCRIBE to Paper Pumpkin - click here –
Product List
See my Customer Appreciation Products for this month: http://creativechelsey.blogspot.com/p/shop-stampin-up-products.html
Follow me on Instagram https://www.instagram.com/creativechelsey
Or join my Facebook group https://www.facebook.com/groups/2221750878097906
To purchase any of the products you need to create this
project visit https://www.stampinup.com?demoid=2042902
———————— My Favorite Supplies ————————
• Stampin' Seal+ [149699] $12.00 —— https://bit.ly/3Ibz8YK
• Multipurpose Liquid Glue [110755] $4.00 —— https://bit.ly/3IaGF9S
• Tear & Tape Adhesive [138995] $7.00 —— https://bit.ly/3ajQSo5
• Stampin' Dimensionals [104430] $4.25 —— https://bit.ly/3IbzezA
• Mini Glue Dots [103683] $5.25 —— https://bit.ly/3anAcw3
• Stampin' Pierce Mat [126199] $5.00 —— https://bit.ly/3IjEq4d
• Simply Shammy [147042] $8.50 —— https://bit.ly/3bQH7hE
• Paper Snips [103579] $11.00 —— https://bit.ly/3ulT6tV
• Take Your Pick [144107] $10.00 —— https://bit.ly/3IeYxR9
• Bone Folder [102300] $7.00 —— https://bit.ly/3uhErzZ
• Clear Block D [118485] $9.00 —— https://bit.ly/3uuabSs
• Paper Trimmer [152392] $25.00 —— https://bit.ly/3abvykH
• Stampin' Cut & Emboss Machine [149653] $125.00 —— https://bit.ly/3ujz8zU
Card #1 – Happy Holidays
Shaded Spruce Cardbase – 5 ½” x 8 ½” scored at 4 ¼”
Real Red Cardstock – scraps for greeting
Green Frame Cardbase – Kit
Small Bird & Branches Die Cut – Kit
Red Ribbon – Kit
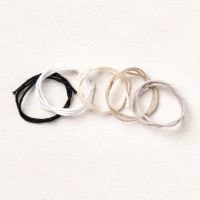
White Baker’s Twine – 10”
1- Separate the Green Frame from the Navy & Green Foil Branch Panel at 4 ¼”. Then separate the Navy from the Green Panel at 4 1/8”. Cut the Green panel also to 4 1/8” by removing the scored edge. Cut the Green panel to 4” x 4 1/8”.
2- Cut out a large circle in the center of the Navy & Green Foil Branch Panel, I used the largest circle from the Spotlight On Nature Dies. If you want a little white showing along the edges, use a tool to remove the top layer of color from all the edges. Be careful when you distress around the thin areas of the frame.
3- Temporarily place the Green 4” x 4 1/8” behind the open circle frame to get an idea where you should stamp the Branch image, on the left top & bottom right areas in Shade Spruce. Make sure to give room for the Bird & Branches Die in the bottom right area. Then remove the Green piece from behind the circle and Stamp.
4- Adhere the Green piece behind the open frame.
5- Fold the Real Red Ribbon in half and add a little adhesive to the back, add it to the upper left corner of the Navy & Green Foil Piece. Lay 10” of White Baker’s Twine across the top of the Ribbon and use a Stapler to hold the Twine in place at the top of the Real Red Ribbon. Then tie a bow.
6- Add the Navy & Green Foil Piece to the center of the Cardbase with dimensionals. Then add the Small Bird & Branches Die Cut to the bottom right area with dimensionals.
7- Stamp your greeting, I used “Happy Holidays” on Real Red
Cardstock. Make sure to use an Embossing Buddy before stamping with VersaMark.
Apply White Embossing Powder, remove excess, and heat to set. Fussy cut out and
add to the center of the Bird & Branch with dimensionals.
Card #2 – Merry Christmas
Pool Party Cardbase – 5 ½” x 8 ½” scored at 4 ¼”
Pool Party Cardstock – scraps for Die Cuts
Real Red Cardstock – scrap for greeting
Navy & Green Foil Piece – Circle
Pool Party & Navy Pattern Leftover Cardbase – Kit
Green Frame Leftover Cardbase – Kit
Medium Bird with Small Branch Die Cut – Kit
White Baker’s Twine – 20”
1- Trim off one long edge from the Green Frame at about ½”. Add this to the bottom of the Horizontal Pool Party Cardbase.
2- Separate the Pool Party & Navy Pattern Cardbase near
the score line, at about 4 1/8” for each pattern. Then put the patterns
together and cut both at 1 ½”. So you have 4 pieces, one 1 ½” and one 2 5/8” in
both patterns. Place the 1 ½” Pool Party piece above the Green Strip on the
Cardbase. Save the other pieces for another alternative.
3- Add the Large Circle from the Navy & Green Foil Pattern
a little to the left of center with dimensionals.
4- Cut out two Branches from the Merry Tags & More Coordinating Dies in Pool Party Cardstock. Add these in an “L” shape in the left area of the large circle. Add the Bird & Branch Die Cut to the center of the Pool Party Branches with dimensionals.
5- Stamp your greeting, I used “Merry Christmas” on Real Red Cardstock. Make sure to use an Embossing Buddy before stamping with VersaMark. Apply White Embossing Powder, remove excess, and heat to set. Fussy cut out and add to the right of the Bird & Branch with dimensionals.
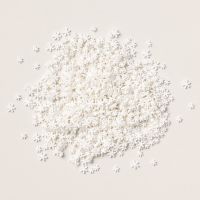
6- Take 20” of White Baker’s Twine, cut it in half at 10” and tie a double bow. Tuck it under the greeting on the right side. Add as many White Snowflakes with small glue dots around the card.
I have also created a video walking you through each step.
To purchase any Stampin’ Up! products please visit
https://www.stampinup.com?demoid=2042902
Have a creative day!
Chelsey
chelsey@creativechelsey.com


.jpg)







No comments:
Post a Comment