
Welcome to Paper Pumpkin Week here at Creative Chelsey. I love getting my Paper Pumpkin Kit every month and creating fun alternative projects using the supplies in the kit. Today I am sharing my first alternative idea using the April 2022 Paper Pumpkin Kit – Change Is Beautiful.

This kit comes with everything you need to make 9 Beautiful Cards, 3 in three different designs. What I like to do is use the supplies in the kit along with some other products and create different or alternative cards. Today I am sharing a simple card idea using the Day scene and a fun watercolor technique. I love creating alternative projects with Paper Pumpkin Kits so make sure to come back for more as I continue to create with this month’s kit.
If this project inspires you to create something, I would love for you to tag me in any social media post using @creativechelsey | #creativechelsey or email me at chelsey@creativechelsey.com.

It is Paper Pumpkin Week here on Creative Chelsey. This is the first alternative this week. If you would like to see all my alternatives check out the playlist here: https://youtube.com/playlist?list=PL40dV1oxpkNmEDXzcuBXTbQJ2A6DI7ahw
Want to see everything in this month’s kit? Watch me UNBOX this month’s Paper Pumpkin Kit here: https://youtu.be/QAt9MlVlJUA
Don't miss out on next month’s Paper Pumpkin Kit - subscribe today!
SUBSCRIBE to Paper Pumpkin - click here –
https://www.paperpumpkin.com/en-us/sign-up/?demoid=2042902
See my Customer Appreciation Products for this month: http://creativechelsey.blogspot.com/p/shop-stampin-up-products.html
Follow me on Instagram https://www.instagram.com/creativechelsey
Or join my Facebook group https://www.facebook.com/groups/2221750878097906
To purchase any of the products you need to create this project visit https://www.stampinup.com?demoid=2042902
Here are the extra pieces of cardstock I used for the cards:
Balmy Blue Cardbase 5 ½” x 8 ½” scored at 4 ¼”
Basic White Cardstock 7/8” x 2 ½” | scraps for stamping
So Saffron Cardstock 2” Circle
From the Kit:
Night & Day Cardbase
Melon Mambo Envelope
Cloud Die Cuts
Embellishments
Here is a list of the supplies I used to make the card:
Balmy Blue Cardstock 146982 $8.75
Basic White Cardstock 159276
$9.75
So Saffron Cardstock 105118 $8.75
Bermuda Bay Ink Pad 147096 $7.50
Crushed Curry Ink Pad 147087 $7.50
Melon Mambo Ink Pad 147051 $7.50
Granny Apple Green Ink Pad 147095 $7.50
Blending Brush 153611 $12.00
Sponge Daubers 133773 $5.00
Linen Thread 104119 $5.00
Paper Trimmer 152392 $25.00
Simply Shammy 147042 $8.00
Stampin’ Seal PLUS Adhesive 149699 $12.00
Multipurpose Liquid Glue 110755 $4.00
Tear & Tape Adhesive 138995 $7.00
Dimensionals 104430 $4.00
Clear Block D 118485 $8.50
Paper Snips 103579 $10.00
Bone Folder 102300 $7.00
Stampin' Pierce Mat 126199 $5.00
Take Your Pick Tool 144107 $10.00
Stampin’ Cut & Emboss Machine 149653 $120.00

1- Separate the Day from the cardbase and cut down to 4” x 5 ¼”. Add to the center of the Balmy Blue Cardbase.

2- Add Crushed Curry watercolor wash to the 2” So Saffron Circle. Let dry. Add over the “sun” on the cardbase with dimensionals. I used a fun watercolor technique that is super quick. Take the plastic sheet from the stamp set. Add a little ink and water. You could also add a little Wink Of Stella for some sparkle. Rub it together, then dab it on the cardstock and let dry.

3- Use a Blending Brush and Bermuda Bay ink on the white side of the cloud die cuts. Add to the bottom left area of the cardbase with dimensionals.
.jpg)
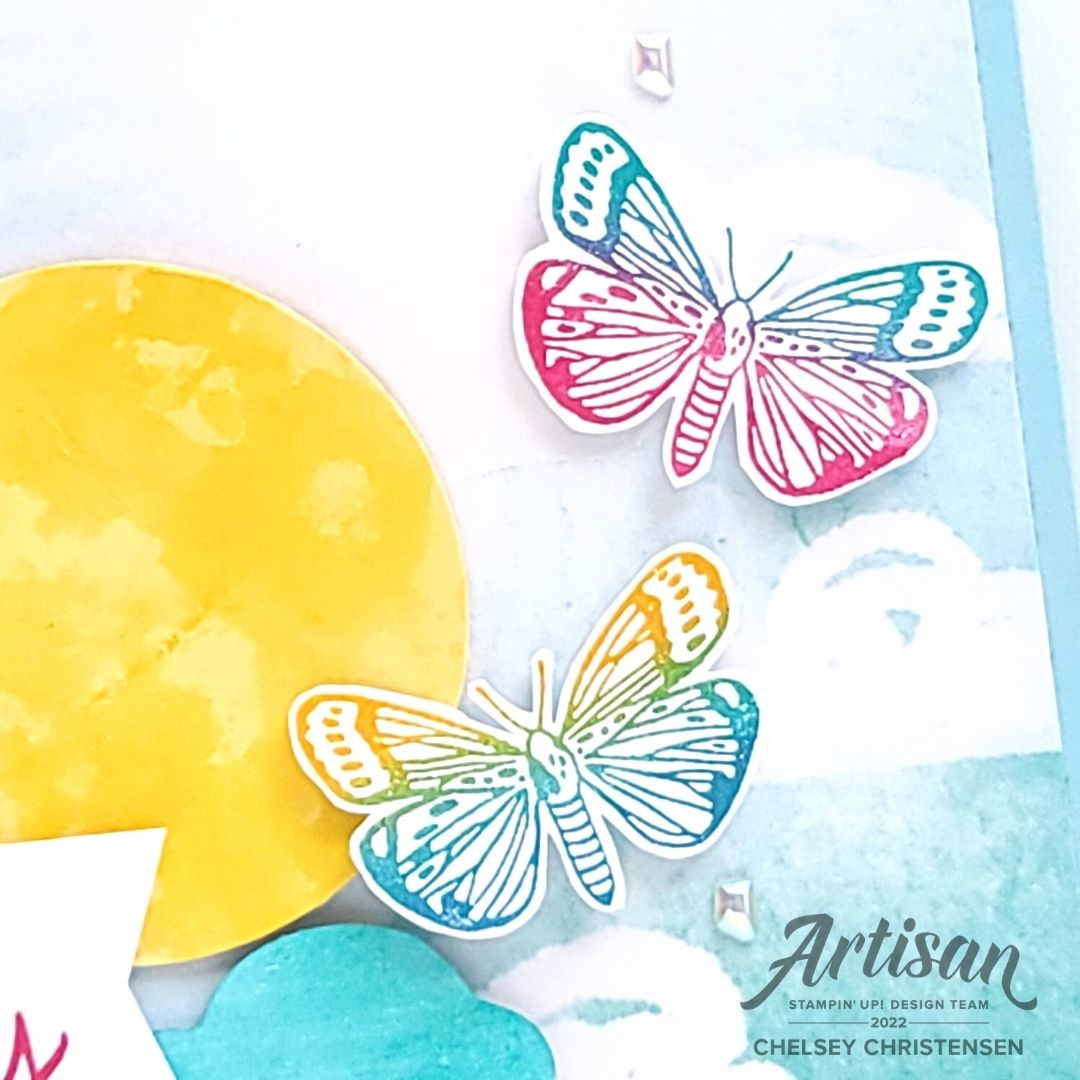
4- Here is a simple way to blend two colors on a stamp. Stamp the butterfly image in two ink colors, keep them separate so they don't get the wrong color on the ink pad. Blend the seam with a sponge dauber in the darker color. Stamp & fussy cut. Repeat for a total of 3 butterflies. Add to the card with dimensionals.

5- Open the Melon Mambo envelope and cut a small 7/8” x 1”, tear one side add to the left side of the Basic White strip. Stamp the greeting in Melon Mambo. Flag the right edge. Add to the left corner of the cardbase with dimensionals.

6- Make a bow with 12” of Linen Thread. Tuck under the greeting on the left side. Add three embellishments.

All Done!
I have also created a video walking you through each step:
To purchase any of the products you see in this video
visit
https://www.stampinup.com?demoid=2042902
Have a creative day!
Chelsey
chelsey@creativechelsey.com
No comments:
Post a Comment