The projects from this kit are beautiful with Glimmer Sentiments, Soft Pastel Colors, and Watercolor Fruit Die Cuts. The kit creates a total of 9 greeting cards 3 in three different designs. If you would like to watch me unbox the kit and create these cards click on the playlist below.
https://www.youtube.com/playlist?list=PL40dV1oxpkNm0O0mbxJE2tVmvp6HOd0MQ
Today I am sharing with you my first alternative card. This card uses fun coloring techniques to help the elements pop. Plus it is quick, easy, and super cute.
Each month I take
the contents from the paper pumpkin kits and make alternative projects. My cards are easy to follow and can be made by both
experienced or new paper crafter. You may need just a couple other products to
complete them. You can follow along with me using supplies you already have or
purchase any products you see me use from my online store. A full supply list
is below or on my blog – www.creativechelsey.com
If you are interested in getting your own paper pumpkin subscription, please use this link to subscribe - https://www.paperpumpkin.com/en-us/sign-up/?demoid=2042902
If this project inspires you to create something, I would
love for you to tag me in any social media post using @creativechelsey |
#creativechelsey or email me at chelsey@creativechelsey.com.
It is Paper Pumpkin Week here on Creative Chelsey. This is the first set of alternative cards this week. If you would like to see all my alternatives check out the playlist here: https://www.youtube.com/playlist?list=PL40dV1oxpkNm0O0mbxJE2tVmvp6HOd0MQ
SUBSCRIBE to Paper Pumpkin - click here –
See my Customer Appreciation Products for this month: http://creativechelsey.blogspot.com/p/shop-stampin-up-products.html
Follow me on Instagram https://www.instagram.com/creativechelsey
Or join my Facebook group https://www.facebook.com/groups/2221750878097906
To purchase any of the products you need to create this
project visit https://www.stampinup.com?demoid=2042902
———————— My Favorite Supplies ————————
• Stampin' Seal+ [149699] $12.00 —— https://bit.ly/3Ibz8YK
• Multipurpose Liquid Glue [110755] $4.00 —— https://bit.ly/3IaGF9S
• Tear & Tape Adhesive [138995] $7.00 —— https://bit.ly/3ajQSo5
• Stampin' Dimensionals [104430] $4.25 —— https://bit.ly/3IbzezA
• Mini Glue Dots [103683] $5.25 —— https://bit.ly/3anAcw3
• Stampin' Pierce Mat [126199] $5.00 —— https://bit.ly/3IjEq4d
• Simply Shammy [147042] $8.50 —— https://bit.ly/3bQH7hE
• Paper Snips [103579] $11.00 —— https://bit.ly/3ulT6tV
• Take Your Pick [144107] $10.00 —— https://bit.ly/3IeYxR9
• Bone Folder [102300] $7.00 —— https://bit.ly/3uhErzZ
• Clear Block D [118485] $9.00 —— https://bit.ly/3uuabSs
• Paper Trimmer [152392] $25.00 —— https://bit.ly/3abvykH
• Stampin' Cut & Emboss Machine [149653] $125.00 —— https://bit.ly/3ujz8zU
Poppy Parade Cardbase – 5 ½” x 8 ½” scored at 4 ¼”
Pool Party Cardstock – scrap for die cut label
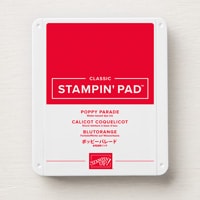
Poppy Parade Ink Pad
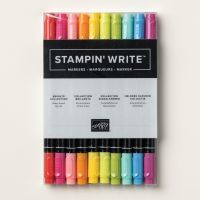
Poppy Parade Marker - Brights Stampin' Write Markers Pack
Blending Brushes
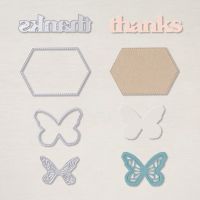
Thanks & Beyond Dies
Pretty In Pink Cardbase – kit
Large Dark Green Fern Die Cut – kit
Large Peach (leaf on the right) – kit
Large Cherries – kit
3 Vanilla Pearls
1- Cut the Pink Cardbase from the kit in half at 4 ¼”. Then trim off the white edge around the pink pattern. It doesn’t have to exact.
2- From the back white piece trim a 3/8” strip from the
bottom. Final size 3/8” x 4 ¼”.
3- Blend with a Blending Brush and Poppy Parade ink
around the edge of the Pink Pattern. Leave the center untouched. Then add
splatter with the Poppy Parade Marker. You can use any red color you have for
the blending & splatters. Add to the center of the Poppy Parade Cardbase.
4- Blend Shy Shamrock ink over the stems of the Cherry Dies only with a Blending Brush. This will darken the stems giving more contrast between the Pool Party Label and Stem. Don’t blend it too dark, you still want to see the watercolor variation.
5- Cut out the Label Die (Thanks & Beyond Dies) from Pool Party Cardstock.
6- Add the Cherries first near the bottom right corner
with dimensionals only under the fruit.
7- Then add the Large Peach with a glue dot under the stems
of the Cherries. Leave a space on the left for the greeting.
8- Cut out three small ferns from the Large Dark Green Fern Die Cut in the kit. You can watch the video if you want to cut the exact three as I do. (5:00)
9- Tuck the leaves around the fruit with glue dots.
10- Stamp your greeting on the 3/8” strip in Shy Shamrock. Separate each word. You may need to stamp the center word again to give equal space to all the words. See video for explanation. Add in the open area on the left with dimensionals.’
11- Add everything to the cardbase with dimensionals. Add three Vanilla Pearls.
I have also created a video walking you through each step.
To purchase any Stampin’ Up! products please visit
https://www.stampinup.com?demoid=2042902
Have a creative day!
Chelsey
chelsey@creativechelsey.com





No comments:
Post a Comment