
Hello my crafting friends,
Today I am excited to share with you a card I created with the beautiful Fitting Florets Collection of products from Stampin’ Up!. This group of products include: Framed Florets Bundle, Framed & Festive Cling Stamp Set, Fitting Florets Designer Series Paper, and Gold Adhesive-Backed Swirls*. I created this card as an assignment with the Stampin’ Up! Artisan Design Team and was asked to create a Christmas Card using the products.

The beautiful Fitting Florets DSP can be used all year long and so I wanted to really show case this product with this card. It is so easy to change the color scheme of Designer Series Paper for any occasion. You can add color with Stampin’ Blend Markers or Ink & Blending Brushes to paper that has white areas. You can also mix and match the basic patterns to create any color combination you need.
I also have a multi-color stamping tip to also share. It makes creating one image with multiple colors so easy.

See my Customer Appreciation Products for this month: http://creativechelsey.blogspot.com/p/shop-stampin-up-products.html
Follow me on Instagram https://www.instagram.com/creativechelsey
Or join my Facebook group https://www.facebook.com/groups/2221750878097906

Be sure to check out the rest of the team’s wonderful creations on the Stampin’ Up! Corporate Facebook Page at - http://www.facebook.com/stampinup
For more inspiration, tips & tricks from the 2022 Artisan Design Team also check out Stampin’ Up! on Instagram – https://www.instagram.com/stampinupofficial

To purchase any of the products you need to create this project visit
https://www.stampinup.com?demoid=2042902
Here are the dimensions and pieces you will need to
create this card:
Thick Basic White Cardbase – 5 ½” x 8 ½” scored at 4 ¼”
Fitting Florets Designer Series Paper – 3 ¼” x 4 ½” | 4
1/8” x 5 3/8” | flower pattern
Polished Pink Cardstock – 3 3/8” x 4 5/8”
Basic White Cardstock – scrap for stamping
Vellum Cardstock – 2 ¼” x 9”
Silver Twine – 10”
")
")
 Designer Series Paper")


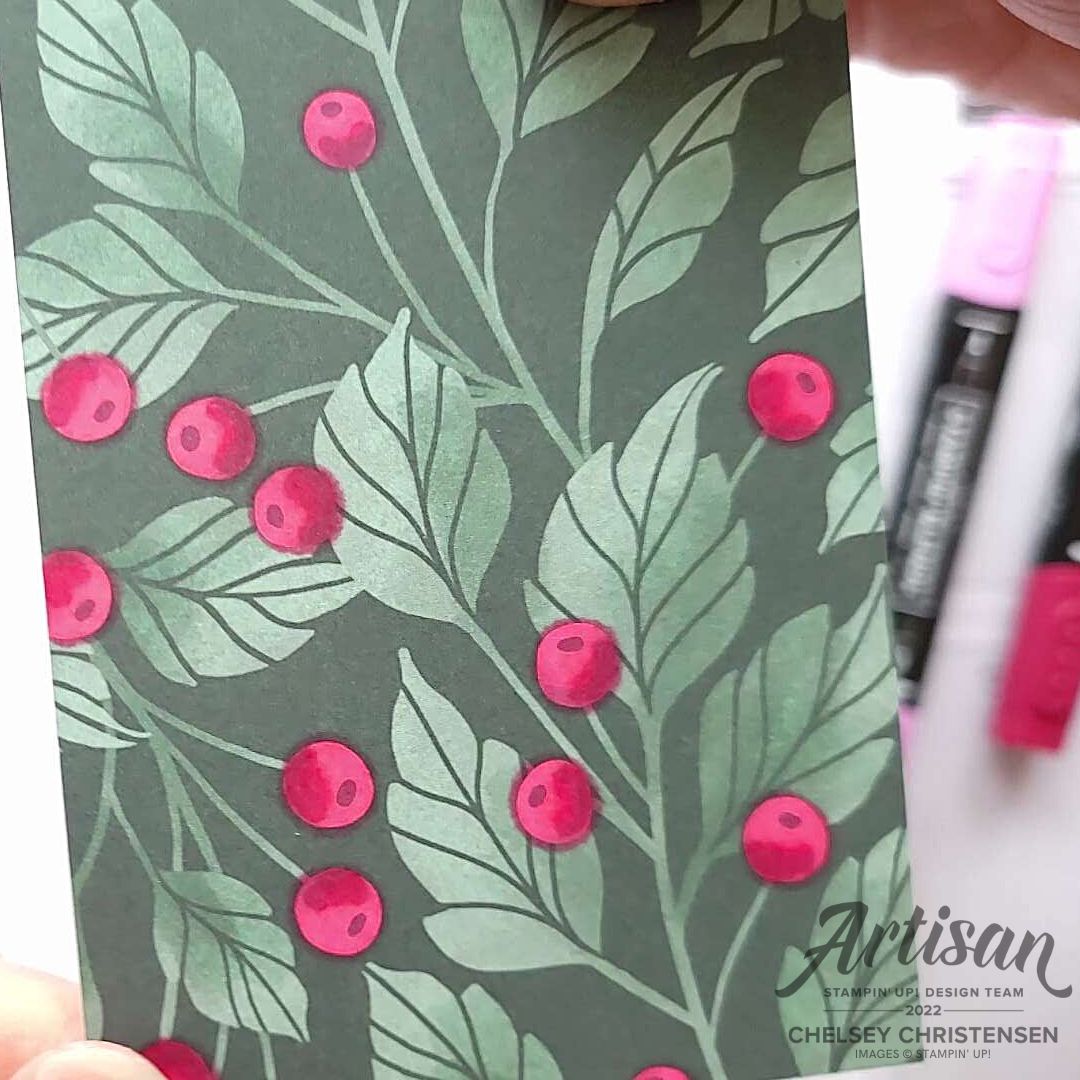
1- Color in the white berries on the Designer Series Paper with Dark Polished Pink Stampin’ Blend Marker. Then add a little depth with the Light Cherry Cobbler Stampin’ Blend Marker.
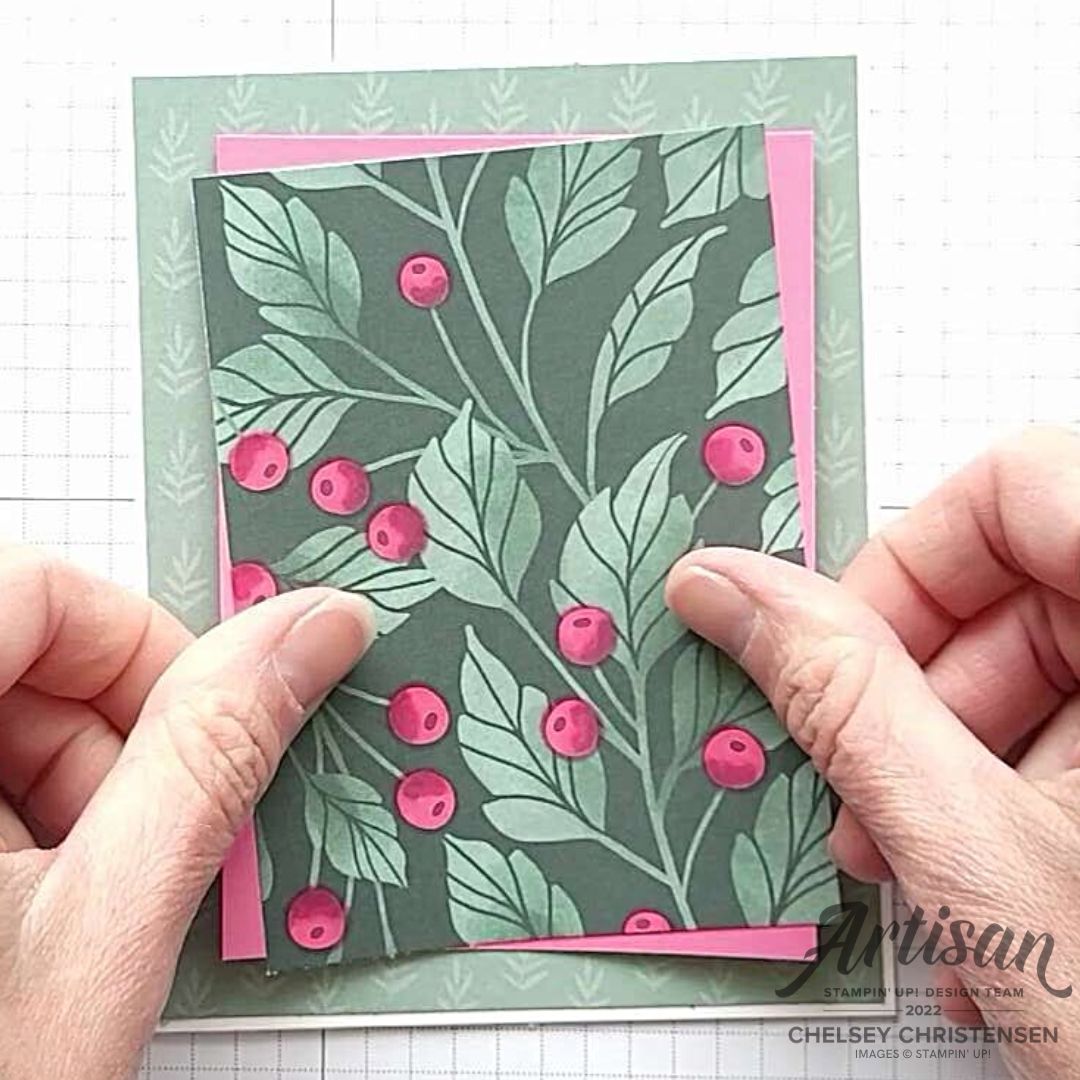
2- Add this paper to the Polished Pink Cardstock at an angle. Add the large DSP to the cardbase and add the other piece to the center.

3- To create the belly band – score the vellum strip at 3/8” from the right side. Then score at 4 5/16” from the other side. Fold along all the score lines. Fold so the small section is tucked underneath the edge. The fold and edge should meet together.
When scoring on Vellum be gentle so it doesn’t tear.
4- Add tear & tape to the small section so they
adhere together. Close the belly band around the card so you know it is large
enough. Make sure the adhesive is on the back of the card. Slide to the center
of the card.

5- Using the Stamparatus. Line up the greeting in the center of a large piece of Basic White Cardstock. Ink it up first in Polished Pink and stamp. Then add Cherry Cobbler ink with the Stampin’ Write Marker over the words you want darker. Stamp and repeat until it is the way you want. Don’t move your paper until it is done.
6- Cut out with one of the ovals from the Coordinating Framed
Florets Dies. Use the Cherry Cobbler Stampin’ Write Marker to create a decorative
edge around the center oval. I didn’t use the oval frame. Add this to the left on
the vellum with dimensionals.

7- Cut out two flowers from the DSP. You can use the coordinating dies on some of the flowers. I used light pink and a darker pink flowers. Add the lighter pink to the bottom. Add the darker flowers on top with dimensionals. Make sure to attach it to the vellum and not the card.

8- Create a faux bow with 10” of silver twine and glue dots. Slide it under the darker pink flowers. Add 9 silver Festive Foil Pearls. I added three in the top left corner, three in the bottom right corner and three around the flowers.
All Done!
If you would like to watch me create this cards with step by step tips and directions please watch this video:
If you need any product to make these cards, please visit my online store: http://www.stampinup.com?demoid=2042902
Have a creative day,
Chelsey
No comments:
Post a Comment