Friday, January 24, 2025

Global Stampin' Video Hop - January 2025 - Six Quick & Easy Valentine's Day Cards Perfect For Beginner Card Makers

It is time for another tutorial for the Global Stampin’ Video Hop on YouTube. Each month on the fourth Friday Stampin’ Up Demonstrators from around the world come together and share their projects based on a monthly theme. January’s Theme is FREE and we can interpret it any way we want. I am so excited to see what everyone creates this month, make sure to watch my video below and then jump around and see them all.


When I heard the word FREE I thought of all the awesome SALE-A-BRATION items you can get for free this month with a qualifying purchase through my Stampin’ Up! online store https://www.stampinup.com?demoid=2042902.


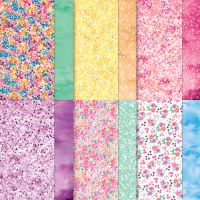
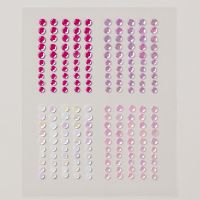
I decided to use my favorite FREE SALE-A-BRATION ITEMS – Bloom Impressions Designer Series Paper and the Purple Adhesive-Backed Sequins. I just love how easily these items can be used with so many colors and products.


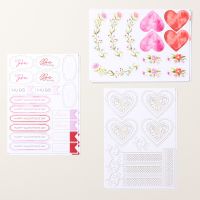
The cards I am sharing today use these FREE items along with the Celebrate Love Mix & Match Ephemera Pack to create 6 quick and easy Valentine’s Day Cards that anyone can make. They are perfect for beginner card makers!


Since each card uses the Ephemera to create different card fronts, I am going to share some fun tips & techniques you can use with this cute pack to make your cards pop! Check them all out below and then create your own cards with this mix & match pack or use the images to help you create the ones I made.


I hope you are inspired today as you see all the Projects from everyone while jumping from video to video. If you are inspired to make a project from something you see today please share it with us, we would love to see what you come up with. You can tag me @creativechelsey in any social media post. 


See my Customer Appreciation Products for this month: http://creativechelsey.blogspot.com/p/shop-stampin-up-products.html

Follow me on Instagram https://www.instagram.com/creativechelsey

Or join my Facebook group https://www.facebook.com/groups/2221750878097906


To purchase any of the products you need to create this project visit

https://www.stampinup.com?demoid=2042902

Product List

Measurements:

Cardbases – 5 ½” x 8 ½” scored at 4 ¼”

Bloom Impressions Designer Series Paper – 3” x 4”

Basic White Cardstock – 3 1/8” x 4 1/8”


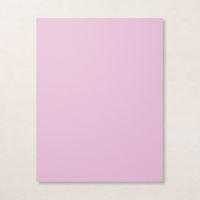
Card #1 – Petal Pink Cardbase


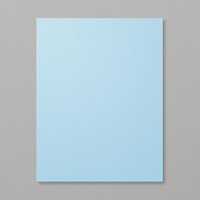
Card #2 – Balmy Blue Cardbase


Card #3 – Bubble Bath Cardbase


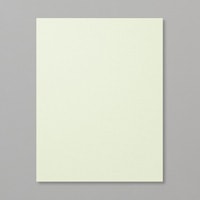
Card #4 – Soft Sea Foam Cardbase


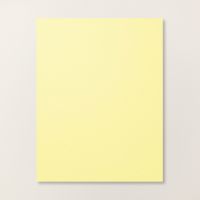
Card #5 – Lemon Lolly Cardbase


Card #6 – Fresh Freesia Cardbase


TIPS & TECHNIQUES


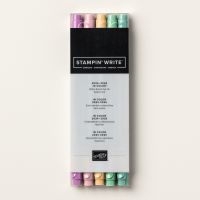
Splatter with a Stampin’ Write Marker on to the Background to give a little texture & interest.


Cut the DSP to 3” x 4” and add to a Basic White 3 1/8” x 4 1/8” to give the pattern a border helping it pop from the cardbase. Add with dimensionals to the center of the cardbase.


Add liquid glue to used Dimensional Backing and tap small delicate pieces into glue when applying them to a card.


Separate the tall Floral Ephemera Pieces in the center to give you two pieces.


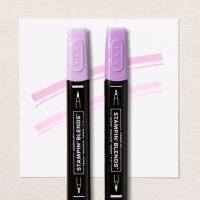
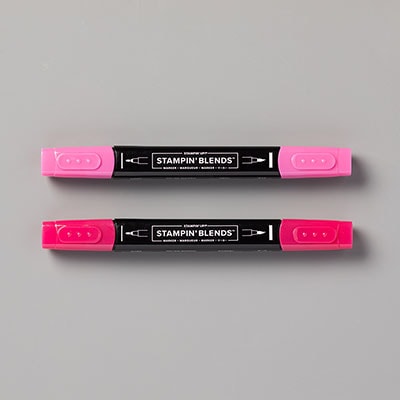
Add Stampin’ Blend Markers to colored cardstock in the same color to give depth and interest behind Ephemera Pieces to help them stand out against the pattern paper.


Cut a rough border around the Ephemera Pieces so you can layer them together.


Color the White Ephemera Pieces with Stampin’ Blend Markers to help them pop from the pattern paper.


Remove the color banner part of the Greeting so you can place it at different angles and in different areas on your card.


Add delicate details by only showing part of the Ephemera Pieces under greetings.


HAVE FUN!


If you would like to watch me create these cards with step-by-step tips and directions, please watch this video:

If you need any product to make these cards, please visit my online store: http://www.stampinup.com?demoid=2042902


Have a creative day,

Chelsey

chelsey@creativechelsey.com


Friday, January 17, 2025

February 2025 Beautiful Butterflies - Online Handmade Card Class

How To Sign Up - Please register here – https://forms.gle/SCLJM8nt3hvQ8jnT6

A PayPal invoice will be emailed to the email address you provide in the form. Please pay the invoice as soon as possible.


Join me for exclusive Online Card Making Tutorials from 
February 18-22 (Tuesday – Saturday)
Class Fee - $35

Today I would like to share with you my upcoming Online Card Class for February 2025. In this class we will be creating 5 Handmade Cards with any Butterfly Stamp Set & Dies. I will be creating my cards with the Beautiful Butterflies Bundle. When choosing your Stamp Set look for one with Butterfly images in multiple sizes and with open areas you can add color. The Dies should have Detailed Butterfly shapes in at least two sizes, large & small. I love seeing your creativity in using different stamps & dies. If you would like me to help you pick something out, please reach out through by email chelsey@creativechelsey.com

In this class we will be using different techniques with Embossing Paste, Stampin’ Blend Markers, Heat Embossing, Blending, and White Gel Pen. These techniques and tips can be used over and over again with many different images.


"Chelsey is the most creative!! Her designs are top notch. Her classes are so fun and I always learn something new from her. It’s so fun to make a pretty card and then be able to mail it to someone!!"
Lisa G. from Minnesota


I hope you decided to join me, it will be really fun class.

Please use the Google Form https://forms.gle/SCLJM8nt3hvQ8jnT6 to sign up for this class

Please see the list below of the product you will need to have to create these cards.  


BEAUTIFUL BUTTERFLIES - $35 (US Only)

You will receive a class kit from me that will include the below supplies:

• Cardstock, Cardbases, and Envelopes for 5 cards (no precut shapes will be included except for one Butterfly Cardbase)

• 6 – 6” x 6” Sheets of Beautiful Bokeh Designer Series Paper

• A Full Pack of Flat Adhesive Pearls

• Full Roll of Iridescent Striped Trim

*Please note that I reserve the right to switch products based on availability. Substituted products will be of similar value and keep the integrity of the design.

If you are interested in purchasing two or more kits so you can make more sets of cards, I will be offering a Cardstock Only Refill Kit for $15 It includes all the DSP, cardstock & envelopes to make another set of cards. It does not include the two Coordinating Embellishments. You will have enough of these items leftover from the full kit to make more cards. Please note that the Cardstock Refill Kit can ONLY be purchased along with one FULL kit. You can purchase as many of either kit as you would like. Please make sure to add this option to your registration before checking out.


"Chelsey’s card classes are phenomenal. Her customer service is exceptional. I always learn something new when I view her videos. I haven’t missed one since I started, and look forward to each one."
Sandra G. from Texas


This class will take place in a private Facebook Group and on YouTube with a Private link. Please specify when registering if you would like the YouTube link (it will be emailed out about 5 minutes before 10am MT each day).  If you can’t participate live, I can also send an email with both the video replay and PDF tutorial after the live class. Please choose this option when registering.

In this Facebook Group I will post:

• Written instructions for each card (PDF) so you can create more cards and use the techniques over and over again.

• Live Videos for each card where I will walk you through each step to create the cards. Watch live or when you have the time.


"I have been taking Chelsey's classes for about 5 years. I always learn something new. She is an exceptional artist which is reflected in the cards she creates. They are all beautiful. I especially love her teaching style. She goes slow with great attention to detail. She often gives closeups of the section of the card she is working on which helps so much. She is such a great teacher. I highly recommend her classes and I've never missed a month since I started. She generally creates these classes using 2 stamps sets so you can pick the one you want to use. However, She also encourages us to just use what we have. I appreciate that so much!"
Debbie L. from Wisconsin


What is not included:

You will need to have these supplies to complete the cards, substitute as you wish.

• Stamp Set or Bundle – Look for one with different sizes of Butterflies & Detailed Butterfly Dies – I recommend: Beautiful Butterflies Bundle (English) [164615] $59.25 —— https://bit.ly/40xrl25

• A 1 ¼” Circle Die or Punch – I will be using: Around It All Dies [164725] $34.00 —— https://bit.ly/4hikyPe

• Your choice of Decorative Masks – I will be using: Linked Together Decorative Masks [164809] $13.00 —— https://bit.ly/4gSYdYY

• Either Embossing Paste [141979] $9.00 —— https://bit.ly/3W2H2fk OR Shimmery White Embossing Paste [145645] $10.00 —— https://bit.ly/3PAtOlU

• Palette Knives [142808] $5.00 —— https://bit.ly/3XNyv1o

• Berry Burst Classic Stampin' Pad [147143] $9.00 —— https://bit.ly/3wftzGK

• Fresh Freesia Classic Stampin' Pad [155611] $9.00 —— https://bit.ly/3PEBEJX

• Azure Afternoon Classic Stampin' Pad [161663] $9.00 —— https://bit.ly/446eoek

• Calypso Coral Classic Stampin' Pad [147101] $9.00 —— https://bit.ly/3OPJYpC

• Versamark Pad [102283] $9.50 —— https://bit.ly/3oztVku

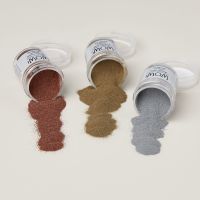
• Basics Wow! Embossing Powder [165679] $21.00 —— https://bit.ly/3MhH3q5

• Heat Tool (Us And Canada) [129053] $32.00 —— https://bit.ly/3RSUON9

• Embossing Additions Tool Kit [159971] $27.00 —— https://bit.ly/3S5ItEX

• Berry Burst Stampin’ Blends Combo Pack [161681] $11.00 —— https://bit.ly/3P0n3dN

• Fresh Freesia Stampin' Blends Combo Pack [155518] $11.00 —— https://bit.ly/3HNmYGE

• Calypso Coral Stampin' Blends Combo Pack [154881] $11.00 —— https://bit.ly/3sKOBb7

• Lemon Lolly Stampin’ Blends Combo Pack [161673] $11.00 —— https://bit.ly/44g7CCK

• Bubble Bath Stampin’ Blends Combo Pack [161675] $11.00 —— https://bit.ly/3sdWNDY

• Balmy Blue Stampin' Blends Combo Pack [154830] $11.00 —— https://bit.ly/3sQsDU0

• Clear Wink Of Stella Glitter Brush [141897] $9.00 —— https://bit.ly/3y5LQnO

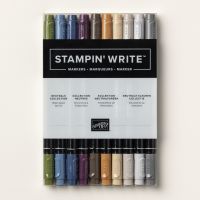
• One Dark Neutrals Stampin' Write Markers [161697] $35.00 —— https://bit.ly/3HGnOUN

• Blending Brushes [153611] $15.00 —— https://bit.ly/3LAVEMo

• Adhesive Sheets [152334] $11.50 —— https://bit.ly/3qPJJjS

• White Gel Pen (this is my favorite from amazon)—— https://amzn.to/3Rp9LrZ 

   (As an Amazon Associate, I earn from qualifying purchases)         


"I love the details of each card! I also love the replay since I work full time I can participate at my own leisure. Having a list of supplies in advance is super helpful."
Angela A. from Utah


Here are the tools & adhesive you will need:

• Paper Trimmer [152392] $26.00 —— https://bit.ly/3abvykH

• Take Your Pick [144107] $11.00 —— https://bit.ly/3IeYxR9

• Stampin' Cut & Emboss Machine [149653] $128.00 —— https://bit.ly/3ujz8zU

• Ribbon Scissors ——

• Paper Snips [103579] $11.00 —— https://bit.ly/3ulT6tV

• Simply Shammy [147042] $8.50 —— https://bit.ly/3bQH7hE

• Bone Folder [102300] $7.00 —— https://bit.ly/3uhErzZ

• Coordinating Clear Blocks ——

• Mini Stampin' Dimensionals [144108] $4.25 —— https://bit.ly/3TPwVXP

• Stampin' Dimensionals [104430] $4.25 —— https://bit.ly/3IbzezA

• Stampin' Seal [152813] $8.00 —— https://bit.ly/3TWjs0r

• Tear & Tape Adhesive [138995] $7.00 —— https://bit.ly/3ajQSo5

• Multipurpose Liquid Glue [110755] $5.50 —— https://bit.ly/3IaGF9S

• Mini Glue Dots [103683] $5.75 —— https://bit.ly/3anAcw3


If you need any Stampin Up product to take this class you can visit my online store at https://www.stampinup.com?demoid=2042902

Please use host code when ordering: YSJAKYDP

Please contact me if you have any questions chelsey@creativechelsey.com


"I work when her classes are taking place, but she is an excellent designer and teacher. I have never had a problem following her class videos and class materials and making my cards on my own. Great value for your money and you will learn a lot from taking her classes."
Valerie A. from Wyoming


FINE PRINT:

• Registration for this class closes on Sunday February 2, 2025.

• This class is available to both customers and Stampin’ Up demonstrators in the USA. If you live outside of the USA I do offer a TUTORIALS ONLY option for you (not available to those in USA). Please select the correct option when registering.

• I will ship the class kit to the address you enter in the registration form. Please make sure it is correct.

• I will contact you, send class information & PayPal invoice through the email address you enter in the registration form. Please make sure it is your current email address.

• I reserve the right to switch products based on availability. Substituted products will be of similar value and keep the integrity of the design.

Please notify me ASAP if there is a problem or the information you have entered is incorrect – chelsey@creativechelsey.com


Please register here – https://forms.gle/SCLJM8nt3hvQ8jnT6

A PayPal invoice will be emailed to the email address you provide in the registration form. Please pay the invoice as soon as possible.


Please contact me with any questions

Have a creative day,

Chelsey

chelsey@creativechelsey.com

Friday, January 10, 2025

Heat Emboss on Vellum - My Favorite Alternative from the December 2024 Paper Pumpkin Kit

Welcome to Paper Pumpkin Week here on Creative Chelsey. This week I have shared many alternative card ideas you can make with supplies from the December 2024 Paper Pumpkin Kit called Notes From The Heart. Today I am sharing my sixth and last card idea.


The cards this month are beautifully simple scalloped edges cards with gorgeous large die cuts. They are perfect to make to send a quick note to friends and family. If you would like to watch me unbox the kit and make the original cards visit this playlist -  
https://www.youtube.com/playlist?list=PL40dV1oxpkNnioYqEkJBHi8pkYbS_nrGp


This is the last alternative card I will be sharing with you this week. For this card I pulled together some of the leftover supplies I had after making the previous 5 cards and came up with one of my favorites. For this card I am sharing another great way to manipulate the Vellum Leaf Die Cut and I love how it gives a beautiful look and texture to the card.


Each month I take the contents from the paper pumpkin kits and make alternative projects. My cards are easy to follow and can be made by both experienced or new paper crafter. You may need just a couple other products to complete them. You can follow along with me using supplies you already have or purchase any products you see me use from my online store. A full supply list is below or on my blog –
www.creativechelsey.com
I also want to mention the amazing perks you can receive when you subscribe to Paper Pumpkin with me as your demonstrator. With every Paper Pumpkin Stamp Set & Ink Spot sent, I design a card and mail out my very own card kit to my subscribers so they can make two of my exclusive card design. These cards so fun and show new ways to use stamps & ink. We also meet once each month to make the card together, chat & have fun. *PLUS I have joined with other Stampin’ Up! Demonstrators to design 8-10 more alternative ideas in a PDF Tutorial (includes photos & instructions). My subscribers receive this PDF Tutorial along with an Exclusively Designed Card Kit, all for FREE! If you would also like to receive this extra perk, sign up for paper pumpkin using the link below and make sure to select me as your demonstrator.

If you are interested in getting your own paper pumpkin subscription, please use this link to subscribe -  https://www.paperpumpkin.com/en-us/sign-up/?demoid=2042902

If this project inspires you to create something, I would love for you to tag me in any social media post using @creativechelsey | #creativechelsey or email me at chelsey@creativechelsey.com.

It is Paper Pumpkin Week here on Creative Chelsey. This is my last alternative card idea. If you would like to see all my alternatives this month check out the playlist here: https://www.youtube.com/playlist?list=PL40dV1oxpkNnioYqEkJBHi8pkYbS_nrGp

Don't miss out on next month’s Paper Pumpkin Kit - subscribe today!
SUBSCRIBE to Paper Pumpkin - click here –


Product List


See my Customer Appreciation Products for this month: http://creativechelsey.blogspot.com/p/shop-stampin-up-products.html

Follow me on Instagram https://www.instagram.com/creativechelsey

Or join my Facebook group https://www.facebook.com/groups/2221750878097906


To purchase any of the products you need to create this project visit https://www.stampinup.com?demoid=2042902


———————— My Favorite Supplies ————————

• Stampin' Seal+ [149699] $12.00 —— https://bit.ly/3Ibz8YK

• Multipurpose Liquid Glue [110755] $4.00 —— https://bit.ly/3IaGF9S

• Tear & Tape Adhesive [138995] $7.00 —— https://bit.ly/3ajQSo5

• Stampin' Dimensionals [104430] $4.25 —— https://bit.ly/3IbzezA

• Mini Glue Dots [103683] $5.25 —— https://bit.ly/3anAcw3

• Stampin' Pierce Mat [126199] $5.00 —— https://bit.ly/3IjEq4d

• Simply Shammy [147042] $8.50 —— https://bit.ly/3bQH7hE

• Paper Snips [103579] $11.00 —— https://bit.ly/3ulT6tV

• Take Your Pick [144107] $10.00 —— https://bit.ly/3IeYxR9

• Bone Folder [102300] $7.00 —— https://bit.ly/3uhErzZ

• Clear Block D [118485] $9.00 —— https://bit.ly/3uuabSs

• Paper Trimmer [152392] $25.00 —— https://bit.ly/3abvykH

• Stampin' Cut & Emboss Machine [149653] $125.00 —— https://bit.ly/3ujz8zU


Blackberry Bliss Cardbase – 5 ½” x 8 ½” scored at 4 ¼”

Blackberry Bliss Cardstock – 3 ¼” x 4 ½”

Gold Foil Paper – 3-3/8” x 4-5/8”

Vellum Leaf Die Cut – kit

White Scallop Sticker – kit

Rectangle Label – kit

Gold Sparkle Gems – kit


1- Use a Coordinating Marker to splatter ink over the White Scallop Sticker. I used Blackberry Bliss.


2- Add the Sticker to the center of the 3 ¼” x 4 ½” Blackberry Bliss piece. Add the Gold Foil behind the Blackberry Bliss piece.

3- Add these stacked cardstock pieces to the center of the cardbase with dimensionals.


4- Sponge VersaMark ink randomly over the Vellum Leaf Die Cut. Add Gold Embossing Powder, remove excess and Heat until shiny with Heat Tool.


5- Add to the center of the White Scallop Sticker with Mini Dimensionals, hidden behind the gold embossing.


6- Stamp your greeting in Blackberry Bliss ink on a label from the kit. I used the Rectangle Label. Add at the bottom of the Vellum Leaf Die Cut with dimensionals.

7- Add 3 Gold Sparkle Gems.

All Done!


I have also created a video walking you through each step.

To purchase any Stampin’ Up! products please visit

https://www.stampinup.com?demoid=2042902


Have a creative day!

Chelsey

chelsey@creativechelsey.com