Friday, August 23, 2024

September 2024 Brayer Backgrounds - Online Handmade Card Class - Changing Leaves & Simply Zinnia Bundles

How To Sign Up - Please register here – https://forms.gle/unp3ZczDXJtJxnT47

A PayPal invoice will be emailed to the email address you provide in the form. Please pay the invoice as soon as possible.

Join me for exclusive Online Card Making Tutorials from
September 23rd – 28th, 2024!
Class Fee - $35

Today I would like to share with you my upcoming Online Card Class for September 2024. In this class we will be creating 5 Handmade Cards with 5 different Brayer Techniques to Create Beautiful Backgrounds. This class has been especially created for the Changing Leaves & Simply Zinnia Bundles from Stampin’ Up! (see supply list below). You can choose which Bundle to use, you don't need to have both Bundles. However, you may also use any Stamp Set, Dies & Embossing Folder of your choice.

Each of these cards show a different way to use the Brayer. There are 5 different techniques I will share in this class; Over Embossing, Pressed Embossing, Plastic Wrap, Rubber Band, and Ombre. Once you learn these techniques you can use them over and over again to create wonderful backgrounds for your cards.

I hope you decided to join me, it will be really fun class.

Simply Zinnia Bundle

Changing Leaves Bundle


You do not want to miss this class!

Please use the Google Form https://forms.gle/unp3ZczDXJtJxnT47 to sign up for this class.


Changing Leaves Bundle

Simply Zinnia Bundle

Please see the list below of the product you will need to have to create these cards.  


BRAYER BACKGROUNDS - $35 (US Only)

You will receive a class kit from me that will include the below supplies:

• Cardstock, Cardbases, and Envelopes for 5 cards (no precut shapes will be included)

• 12 – 6” x 6” Sheets of Iconic Celebrations Designer Series Paper

• 1 – 6” x 6” Sheet of Gold Foil

• Two Coordinating Embellishments – Surprise! may change due to inventory

*Please note that I reserve the right to switch products based on availability. Substituted products will be of similar value and keep the integrity of the design.


If you are interested in purchasing two or more kits so you can make more sets of cards, I will be offering a Cardstock Only Refill Kit for $15 It includes all the DSP, cardstock & envelopes to make another set of cards. It does not include the two Coordinating Embellishments. You will have enough of these items leftover from the full kit to make more cards. Please note that the Cardstock Refill Kit can ONLY be purchased along with one FULL kit. You can purchase as many of either kit as you would like. Please make sure to add this option to your registration before checking out.


Changing Leaves Bundle

Simply Zinnia Bundle

This class will take place in a private Facebook Group and on YouTube with a Private link. Please specify when registering if you would like the YouTube link (it will be emailed out about 5 minutes before 10am MT each day).  If you can’t participate live I can also send an email with both the video replay and PDF tutorial after the live class. Please choose this option when registering.


In this Facebook Group I will post:

• Written instructions for each card (PDF) so you can create more cards and use the techniques over and over again.

• Live Videos for each card where I will walk you through each step to create the cards. Watch live or when you have the time.


Changing Leaves Bundle

Simply Zinnia Bundle

What is not included:

You will need to have these supplies to complete the cards, substitute as you wish.

• Stamp Set or Bundle – I recommend one of the Bundles below:

     • Changing Leaves Bundle (English) [164139] $54.00 —— https://bit.ly/4cBDZjl

     • Simply Zinnia Bundle (English) [163480] $52.00 —— https://bit.ly/46VZytP

          • Zinnia 3 D Embossing Folder [163337] $11.00 –– https://bit.ly/4dUtnxH

• Stampin' Brayer [162936] $16.00 —— https://bit.ly/47EJoDL

• Spotlight On Nature Dies [163580] $35.00 —— https://bit.ly/4cowbSS

• Heat Tool (Us And Canada) [129053] $32.00 —— https://bit.ly/3RSUON9

• Embossing Additions Tool Kit [159971] $27.00 —— https://bit.ly/3S5ItEX

• Metallics Wow! Embossing Powder [165678] $21.00 —— https://bit.ly/3Mj92pt

• Basics Wow! Embossing Powder [165679] $21.00 —— https://bit.ly/3MhH3q5

• Versamark Pad [102283] $9.50 —— https://bit.ly/3oztVku

• Crumb Cake Classic Stampin' Pad [147116] $9.00 —— https://bit.ly/3TuaVSE

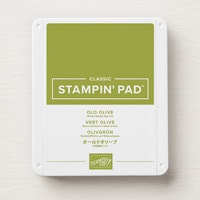
• Old Olive Classic Stampin' Pad [147090] $9.00 —— https://bit.ly/3uHU8Ra

• Cajun Craze Classic Stampin' Pad [147085] $9.00 —— https://bit.ly/3DyQk9Q

• Crushed Curry Classic Stampin' Pad [147087] $9.00 —— https://bit.ly/3S5aPj4

• Old Olive Stampin' Blends Combo Pack [154892] $11.00 —— https://bit.ly/3RPRLG1

• Cajun Craze Stampin' Blends Combo Pack [154879] $11.00 —— https://bit.ly/3OzAq0V

• Wild Wheat Stampin’ Blends Combo Pack [161661] $11.00 —— https://bit.ly/3SzqhXC

• Small Blending Brushes [160518] $14.00 —— https://bit.ly/3KsWMCc

*optional* Stampin' Glass Mat Studio (Imperial) [163987] $60.00 —— https://bit.ly/3RZhUUv

• Stampin' Pierce Mat [126199] $5.00 —— https://bit.ly/3IjEq4d

• Water Painters [151298] $13.00 —— https://bit.ly/3R5letH

• Rubber Bands ——

• Plastic Wrap ——

• Sandpaper ——

• White Gel Pen (this is my favorite from amazon)—— https://amzn.to/3Rp9LrZ 

   (As an Amazon Associate, I earn from qualifying purchases)         


Here are the tools & adhesive you will need:

• Paper Trimmer [152392] $26.00 —— https://bit.ly/3abvykH

• Take Your Pick [144107] $11.00 —— https://bit.ly/3IeYxR9

• Stampin' Cut & Emboss Machine [149653] $128.00 —— https://bit.ly/3ujz8zU

• Ribbon Scissors ——

• Paper Snips [103579] $11.00 —— https://bit.ly/3ulT6tV

• Simply Shammy [147042] $8.50 —— https://bit.ly/3bQH7hE

• Bone Folder [102300] $7.00 —— https://bit.ly/3uhErzZ

• Coordinating Clear Blocks ——

• Adhesive Sheets [152334] $11.50 —— https://bit.ly/3qPJJjS

• Mini Stampin' Dimensionals [144108] $4.25 —— https://bit.ly/3TPwVXP

• Stampin' Dimensionals [104430] $4.25 —— https://bit.ly/3IbzezA

• Stampin' Seal [152813] $8.00 —— https://bit.ly/3TWjs0r

• Tear & Tape Adhesive [138995] $7.00 —— https://bit.ly/3ajQSo5

• Multipurpose Liquid Glue [110755] $5.50 —— https://bit.ly/3IaGF9S

• Mini Glue Dots [103683] $5.75 —— https://bit.ly/3anAcw3


If you need any Stampin Up product to take this class you can visit my online store at https://www.stampinup.com?demoid=2042902

Please use host code when ordering: CSRSX37C


Changing Leaves Bundle

Simply Zinnia Bundle

Please contact me if you have any questions chelsey@creativechelsey.com


FINE PRINT:

• Registration for this class closes on Sunday September 8th.

• This class is available to both customers and Stampin’ Up demonstrators in the USA. If you live outside of the USA I do offer a TUTORIALS ONLY option for you (not available to those in USA). Please select the correct option when registering.

• I will ship the class kit to the address you enter in the registration form. Please make sure it is correct.

• I will contact you, send class information & PayPal invoice through the email address you enter in the registration form. Please make sure it is your current email address.

• I reserve the right to switch products based on availability. Substituted products will be of similar value and keep the integrity of the design.

Please notify me ASAP if there is a problem or the information you have entered is incorrect – chelsey@creativechelsey.com


Please register here – https://forms.gle/unp3ZczDXJtJxnT47

A PayPal invoice will be emailed to the email address you provide in the registration form. Please pay the invoice as soon as possible.


Please contact me with any questions

Have a creative day,

Chelsey

chelsey@creativechelsey.com

Saturday, August 17, 2024

Three Cards Made From The Envelopes in the July 2024 Paper Pumpkin Kit - Stampin' Up!

Hi Everyone and welcome to Paper Pumpkin Week here on Creative Chelsey. Yesterday I shared three fun fold cards you can make with July’s kit. Today I am sharing with you my last set of three cards you can make with the envelopes from the July 2024 Paper Pumpkin Kit called Painted Petals.


The projects from this kit are amazing with beautiful floral designs and bright happy colors. I also love the greetings that are in the stamp set. They are perfect for any type of card. The kit creates a total of 9 greeting cards 3 in three different designs. If you would like to watch me unbox the kit and create these cards click on the playlist below.

https://www.youtube.com/playlist?list=PL40dV1oxpkNnPYhJOi89WXJ44WsyLI9ZM

Each month I take the contents from the paper pumpkin kits and make alternative projects. My cards are easy to follow and can be made by both experienced or new paper crafter. You may need just a couple other products to complete them. You can follow along with me using supplies you already have or purchase any products you see me use from my online store. A full supply list is below or on my blog – www.creativechelsey.com


Today I am sharing with you my last set of alternative cards. I have made all three cards from the three envelopes in the kit. These cards are super easy to make and the layouts are universal and can be used with many different images and papers. Make sure to watch the whole video to get all the tips & tricks.

If you are interested in getting your own paper pumpkin subscription, please use this link to subscribe -  https://www.paperpumpkin.com/en-us/sign-up/?demoid=2042902


If this project inspires you to create something, I would love for you to tag me in any social media post using @creativechelsey | #creativechelsey or email me at chelsey@creativechelsey.com.

If you would like to see written instructions or close up images of these cards please visit my blog -

It is Paper Pumpkin Week here on Creative Chelsey. This is the last set of alternative cards this week. If you would like to see all my alternatives check out the playlist here:

https://www.youtube.com/playlist?list=PL40dV1oxpkNnPYhJOi89WXJ44WsyLI9ZM


Don't miss out on next month’s Paper Pumpkin Kit - subscribe today!
SUBSCRIBE to Paper Pumpkin - click here –


Product List


See my Customer Appreciation Products for this month: http://creativechelsey.blogspot.com/p/shop-stampin-up-products.html

Follow me on Instagram https://www.instagram.com/creativechelsey

Or join my Facebook group https://www.facebook.com/groups/2221750878097906


To purchase any of the products you need to create this project visit https://www.stampinup.com?demoid=2042902


———————— My Favorite Supplies ————————

• Stampin' Seal+ [149699] $12.00 —— https://bit.ly/3Ibz8YK

• Multipurpose Liquid Glue [110755] $4.00 —— https://bit.ly/3IaGF9S

• Tear & Tape Adhesive [138995] $7.00 —— https://bit.ly/3ajQSo5

• Stampin' Dimensionals [104430] $4.25 —— https://bit.ly/3IbzezA

• Mini Glue Dots [103683] $5.25 —— https://bit.ly/3anAcw3

• Stampin' Pierce Mat [126199] $5.00 —— https://bit.ly/3IjEq4d

• Simply Shammy [147042] $8.50 —— https://bit.ly/3bQH7hE

• Paper Snips [103579] $11.00 —— https://bit.ly/3ulT6tV

• Take Your Pick [144107] $10.00 —— https://bit.ly/3IeYxR9

• Bone Folder [102300] $7.00 —— https://bit.ly/3uhErzZ

• Clear Block D [118485] $9.00 —— https://bit.ly/3uuabSs

• Paper Trimmer [152392] $25.00 —— https://bit.ly/3abvykH

• Stampin' Cut & Emboss Machine [149653] $125.00 —— https://bit.ly/3ujz8zU


Card #1 –

Soft Sea Foam Cardbase – 5 ½” x 8 ½” scored at 4 ¼”

Old Olive Envelope – kit

Mossy Meadow Stampin’ Write Marker

Old Olive Ink Pad

1 ½” or 1 ¾” Circle Punch

Linen Thread – 16”


1- Trim folded edges from one Green Envelope to separate the front from the back. Trim envelope flowers to measure 2 ½” x 4”. From the remainder of envelope cut a 3” x 4” layer. 

2- Distress the edges of the green layer. Attach flower panel to center of distressed green layer with Stampin’ Dimensionals.


3- Splatter ink with Old Olive Marker over the cardbase front . Attach flower layers to the center.


4- Stamp greeting in Old Olive ink and cut out with a Circle Punch that fits. Cut 16” of Linen Thread and add to the back of the greeting in a double faux bow. Attach as shown with Stampin’ Dimensionals.


Card #2

Petal Pink Cardbase – 5 ½” x 8 ½” scored at 4 ¼”

Melon Mambo Envelope – kit

Melon Mambo Stampin’ Write Marker

Memento Black Ink Pad

Old Olive Rectangle Strip – kit

Linen Thread – 12”

Greeting Label – kit

Spotlight on Nature Dies or other Large Shape Die


1- Trim folded edges from one Melon Mambo Envelope to separate the front from the back. Use a Large Circle Die to cut out the flowers. I used the largest die from the Spotlight on Nature Dies.


2- Trim the excess Melon Mambo Envelope Paper into a rectangle. Mine was 1 ¾” x 4 ¼”.


3- Splatter ink with Melon Mambo Marker over the cardbase front . Attach the Melon Mambo rectangle to the center.


4- Add the Large Flower Circle with dimensionals to the center of the cardbase.

5- Attach the small Old Olive Rectangle over the Circle on the right side.

6- Stamp greeting in Black ink on a matching Greeting Label and over the Old Olive Rectangle with dimensionals. Tie 12” of Linen Thread and add to the bottom right corner of the greeting.


Card #3

Thick Basic White Cardbase – 5 ½” x 8 ½” scored at 4 ¼”

Calypso Coral Envelope – kit

Basic Black Stampin’ Write Marker

Memento Black Ink Pad

Calypso Coral Rectangle Strip – kit

Leftover Old Olive & Melon Mambo Cardbase pieces – kit

Linen Thread – 12”

Greeting Label – kit


1- Trim folded edges from one Calypso Coral Envelope to separate the front from the back. Cut the flowers from the front to 2 ¾” x 4 ¼”. From the white space trim two ½” x 4 ¼” pieces.

2- Attach the two Calypso Coral  ½” strips to the top and bottom of the Flower piece. Make sure the left edges line up.


3- Cut the Melon Mambo & Old Olive scraps from the cardbases to 1 ½” x any size. Layer them on the right side of the Flower Piece in the open space.


4- Use a Black Marker to splatter ink over all the pieces. Make sure they are dry or they will smear. Maybe use a Black Stampin’ Blend Marker instead – it might not smear.

5- Once dry, add everything to the center of the White Cardbase.


6- Add the Small Calypso Coral Rectangle to the right side over the seam where the Old Olive & Melon Mambo pieces match. You can add it with a full size dimensional (or ½ size – watch the video).

7- Stamp the greeting in Black ink on a matching Label. Add over the Calypso Coral Rectangle with dimensionals or ½” size.

8- Tie a bow with 12” of Linen Thread and add in the bottom left corner of the Calypso Coral Rectangle.


I have also created a video walking you through each step.


To purchase any Stampin’ Up! products please visit

https://www.stampinup.com?demoid=2042902


Have a creative day!

Chelsey

chelsey@creativechelsey.com

Friday, August 16, 2024

Three Amazing Alternative Fun Fold Cards made with the July 2024 Paper Pumpkin Kit - Painted Petals

Hi Everyone and welcome to Paper Pumpkin Week here on Creative Chelsey. Over the next two days I am going to share with you 6 card ideas you can make with one set of supplies from the July 2024 Paper Pumpkin Kit called Painted Petals. Because I was so late in getting these cards out and next month’s kit is already on its way I decided to combine the cards into two tutorials.


The projects from this kit are amazing with beautiful floral designs and bright happy colors. I also love the greetings that are in the stamp set. They are perfect for any type of card. The kit creates a total of 9 greeting cards 3 in three different designs. If you would like to watch me unbox the kit and create these cards click on the playlist below.

https://www.youtube.com/playlist?list=PL40dV1oxpkNnPYhJOi89WXJ44WsyLI9ZM


Each month I take the contents from the paper pumpkin kits and make alternative projects. My cards are easy to follow and can be made by both experienced or new paper crafter. You may need just a couple other products to complete them. You can follow along with me using supplies you already have or purchase any products you see me use from my online store. A full supply list is below or on my blog – www.creativechelsey.com

Today I am sharing with you my first set of alternative cards. I have made all three cards as fun fold cards. These cards are super easy to make. There are some great tips & tricks I share so make sure to watch the whole video.


If you are interested in getting your own paper pumpkin subscription, please use this link to subscribe -  https://www.paperpumpkin.com/en-us/sign-up/?demoid=2042902

If this project inspires you to create something, I would love for you to tag me in any social media post using @creativechelsey | #creativechelsey or email me at chelsey@creativechelsey.com.

It is Paper Pumpkin Week here on Creative Chelsey. This is the first set of alternative cards this week. If you would like to see all my alternatives check out the playlist here:

https://www.youtube.com/playlist?list=PL40dV1oxpkNnPYhJOi89WXJ44WsyLI9ZM


Don't miss out on next month’s Paper Pumpkin Kit - subscribe today!
SUBSCRIBE to Paper Pumpkin - click here –


Product List


See my Customer Appreciation Products for this month: http://creativechelsey.blogspot.com/p/shop-stampin-up-products.html

Follow me on Instagram https://www.instagram.com/creativechelsey

Or join my Facebook group https://www.facebook.com/groups/2221750878097906


To purchase any of the products you need to create this project visit https://www.stampinup.com?demoid=2042902


———————— My Favorite Supplies ————————

• Stampin' Seal+ [149699] $12.00 —— https://bit.ly/3Ibz8YK

• Multipurpose Liquid Glue [110755] $4.00 —— https://bit.ly/3IaGF9S

• Tear & Tape Adhesive [138995] $7.00 —— https://bit.ly/3ajQSo5

• Stampin' Dimensionals [104430] $4.25 —— https://bit.ly/3IbzezA

• Mini Glue Dots [103683] $5.25 —— https://bit.ly/3anAcw3

• Stampin' Pierce Mat [126199] $5.00 —— https://bit.ly/3IjEq4d

• Simply Shammy [147042] $8.50 —— https://bit.ly/3bQH7hE

• Paper Snips [103579] $11.00 —— https://bit.ly/3ulT6tV

• Take Your Pick [144107] $10.00 —— https://bit.ly/3IeYxR9

• Bone Folder [102300] $7.00 —— https://bit.ly/3uhErzZ

• Clear Block D [118485] $9.00 —— https://bit.ly/3uuabSs

• Paper Trimmer [152392] $25.00 —— https://bit.ly/3abvykH

• Stampin' Cut & Emboss Machine [149653] $125.00 —— https://bit.ly/3ujz8zU


Card #1 –

Thick Basic White Cardbase – 4 ¼” x 11” scored at 5 ½”

Melon Mambo Cardbase – kit

Mossy Meadow Cardstock – 3 ¼” x 4 ½”

Melon Mambo Die Cut Flower – kit

Greeting Label – kit

Sequins – kit


1- Trim the Melon Mambo Cardbase along the score line at 4 ¼”. Cut the front down to 3 1/8” x 4 3/8” to frame the flowers. I trimmed 1/8” from the right side & 1” from the left side. ¾” from the top & 3/8” from the bottom.

2- From the back solid Melon Mambo side cut in half to 2 ¾” x 4 ¼”. Add a ½” score line that runs parallel to the long edge. Fold.


3- On the front of the White Cardbase, place the bottom edge inside the folded Melon Mambo piece, DO NOT GLUE. Make sure all the sides are lined up. Place only the front of the cardbase into your paper trimmer and cut a diagonal line through both the Melon Mambo piece and the front of the cardbase. This will insure that they are the same angle.


4- Now adhere the Melon Mambo piece to the bottom of the White Cardbase with the ½” fold attached to the back. The angle cuts from both the front of the cardbase and the Melon Mambo piece should meet together.


5- From the White piece that was cut from the front white cardbase. Stamp the Diagonal Lined design along the angled edge in Old Olive. Then cut off the stamped edge at ½” keeping the angle the same.

Attach this to the back of the front White Cardbase flap so you see about 1/8” of so of the diagonal detail. When the card is closed you will see this detail on top of the Melon Mambo piece.


6- Add the Soft Melon Mambo Flowers (from the cardbase in the kit) to the Mossy Meadow cardstock. Then add to the center of the card with dimensionals only attached to the top white area of the cardbase.

7- Add the Melon Mambo Die Cut Flowers to the center of the Soft Melon Mambo Flowers with dimensionals.


8- Stamp your greeting in Old Olive ink on a matching label from the kit. Add to the right area near the flowers with dimensionals.

9- Add three Sequins from the kit.


Card #2

Thick Basic White Cardbase – 5 ½” x 8 ½” scored at 2 ½” & 6 ¾”

Old Olive Cardbase – kit

White Die Cut Flower – kit

Greeting Label – kit

Sequins – kit


1- Cut the Old Olive Cardbase in half at the score line 4 ¼”. From the back Old Olive side trim a piece that is 1 ¾” x 5 ½”. From the front piece trim around the flowers to 2 ½” x 5 ½”. I removed ¼” from the left and 1 ½” from the right.


2- On the back of the 1 ½” front piece stamp the Diagonal Lined Design across the long edge in Calypso Coral ink. Trim this detail off at ½” and add it behind the Soft White Flower piece on the right edge so about 1/8” show.


3- Add the Soft Flowers to the left 2 ½” flap on the cardbase. Add the Old Olive piece to the 1 ¾” right flap.


4- Add the White Die Cut Flowers to the left flap with about ¼” hanging off the edge. Add this piece with dimensionals only on the left flap.

5- Stamp your greeting in Calypso Coral on a matching label and add over the flower stems with dimensionals.

6- Add three sequins.


Card #3

Basic White Cardbase – 5 ½” x 8 ½” scored at 4 ¼”

Calypso Coral Cardbase – kit

Basic White Cardstock – 4 1/8” x 5 3/8”

Calypso Coral Die Cut Flower – kit

Greeting Label – kit

Sequins – kit


1- Separate the front of the Calypso Coral Cardbase in half at the score line 4 ¼”. Adhere the Calypso Coral back piece to the front of the White Cardbase with adhesive ONLY around the outside edge, keep it to a small amount.

2- Use a large nesting shapes die like the Spotlight On Nature Dies to create an opening on the front of the cardbase. Make sure to open the cardbase so it doesn’t cut through the back, it should cut all the way through both pieces on the front.


3- Adhere the 4 1/8” x 5 3/8” White piece to the back of the front of the cardbase. Separate the large shape cut outs, white from the Calypso Coral. Adhere the White piece back into the opening. I added adhesive only around the outside edge. 


Use the next size down to cut out a smaller opening. This will give you a white border around the opening. Make sure to open the cardbase so it doesn’t cut through the back.


4- From the Front of the Calypso Coral cardbase Soft Flowers, score ¼” along the right edge. Fold and adhere it to the back of the White Cardbase on the right side. This will create a third panel that will sit inside the card showing through the opening.


5- Adhere the Calypso Coral Die Cut Flower to the front of the cardbase in the center of the opening. Add with dimensionals only at the top and bottom where it will attach to the front of the cardbase.

6- Stamp your greeting on the matching label in Memento Black ink. Adhere to the bottom right corner with dimensionals.

7- Add three sequins.


I have also created a video walking you through each step.

To purchase any Stampin’ Up! products please visit

https://www.stampinup.com?demoid=2042902


Have a creative day!

Chelsey

chelsey@creativechelsey.com