Wednesday, November 6, 2024

Last Alternative Card Made with an Envelope from October 2024 Paper Pumpkin Kit - Nests Of Christmas

Welcome to Paper Pumpkin Week here on Creative Chelsey. For the past couple days I have shared with you a ton of great card ideas you can make with one set of supplies from the October 2024 Paper Pumpkin Kit called Nest Of Christmas.

Today I am sharing my last alternative idea. This card uses the designs found on the front & flap of the envelope from the kit. By fussy cutting them out and adding them to a cardbase we can create a beautiful border element for our card.


Each month I take the contents from the paper pumpkin kits and make alternative projects. My cards are easy to follow and can be made by both experienced or new paper crafter. You may need just a couple other products to complete them. You can follow along with me using supplies you already have or purchase any products you see me use from my online store. A full supply list is below or on my blog –
www.creativechelsey.com


Do you want more alternative card ideas for your paper pumpkin kits? Then subscribe to paper pumpkin and choose me as your demonstrator. I have joined with other Stampin’ Up! Demonstrators to design 8-10 more alternative ideas in a PDF Tutorial (includes photos & instructions). My subscribers receive this PDF Tutorial along with an Exclusively Designed Card Kit, all for FREE!

Please use this link to subscribe -  https://www.paperpumpkin.com/en-us/sign-up/?demoid=2042902


If this project inspires you to create something, I would love for you to tag me in any social media post using @creativechelsey | #creativechelsey or email me at chelsey@creativechelsey.com.


It is Paper Pumpkin Week here on Creative Chelsey. This is the fourth and last alternative card idea this week. If you would like to see all my alternatives, check out the playlist here: https://www.youtube.com/playlist?list=PL40dV1oxpkNnE996_dBTQsDULDZgm1jVj

Don't miss out on next month’s Paper Pumpkin Kit - subscribe today!
SUBSCRIBE to Paper Pumpkin - click here –


Product List


See my Customer Appreciation Products for this month: http://creativechelsey.blogspot.com/p/shop-stampin-up-products.html

Follow me on Instagram https://www.instagram.com/creativechelsey

Or join my Facebook group https://www.facebook.com/groups/2221750878097906


To purchase any of the products you need to create this project visit https://www.stampinup.com?demoid=2042902


———————— My Favorite Supplies ————————

• Stampin' Seal+ [149699] $12.00 —— https://bit.ly/3Ibz8YK

• Multipurpose Liquid Glue [110755] $4.00 —— https://bit.ly/3IaGF9S

• Tear & Tape Adhesive [138995] $7.00 —— https://bit.ly/3ajQSo5

• Stampin' Dimensionals [104430] $4.25 —— https://bit.ly/3IbzezA

• Mini Glue Dots [103683] $5.25 —— https://bit.ly/3anAcw3

• Stampin' Pierce Mat [126199] $5.00 —— https://bit.ly/3IjEq4d

• Simply Shammy [147042] $8.50 —— https://bit.ly/3bQH7hE

• Paper Snips [103579] $11.00 —— https://bit.ly/3ulT6tV

• Take Your Pick [144107] $10.00 —— https://bit.ly/3IeYxR9

• Bone Folder [102300] $7.00 —— https://bit.ly/3uhErzZ

• Clear Block D [118485] $9.00 —— https://bit.ly/3uuabSs

• Paper Trimmer [152392] $25.00 —— https://bit.ly/3abvykH

• Stampin' Cut & Emboss Machine [149653] $125.00 —— https://bit.ly/3ujz8zU


Thick Basic White Cardbase – 5 ½” x 8 ½” scored at 4 ¼”

Back & Front of an Envelope – Kit

Greeting Label – Kit

Large Green Rectangle from the Center of the Cardbase – Kit

Shaded Spruce Ribbon – 6”

White Baker’s Twine – 20”


1- If you haven’t already trim around one Envelope to open the front from the back. Do not remove the Green Foil Trim.

2- Fussy cut out all the Pine Branch Designs from the Front of the Envelope & the Flap.


3- Line up the long edge of the Front of the Envelope piece (after you have removed the Pine Branches) on your paper trimmer and cut 5/8” from the small edge with the hole from the Pine Branch, see video.


4- Adhere the large piece to the bottom of the Cardbase, then attach the 5/8” Strip to the top with adhesive only along the top edge. Make sure to line up the Green Foil Edge.


5- Tuck the Flap Pine Branch Fussy Cut piece under the 5/8” Strip, only add adhesive to the top edge so you can slide stuff underneath.

6- Add the Corner Pine Branch in the top left corner with adhesive along the outer edges.


7- Stamp the Pine Branch and Scattered Dots in Shaded Spruce in the top left & bottom right corners of the Shaded Spruce Rectangle from the Cardbase.


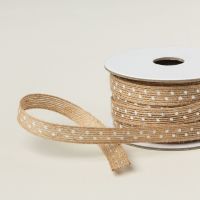
8- Wrap 6” of Shaded Spruce Ribbon around the Shaded Spruce Piece about 1” from the bottom edge.. Attach the ends to the back.

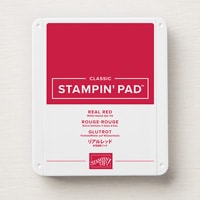
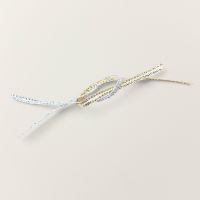
9- Color 20” White Twine with your Real Red Stampin’ Blends and let dry. Wrap around the center of the Shaded Spruce and tie a bow on the right side. Then add this piece to the center of the cardbase under the Pine Branches with adhesive at the top and dimensionals at the bottom.


10- Add Dimensionals under the Pine Branches that layer over the Shaded Spruce piece.

11- Stamp your greeting on one of the Labels from the Kit. Add above the Ribbons with dimensionals.


12- Stamp the Cardinal in Memento Black on a Scrap of White Envelope Paper. Color with Real Red, Daffodil Delight & Cajun Craze Blends. Fussy cut out and add between the Pine Branches and Greeting with dimensionals.

All Done!


I have also created a video walking you through each step.

To purchase any Stampin’ Up! products please visit

https://www.stampinup.com?demoid=2042902


Have a creative day!

Chelsey

chelsey@creativechelsey.com

Saturday, November 2, 2024

Sheetload of Cards - November 2024 - Mix & Match Patterns From Different Packs!

Welcome to Creative Chelsey. Today, I am sharing my set of cards made with the November 2024 Sheetload Of Cards Template created by Alisha, of Call Me Crafty Al. Every month on the first she creates great templates which she shares on her YouTube Channel for free. You can get your free template from her channel, the link is below.


Make sure to also see what everyone has created this month. Start with my video below and then use the links found in the description box on YouTube to watch the rest.

With the PDF instructions she provides you can make 8 Cards with just 2 sheets of 12” x 12” pattern paper.


I wanted strong fall colors and textures for my cards this month and chose to use one pattern from two different Designer Series Paper packs. They are the Country Woods Pack which is where I pulled the woodgrain pattern & Take To the Sky Pack which has this great plaid pattern. Check out the links below to see all the patterns in each pack.


This beautiful large leaf and the two die cuts are from the Changing Leaves Bundle. I love how they layer so well together and the touch of Cooper from the Oxidized Cooper Specialty Paper adds the perfect accent.


The greeting comes from the Simply Zinnia Bundle. I love how it looks with a little heat embossing. It really helps the greeting really pop from the Dark Early Espresso Cardstock.


Of course I wanted to add an fun embellishment and another touch of copper with the Neutral Sequins.

I love making cards using the Sheetload Template. If you have never played around with the templates, make sure to grab yours by clicking on the link here.

************** 

Find out how to GET YOUR FREE COPY of the November 2024 SheetLoad of Cards, here: https://youtu.be/QxIRQGsqBts

*****************


I love how these cards come together perfectly and pulling in many different products. I hope you this may help you look at your supplies a little differently and see what you can bring together to make gorgeous cards.


As a part of her Creative Team, I get a sneak peek at her templates and then get to design and share my cards with you. 


Here are my Current Customer Appreciation Products: http://creativechelsey.blogspot.com/p/shop-stampin-up-products.html

Follow me on Instagram https://www.instagram.com/creativechelsey

Or join my Facebook group https://www.facebook.com/groups/2221750878097906


Product List


I have shared and talked about these cards on my YouTube Channel, so check them out.


To purchase any of the products you see in this video visit https://www.stampinup.com?demoid=2042902


Have a creative day!

Chelsey

chelsey@creativechelsey.com

Friday, November 1, 2024

Unique Cardinal Coloring Ideas for the October 2024 Paper Pumpkin Kit - Stampin' Up!

Welcome to Paper Pumpkin Week here on Creative Chelsey. For the past couple days I have shared with you a ton of great card ideas you can make with one set of supplies from the October 2024 Paper Pumpkin Kit called Nest Of Christmas.


The two cards I am sharing today, use more of the beautiful patterns found inside the trifold Cardbases. Along with tags & leaves cut from the coordinating Merry Tags & More Dies. I also love the neutral coloring the Female Cardinals and wanted to share two ways to color the birds to give you more options other than only red.


Each month I take the contents from the paper pumpkin kits and make alternative projects. My cards are easy to follow and can be made by both experienced or new paper crafter. You may need just a couple other products to complete them. You can follow along with me using supplies you already have or purchase any products you see me use from my online store. A full supply list is below or on my blog –
www.creativechelsey.com


If you are new to Paper Pumpkin and are interested in getting your own monthly crafting kit you can subscribe using the link below. I love my subscribers and send them an exclusive card kit each month. This kit includes the cardstock and embellishments they need to make two of my exclusive card design with the Stamp Set & Ink from that month’s kit.

Please use this link to subscribe -  https://www.paperpumpkin.com/en-us/sign-up/?demoid=2042902


If this project inspires you to create something, I would love for you to tag me in any social media post using @creativechelsey | #creativechelsey or email me at chelsey@creativechelsey.com.


It is Paper Pumpkin Week here on Creative Chelsey. This is the third alternative card idea this week. If you would like to see all my alternatives, check out the playlist here: https://www.youtube.com/playlist?list=PL40dV1oxpkNnE996_dBTQsDULDZgm1jVj


Don't miss out on next month’s Paper Pumpkin Kit - subscribe today!
SUBSCRIBE to Paper Pumpkin - click here –


Product List


See my Customer Appreciation Products for this month: http://creativechelsey.blogspot.com/p/shop-stampin-up-products.html

Follow me on Instagram https://www.instagram.com/creativechelsey

Or join my Facebook group https://www.facebook.com/groups/2221750878097906


To purchase any of the products you need to create this project visit https://www.stampinup.com?demoid=2042902


———————— My Favorite Supplies ————————

• Stampin' Seal+ [149699] $12.00 —— https://bit.ly/3Ibz8YK

• Multipurpose Liquid Glue [110755] $4.00 —— https://bit.ly/3IaGF9S

• Tear & Tape Adhesive [138995] $7.00 —— https://bit.ly/3ajQSo5

• Stampin' Dimensionals [104430] $4.25 —— https://bit.ly/3IbzezA

• Mini Glue Dots [103683] $5.25 —— https://bit.ly/3anAcw3

• Stampin' Pierce Mat [126199] $5.00 —— https://bit.ly/3IjEq4d

• Simply Shammy [147042] $8.50 —— https://bit.ly/3bQH7hE

• Paper Snips [103579] $11.00 —— https://bit.ly/3ulT6tV

• Take Your Pick [144107] $10.00 —— https://bit.ly/3IeYxR9

• Bone Folder [102300] $7.00 —— https://bit.ly/3uhErzZ

• Clear Block D [118485] $9.00 —— https://bit.ly/3uuabSs

• Paper Trimmer [152392] $25.00 —— https://bit.ly/3abvykH

• Stampin' Cut & Emboss Machine [149653] $125.00 —— https://bit.ly/3ujz8zU


Card #1 – Joyful Christmas Season

Thick Basic White Cardbase – 5 ½” x 8 ½” scored at 4 ¼”

Shaded Spruce Cardstock – scrap

Real Red Cardstock – scrap for greeting

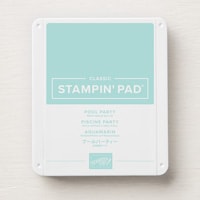
Pool Party & Navy Branch Pattern Leftover Pieces – Kit

Shaded Spruce ½” Strip Leftover from Frame – Kit

Back of Envelope for Stamping – Kit


1- Adhere the 2 ½” Pool Party Pattern on the right edge of the Cardbase. Add the 1 ½” Night of Navy Branch Pattern to the left with a ½” Strip of Shaded Spruce pattern (from the Square Frame Cardbase) between the two to cover the gap.


2- Stamp in Memento Black ink, then color one Cardinal on the Back Side of one Envelope (we have already cut and removed it in a previous alternative). I used Daffodil Delight, Crumb Cake and Real Red Blends to color, you can see the step-by-step in the video below. Fussy cut out.


3- Also stamp 3 Pine Branches in Shaded Spruce ink and Two Berry Clusters in Memento Black ink colored with Real Red Blends on the same Envelope paper. Fussy cut out.


4- Use the Merry Tags & More Dies to cut out two large Leaves from Shaded Spruce Cardstock and add these in a “V” shape in the center of the Cardbase.

5- Layer the Cardinal a little to left over center over the Leaves with dimensionals.

6- Stamp your greeting in VersaMark on Real Red Cardstock, make sure to use an Embossing Buddy before you stamp. Cover in White Embossing Powder and heat until shiny. Trim around each word and adhere to the right or below the Cardinal with dimensionals.


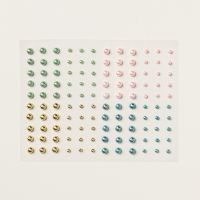
7- Tuck in the Stamped Pine Branches and Berries. Then add 3-5 Gold Sparkle Gems.

All Done!


Card #2 – Joyful Thoughts

Basic Beige Cardbase – 5 ½” x 8 ½” scored at 4 ¼”

Pool Party Cardstock – scrap for tag

Garden Green Cardstock – scrap

Night of Navy Cardstock - scrap

Navy Branch Pattern Leftover Piece – Kit

Shaded Spruce Leftover Strip – Kit

Real Red Ribbon – Kit


1- Cut the 2 ½” Navy Branch Pattern piece in half at 2 ¾”. Adhere them to the cardbase at angles, one in the top right corner and the other in the bottom left corner.

2- Cut out a Banner from each side of the 1 ½” x 4 ¼” Shaded Spruce Leftover Piece (from a previous alternative) and add at an angle with dimensionals to the center.


3- Cut a Tag with the Merry Tag & More Die Set from Pool Party Cardstock. Then remove the Hole Punch so it is a straight edge. Stamp the Splatter Dots in Night of Navy randomly around the Tag. Adhere the Real Red Ribbon across the Tag about ¾” from the bottom.


4- Stamp in Memento Black ink, then color one Cardinal on the Back Side of one Envelope. I used Crumb Cake and Real Red Blends to color, you can see the step-by-step in the video below. Fussy cut out and add to the center of the Tag with dimensionals.

5- Cut out One Large Leaf using the Merry Tags & More Dies from Garden Green Cardstock. Adhere it to the Left and under the Cardinal.


6- Stamp your greeting in VersaMark on Night of Navy Cardstock, make sure to use an Embossing Buddy before you stamp. Cover in White Embossing Powder and heat until shiny. Trim around each word and adhere around the Cardinal with dimensionals.


7- Add the Tag to the center of the card with dimensionals at the top and bottom. Add 3-6 Silver Sparkle Gems around the Tag and Cardbase.

All Done!


I have also created a video walking you through each step.

To purchase any Stampin’ Up! products please visit

https://www.stampinup.com?demoid=2042902


Have a creative day!

Chelsey

chelsey@creativechelsey.com