Friday, November 22, 2024

Global Stampin' Video Hop: Christmas Is In The Air - Great Tips To Adding Little Details - Stampin Up! Handmade Card Tutorial

It is time for another tutorial for the Global Stampin’ Video Hop on YouTube. Each month on the fourth Friday Stampin’ Up Demonstrators from around the world come together and share their projects based on a monthly theme. November’s Theme is CHRISTMAS. I am so excited to see what everyone creates this month, make sure to watch my video below and then jump around and see them all.


A couple weeks ago we had a 3-day snow storm which created the most beautiful winter scene. All the trees were covered in a blanket of white snow and had a soft glow every evening. I was inspired by the beauty and wanted to create a Christmas Card that captured the feeling.


I combined three different Stamp & Die Bundles to create my card. They are the Peaceful Season Bundle for the Greetings, Forever Forest Bundle for the Trees, & Merriest Trees Bundle for the Gifts. I love how fun it is to combine different sets together!


I also used a lot of different techniques to create this card, you can find the step-by-step instructions below. Some of the techniques are: Emboss Resist, Water Lifting, Dimensionals Die Cutting, Creating a Die Cut Template for Small Images.


I hope you are inspired today as you see all the Christmas Projects from everyone while jumping from video to video. If you are inspired to make a project from something you see today please share it with us, we would love to see what you come up with. You can tag me @creativechelsey in any social media post.

See my Customer Appreciation Products for this month: http://creativechelsey.blogspot.com/p/shop-stampin-up-products.html

Follow me on Instagram https://www.instagram.com/creativechelsey

Or join my Facebook group https://www.facebook.com/groups/2221750878097906

To purchase any of the products you need to create this project visit

https://www.stampinup.com?demoid=2042902

Product List

———————— My Favorite Supplies ————————

• Foam Adhesive Sheets [152815] $8.25 —— https://bit.ly/49eQBwZ

• Stampin' Seal+ [149699] $12.00 —— https://bit.ly/3Ibz8YK

• Multipurpose Liquid Glue [110755] $4.00 —— https://bit.ly/3IaGF9S

• Tear & Tape Adhesive [138995] $7.00 —— https://bit.ly/3ajQSo5

• Stampin' Dimensionals [104430] $4.25 —— https://bit.ly/3IbzezA

• Mini Glue Dots [103683] $5.25 —— https://bit.ly/3anAcw3

• Stampin' Pierce Mat [126199] $5.00 —— https://bit.ly/3IjEq4d

• Simply Shammy [147042] $8.50 —— https://bit.ly/3bQH7hE

• Paper Snips [103579] $11.00 —— https://bit.ly/3ulT6tV

• Take Your Pick [144107] $10.00 —— https://bit.ly/3IeYxR9

• Bone Folder [102300] $7.00 —— https://bit.ly/3uhErzZ

• Clear Block D [118485] $9.00 —— https://bit.ly/3uuabSs

• Paper Trimmer [152392] $25.00 —— https://bit.ly/3abvykH

• Stampin' Cut & Emboss Machine [149653] $125.00 —— https://bit.ly/3ujz8zU


Misty Moonlight Cardbase – 5 ½” x 8 ½” scored at 4 ¼”

Basic White Cardstock – (2) 4” x 5 ¼” & scraps for stamping & die cuts

Cherry Cobbler Cardstock – scraps for stamping & die cuts

Silver Foil – scrap for die cut tree

Silver Ribbon – 12”


Emboss Resist Technique:

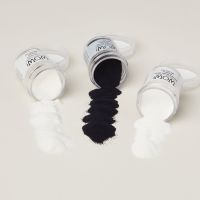
1- Heat Emboss on one of the Basic White pieces stamp the group of three trees across the cardstock. Begin by adding Embossing Powder to the cardstock, stamp in VersaMark, apply White Embossing Powder, remove excess, and heat until set.

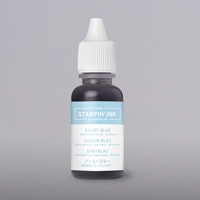
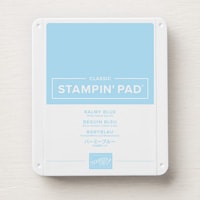
2- With a Blending Brush add Balmy Blue ink to the center, then add Misty Moonlight ink to the sides and a little at the top & bottom. This will create a glowing look. Make sure to remove the excess ink on top of the embossed trees with a paper towel.


Water Lifting Technique:

3- With a little water splatter over the blend, let the water sit for a moment and then blot with a paper towel to pick up the water & ink. This will create a splatter effect. Add everything to the front of the Misty Moonlight Cardbase.


4- Cut out a Large Single Tree from the Forever Forest Dies in Silver Foil. Add to the left of center with dimensionals. I cut a strip from Adhesive Sheet and placed it down the middle of the tree.


Creating a Die Cut Template for Small Images

5- Add all the Small Presents from the Merriest Trees Set to one side of a Clear Block, make sure to leave enough space between the stamps for the dies to sit next to each other. I also add the Bows to the other side of the same clear block.

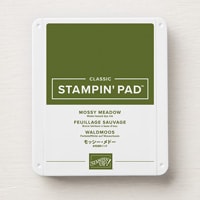
6- Ink and stamp both the presents & bows on Basic White Cardstock scraps in 3 coordinating colors. I used: Misty Moonlight, Cherry Cobbler & Garden Green.


7- Lay ALL the coordinating dies over the matching stamped image. Hold in place with tape. Cut out all images at one time. Remove the loose images, but not the dies – This is your die cutting template that you can use over and over as long as you don’t move the stamps on the clear block. Repeat with all the colors & bows.


8- Add the presents & bows to the bas of the Silver Tree with glue dots & dimensionals.


Dimensionals Die Cutting:

9- Add Adhesive Sheet to the back of a scrap of Cherry Cobbler Cardstock. Die Cut “Christmas”. You may want to add a thin shim to make sure the die cut goes through all the layers. Also cut out the “Back Christmas Piece” in Basic White Cardstock, no adhesive sheet.

10- Remove only the paper backing and any pieces that are not part of the “Christmas” die cut. Like the inside of the “a”. Try to keep “Christmas” inside the die. It will help keep the shape as you add it to the backing.

11- Remove the White Back Piece from the Die and carefully add the Cherry Cobbler Christmas, still in the die, to the center. Then remove the die.

If your Christmas doesn’t stay inside the die, you can carefully add it to the center, you will want to start on one side and slowly adjust the shape to fit. 


12- Heat Emboss “Is In The Air” with White Embossing Powder on Cherry Cobbler Cardstock. See this blog post for getting good heat emboss results every time: https://creativechelsey.blogspot.com/2024/11/basic-paper-crafting-techniques-heat.html

Trim around the greeting and add above the presents with a dimensional on the right and glue dot on the left over the tree.

Add "Christmas" above “Is In The Air” with dimensionals on the sides and glue dot in the middle where it will go over the tree.


13- Create a faux bow with 12” of Silver Ribbon and tuck it under the “s”.


14- If you want to add a design to the inside, you can do a little blending on the bottom of the other 4” x 5 ¼” Basic White piece with the Misty Moonlight & Balmy Blue ink & Blending Brush. Then stamp a small tree in Garden Green and another greeting in Cherry Cobbler in the bottom left corner.

All Done!


If you would like to watch me create this card with step-by-step tips and directions, please watch this video: https://youtu.be/DEW_FojprXg


If you need any product to make these cards, please visit my online store: http://www.stampinup.com?demoid=2042902


Have a creative day,

Chelsey

chelsey@creativechelsey.com


Tuesday, November 19, 2024

Basic Paper Crafting Techniques - Heat Embossing - Get Great Results Every Time!

Today I would like to share with you some great tips when Heat Embossing. 

I follow these steps every single time I heat emboss and find that they give me perfect results every time. If you are nervous about trying Heat Embossing then follow these simple steps below and I promise you will get great results.

If you have any issues, you can email me and I would be happy to help - chelsey@creativechelsey.com

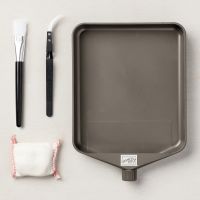
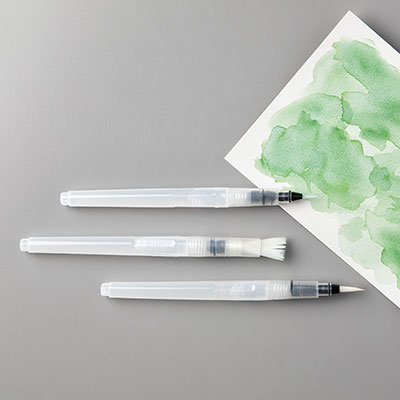
1- You need the right tools, I recommend:

Product List


2- Add Embossing Buddy to the top of your cardstock

Be generous with the Embossing Buddy and make sure to cover most of your cardstock. This will keep the Embossing Powder from sticking to fingerprints or other area you don't want.


3- Stamp your Image in VersaMark Ink

VersaMark is the best ink to work with when Heat Embossing. It is a sticky ink and so will hold the Embossing Powder in place.

*If you are using a different type of ink (Classic Stampin' Ink Pad) you will need to apply the Embossing Powder quickly while it is still wet. Once it is dry the Embossing Powder will not stick to the ink.

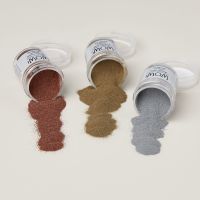
4- Pour the Embossing Powder over the stamped image & tap off the excess. 

If needed use a Small Brush to remove any Powder that has stuck to the Cardstock. 

I like to do this over a Clear Drawer so I don't have to put the Embossing Powder back into the small container. I keep it loose in the drawer and have multiples stacked together. One for each color of Embossing Powder. They are easy to pull out & put back. 

Here are the trays I use for my Embossing Powders: https://amzn.to/47Cu0JE

I have the four drawer style and have two - so a total of 8 drawers. They stack nicely on top of each other. As an Amazon Associate I earn from qualifying purchases.


5- Heat with the Heat Tool from under the cardstock.

I think this gives the embossed area a smooth top and you don't risk blowing away any of the powder before it is set.

I use Setting #2 on my Heat Tool. You can also warm up your Heat Tool before applying it to the cardstock. 

Keep the Heat Tool moving, don't let it just sit under the cardstock, I could scorch the paper.

Once you see the Embossing Powder melt and get shiny, move to the next area.

Use Tweezers to hold the paper so you don't burn your finger, especially on small pieces of cardstock.


6- Let Cool, and wipe of the Embossing Buddy with a Microfiber or Knit Hand Towel. 

This should bring the cardstock back to it's original color.


I hope these tips help you the next time you use Heat Embossing on your projects. 


If you would like to watch me walk through each step, I have also made a video.


To purchase any of the products you need to create this project visit https://www.stampinup.com?demoid=2042902


Have a Creative Day,

Chelsey


Monday, November 18, 2024

Thankful For You Sale

I am so grateful for your support and love this past year. It has been a wonderful year of creativity and fun. I want to say thank you to so many of you who have visited my blog, watched my videos, left supportive and kind comments on my social media posts, purchased Stampin' Up! products from me, participated in one or more online classes with me, and who have joined my Creative & Company Team of Demonstrators. Thank you so much!


I love this time of year when we reach out in the spirit of Thanksgiving with notes of love and kindness. For me one way I can show how grateful I am to you is to put together some fun Creative Chelsey promotions. This year I am offering three different promotions. All the details are below. Please reach out if you have any questions, I am always happy to help (chelsey@creativechelsey.com).


Bundle 4 Future Online Classes and get $10 off.


I know many of you love my online classes and I want to give you the opportunity to get them at an even better price. Purchase 4 classes for 2025 normally $140 ($35 each) and get $10 off - $130. This price is only available between Nov. 18 - Nov. 30, 2024.


You may only purchase a total of Two Bundles for a total of 8 classes in 2025. There will only be 9 classes in total in 2025. I do not know what Stamp Sets, Techniques or Dates the classes will be held, but I will have classes in January, February, March, April, May, August, September, October & November 2025. 


Only Participants in the United States may purchase these prepaid classes. 


*To redeem your Prepaid Classes, please select the option when registering for the class each month through the Google Form. Or you can email me during registration. All Prepaid classes need to be redeemed by December 31, 2025, on January 1, 2026 unredeemed classes will expire.


cards
Powered by paypal


25% OFF All Past Online Classes


Did you miss one or more of my classes this year? Or what about last year? Visit my Etsy Shop - https://creativechelsey.etsy.com to get 25% off all my Past Online Class Digital Downloads. No Class Kit included. This price is only available between Nov. 18 - Nov. 30, 2024.  

Learn the fun techniques, get great paper crafting tips, and create beautiful cards from any past class. 


If you don't see a class you know I have done, please email me and I will upload it for you. Some of my very first classes have not been added to my etsy shop yet. I only add them when someone shows interest in it. You can see a list of my earliest classes on my blog - https://creativechelsey.blogspot.com/p/past-online-classes.html please keep in mind that the discount is not applied to the ones listed on my blog. Email me with any questions.


Mystery Grab Bags


Get yourself the ultimate present this year with my Mystery Grab Bags. All products are Brand New or Gently Used, Retired Stampin' Up Products. Prices include shipping to you. Only available for shipping in the United States. You may purchase as many Grab Bags as you would like, however, there may be the same products in different Bags. 

All Mystery Grab Bags will be shipped after December 1, 2024 to the address provided by PayPal. Please double check that this address is correct. 

Grab Bags are only available to purchase between Nov. 18 - Nov. 30, 2024


I have Three Options Available:

$30 Mystery Grab Bag - includes 10 items:

  • One Stamp Set
  • One Stamp & Dies Bundle (counts as 2 items)
  • Two Packs of Designer Series Paper
  • One Past Class Kit with Video & PDF Tutorials (sent by email)
  • Two Rolls of Ribbon
  • Two Embellishments

$45 Mystery Grab Bag - 15 items:

  • Two Stamp Sets
  • Two Stamp & Dies Bundle (counts as 4 items)
  • Two Packs of Designer Series Paper
  • One Past Class Kit with Video & PDF Tutorials (sent by email)
  • Three Rolls of Ribbon
  • Three Embellishments

$60 Mystery Grab Bag - 20 items:

  • Three Stamp Sets
  • Three Stamp & Dies Bundle (counts as 6 items)
  • Three Packs of Designer Series Paper
  • One Past Class Kit with Video & PDF Tutorials (sent by email)
  • Three Rolls of Ribbon
  • Three Embellishments
  • One Surprise Item

cards
Powered by paypal


Happy Thanksgiving!

Please reach out if you have any questions on these promotions.

Thank you again for all your love and support 🩷

Chelsey