
Welcome to Paper Pumpkin Week here on
Creative Chelsey! Today I’m sharing my sixth alternative card idea using
the August 2026 Kindred Greetings Paper Pumpkin Kit. This is the third
video in my alternative card series, and I’ve combined a few cards with similar
techniques to share even more creative inspiration with you.

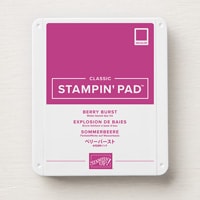
For this card, I combined a Berry Burst blended background, stamped branches and splatter, a vellum circle, and layered die-cut leaves. I also added a shimmer-brushed greeting to give the card a little extra sparkle!

Have You Joined the
Paper Pumpkin Cut Club Yet?

If you love
making alternatives each month and want exclusive perks, make sure you join my
Paper Pumpkin Cut Club on YouTube! For only $4.99/month, members receive:
✨ Loyalty badges & custom emojis
✨ Early access to all my Paper Pumpkin alternative
videos
✨ Member shout-outs
✨ The Exclusive
Monthly Cutting Guide
✨ Members-only livestreams & behind-the-scenes
sneak peeks
The Cutting Guide
is one of the most requested resources I create—it shows exactly how to cut
your cardbases/gift boxes to make all of my alternatives. Cut Club members get
it EVERY MONTH.
You can join here → https://www.youtube.com/channel/UCszCS397ptot3vJdvLCirTg/join

Want to Subscribe to
Paper Pumpkin?

If you’re not
already receiving Paper Pumpkin, now is a great time to join! My subscribers
receive:
🎁 A FREE
exclusive card kit designed by me each month
🎁 The
Exclusive Monthly Cutting Guide
🎁 A
monthly live crafting session
🎁 A
multi-demonstrator PDF tutorial packed with 7–10 alternate ideas
🎁 And of
course—my support, tips, and creative inspiration!
Subscribe here and select me as your
demonstrator (Chelsey Christensen–CO):
https://www.stampinup.com/products/paper-pumpkin-subscription/?demoid=2042902

Supplies









———————— My Favorite Supplies ————————
• Stampin' Seal+ [149699] —— https://bit.ly/3Ibz8YK
• Multipurpose Liquid Glue [110755] —— https://bit.ly/3IaGF9S
• Tear & Tape Adhesive [138995] —— https://bit.ly/3ajQSo5
• Stampin' Dimensionals [104430] —— https://bit.ly/3IbzezA
• Mini Glue Dots [103683] $7.25 —— https://bit.ly/3anAcw3
• Stampin' Pierce Mat [126199] —— https://bit.ly/3IjEq4d
• Simply Shammy [147042] —— https://bit.ly/3bQH7hE
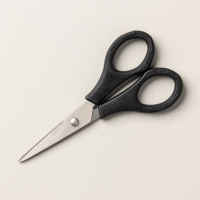
• Paper Snips [103579] —— https://bit.ly/3ulT6tV
• Take Your Pick [144107] —— https://bit.ly/3IeYxR9
• Bone Folder [102300] —— https://bit.ly/3uhErzZ
• Clear Block D [118485] —— https://bit.ly/3uuabSs
• Paper Trimmer [152392] —— https://bit.ly/3abvykH
• Stampin' Cut & Emboss Machine
[149653] —— https://bit.ly/3ujz8zU
Supplies You’ll Need
From the August 2026 Kindred Greetings Paper Pumpkin Kit
●
Thick Basic White Cardbase -
5-1/2" x 8-1/2" scored at 4-1/4" vertical
●
Vellum Cardstock - 3" Circle
●
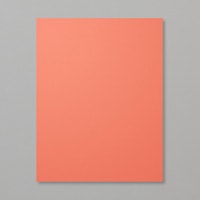
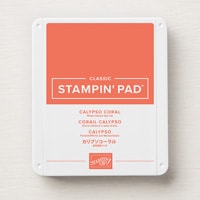
Calypso Coral - 1-1/2" x
2-3/4"
●
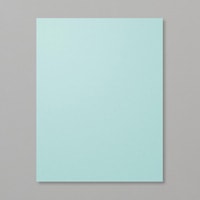
Pool Party - scrap for die cut
leaves
●
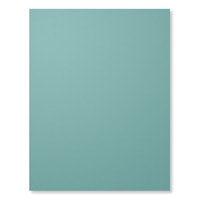
Lost Lagoon - scrap for die cut
leaves
●
Basic White - scrap for stamped
heart
●
Gray & White Twine - 12"
●
Long Rectangle*
●
One linen-textured white cardbase*
- 4” x 5-1/2"
Tip: You can substitute similar colors
from your stash to create a completely different look!

Step-by-Step Instructions

Step 1: Prepare the Die-Cut Greeting

Cut the word “hello”
from Calypso Coral cardstock using the Circle of Seasons Dies.
Place the die-cut on
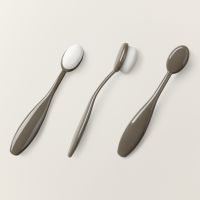
your silicone craft sheet and brush the top with the Crisp Cantaloupe Shimmer
Brush.
Set it aside to dry before assembling the
card.
Step 2: Add Color to the Greeting Label

Use the Crisp
Cantaloupe Shimmer Brush to add a light wash of color across the label.
Apply the color in
loose strokes, allowing some of the brush marks to show for added texture.
Set the label aside to dry.
Step 3: Blend the Linen-Textured Background

Using a blending
brush and Berry Burst ink, blend color into the center of the piece.
Keep the color
concentrated toward the middle rather than blending all the way to the edges.
This creates a soft area of color while allowing the beautiful linen texture to
remain visible.
Add more ink gradually until you achieve the
depth of color you like.
Step 4: Stamp the Branches and Splatter

Stamp the image off
once on scratch paper, then stamp it onto the blended panel.
Repeat the process
across the panel, arranging the branches from one side to the other to create a
hedge-like row of leaves.
Ink the splatter stamp with Berry Burst ink and stamp splatters around the branches.
Add as much or as little splatter as you
prefer.
Step 5: Trim and Attach the Background

To achieve this
size, remove approximately ¼" from the top and bottom, then trim ¼"
from one side as needed.
Attach the panel to
a Thick Basic White card base using liquid adhesive.
Smooth the panel down carefully, I like to do
it from the inside of the card, if needed.
Step 6: Stamp the Hearts

Using Crisp
Cantaloupe ink, stamp several small hearts onto the background in the open
spaces around the branches.
Stamp one additional
heart onto a scrap of Basic White cardstock.
Set the extra heart aside to cut out and use
as a raised embellishment later.
Step 7: Stamp the Greeting

Stamp the word “friend”
to the right of “hello” using Calypso Coral ink.
Allow the ink to dry before assembling the
greeting.
Step 8: Attach the Vellum Circle
Add a small amount
of liquid adhesive to the center and back of the vellum circle, where it will
be hidden by the greeting.
Position the circle
over the lower portion of the stamped branches.
Press gently to secure it without adding
visible adhesive around the edges.
Step 9: Add the Twine and Die-Cut Leaves

Arrange the twine
behind the greeting and secure it on the back with adhesive.
Create a single bow,
adjusting the loops until you like the shape and size.
Attach the Lost
Lagoon and Pool Party die-cut leaves using glue dots behind the twine.
Arrange the leaves
on either side of the bow, tucking some of the pieces together to create a
layered look.
Adjust the bow and leaves until everything
sits nicely behind the greeting.
Step 10: Assemble the Greeting and Finish the Card

Trim around the
extra stamped heart from Step 6.
Add a small
dimensional to the back of the heart and place it near the layered leaves.
Adjust the leaves
and heart so they overlap naturally.
Check that all the pieces are secure, and your
card is complete!
Make It Your Own
One of my favorite things about
alternative Paper Pumpkin cards is how easy it is to change the look with
different colors and supplies. Try a different ink color for the blended
background, switch out the die-cut leaves, or use another greeting to make this
design your own.
The combination of the linen texture,
soft blending, stamped branches, vellum, and layered die cuts creates a
beautiful card with lots of dimension and detail.
Watch the Full Video Tutorial
Want to see exactly how I created this
card? Watch my YouTube tutorial for the full step-by-step process, including
blending the background, stamping the branches, and assembling all the layered
details.
Be sure to subscribe to my YouTube
channel for more Paper Pumpkin alternative card ideas!
If you enjoy seeing how to stretch your monthly kit into something new, I have
lots of creative inspiration to share.
If this project inspires you to create
something, I would love for you to tag me on social media using @creativechelsey
| #creativechelsey or email me at chelsey@creativechelsey.com.
Have a creative day,
Chelsey
No comments:
Post a Comment