Welcome to Paper Pumpkin Week here at Creative Chelsey. I love getting my Paper Pumpkin Kit every month and creating fun alternative projects using the supplies in the kit. Today is my third alternative project using the August 2020 Paper Pumpkin Kit – World’s Greatest. For this card I was inspired to use a paper rosette and make a ribbon banner. I have some fun tips and tricks that will make creating these easier. I love creating alternative cards with Paper Pumpkin Kits so make sure to come back for more videos as I continue to create with this month’s kit. I would love to see your finished creations that are inspired by this tutorial! You can tag me in any social media post using @creativechelsey | #creativechelsey or email me at chelsey@creativechelsey.com
It is Paper Pumpkin Week here on Creative Chelsey. This is the third tutorial this week. If you missed some check out the playlist here: https://www.youtube.com/playlist?list=PL40dV1oxpkNmlqohlspebZM6XBEYxNQvq
Watch me UNBOX this month’s Paper Pumpkin Kit here: https://youtu.be/OXlVAwUfaEE
Follow me on Instagram https://www.instagram.com/creativechelsey/
Or join my Facebook group https://www.facebook.com/groups/2221750878097906
To purchase any of the products you need to create this project visit https://www.stampinup.com?demoid=2042902
Don't miss out on next month’s Paper Pumpkin Kit - subscribe today!
SUBSCRIBE to Paper Pumpkin - click here –
https://www.paperpumpkin.com/en-us/sign-up/?demoid=2042902
Here are the dimensions and pieces you will need to create these cards:
From the Kit:
Half of the Mint Macaron pattern cardbase (cut at 4 ¼”)
1 Bumblebee watercolor piece
1 Small circle die cut
1 Gold circle die cut
Gold Stars
6” of Pacific Point 1” Ribbon
Extra Cardstock:
Thick Whisper White Cardstock card base 5 ½” x 8 ½” scored at 4 ¼” (or use a white cardbase from the kit)
Mint Macaron Cardstock 1” x 11”
Here is a list of the supplies I used to make the cards:
Thick Whisper White Cardstock 140272 $8.25
Mint Macaron Cardstock 138337 $8.75
Simply Scored – Scoring Tool 122334 $30.00
Paper Trimmer 152392 $25.00
Silicon Craft Sheet 127853 $6.00
Hot Glue
Simply Shammy 147042 $8.00
Stampin’ Seal Adhesive 152813 $8.00
Multipurpose Liquid Glue 110755 $4.00
Dimensionals 104430 $4.00
Clear Block D 118485 $8.50
Paper Snips 103579 $10.00
Bone Folder 102300 $7.00
Stampin' Pierce Mat 126199 $5.00
Take Your Pick Tool 144107 $10.00
1- Begin by cutting the Mint Macaron cardbase in half end size 4 ¼” x 5 ½”. You can use the other half to make my first alternative project – check it out here: http://creativechelsey.blogspot.com/2020/08/august-2020-paper-pumpkin-alternative.html
2- Create the Paper Rosette: Use a scoring tool like the simply scored or a paper trimmer with a score blade. We want to have a score line every ¼”.TIP: to make folding easier, score the 1” strip every ½” starting a ¼”. For example: ¼”, ¾”, 1 ¼”, 1 ¾”, etc. Then flip the cardstock strip over to the other side and score in between the existing score lines. For example: ½”, 1”, 1 ½”, 2, etc.
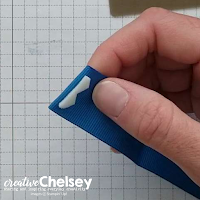
3- Fan fold down the whole strip.4- Use a strong glue to glue the ends together. Then stand the ring up on the Silicon Craft Sheet and place hot glue in the center. Bring the top of the ring together and flip the bottom out. Hold and press the center in the hot glue until cool. Add hot glue to the other side of the rosette and press on to the Silicon Craft Sheet until cool. 5- Adhere the Mint Macaron pattern piece to the front of the cardbase with liquid glue so you can move it around and match it exactly to the cardbase. Use a bone folder to smooth out the glue so you don’t get any lumps as it dries. Add the Bumblebee watercolor piece to the center of the card.6- Add the paper rosette a little higher than center with hot glue.7- Create the Ribbon Banner: cut 6” of the Pacific Point Ribbon from the kit, flag each end by folding in half and cutting from the fold to the corners. Repeat on the other side. From the edge of the dimensionals cut a ¾” x ¼” piece (you will need 4 of these). Measure 1” from the points of the banner and add 1 long dimensional. Fold the ribbon over the dimensional. Place the banner side down and add a second long dimensional over the fold, then fold the ribbon back over the second dimensional. Repeat on the other side. (see video below for help)7- Add the ribbon across the paper rosette and adhere with hot glue. To tack down the ends use glue dots.8- Stamp your greeting in Pacific Point in the center of the small circle and adhere to the center of the Gold die cut. Add to the center of the Paper Rosette with hot glue. 9- Add three gold starts to the card with glue dots in opposite corners of the card – total of 6 stars.All Done!
I have also created a video walking you through each step:
To purchase any of the products you see in this video visit
https://www.stampinup.com?demoid=2042902
Have a creative day!
Chelsey
chelsey@creativechelsey.com


No comments:
Post a Comment