It is Paper Pumpkin Week here on CreativeChelsey. This is the second video this week. Make sure to keep coming back for more.
Don't miss out on next months Paper Pumpkin Kit - subscribe today!
SUBSCRIBE to Paper Pumpkin - click here - https://www.paperpumpkin.com/en-us/sign-up/?demoid=2042902
Here are the dimensions and pieces you will need to create these cards:
Card #1 - Sled
Crumb Cake Cardstock card bases 5.5" x 8.5" scored at 4.25" | 4" x 5.25"
From the Kit:
1 Sled
1 Medium & 1 Large Snowflake
16" Green Ribbon
6" Silver Twine
1 Red Circle
1 White Large Banner
Sequins
Card #2 - Wreath of Peace
Crumb Cake Cardstock card bases 5.5" x 8.5" scored at 4.25"
Real Red Cardstock 3.25" x 3.75"
30" Linen Thread
From the Kit:
1 Sled
10 Holly leaves
5 Springs
1 White large banner
2 Red circles
1 Pool Party small banner
Silver sequins
Here is a list of the supplies I used to make the cards:
Crumb Cake Cardstock 120953 $8.75
Real Red Cardstock 102482 $8.75
Crumb Cake Ink Pad 147116 $7.50
Dark Pool Party Stampin' Blends Marker 144594 $4.50
Stamparatus 146276 $49.00
Paper Trimmer 152392 $25.00
Aqua Painter 103954 $17.00
Simply Shammy 147042 $8.00
Snail Adhesive 104332 $7.00
Multipurpose Liquid Glue 110755 $4.00
Dimensionals 104430 $4.00
Clear Block D 118485 $8.50
Paper Snips 103579 $10.00
Bone Folder 102300 $7.00
Stampin' Pierce Mat 126199 $5.00
Take Your Pick Tool 144107 $10.00
Card #1 Sled
1- Using the Stamparatus stamp the Peace stamp in Crumb Cake ink along the left edge. Start at the top. You want the stamp to come off the card just a little. Then repeat the stamp all the way from the top to the bottom, by shifting the clear plate down one hinge at a time.2- Clean and remove the stamp from the plate. Line it up between the stamped images. I placed it so the "P" lines up with the "E". Pick it up with the clear plate.
3- Stamp the image in the same way as above all the way down the left side of the cardstock. Clean the stamp and remove it to a clear block.
4- Tie a bow with the Green Ribbon around the Crumb Cake cardstock near the bottom over the 3rd peace from the bottom. I forgot this step- dang it!
5- Adhere the Crumb Cake cardstock to the card base.
6- Tie the silver thread to the sled.
7- Adhere the sled under the ribbon to the right of the card. You can do it at an angle if you would like.
8- Use your fingernail and curve the large and medium snowflakes up. Glue 1 red circle between the snowflakes. Make sure to off set the snowflakes.
9- Stamp the Peace in Shaded Spruce on the small white banner piece from the kit. Add to the card with dimensionals. Place it over the 4th Peace from the bottom.
10- Add the snowflakes above the greeting and to the right - over the sled
11- Add 3 sequins.
All done!
Card #2 Wreath of Peace
1- Use the aqua painter and crumb cake ink and splatter on the card base. see video below.2- Adhere the Real Red cardstock to the center of the card base.
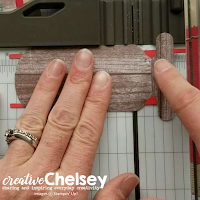
3- With the Paper Trimmer - trim off the top and bottom of one sled. It should be about 2.75" wide after trimming it.
4- To create the wreath - add snail adhesive around the edge of one red circle- I did this on the white side. Using 10 Holly leaves place them along the edge of the circle. You want the to lay at an angle and slightly covering the previous one. When adding the last one - lift the first one slightly and tuck in under.
5- Add 5 sprigs between every two holly leaves. Then add the 2nd red circle, white side up, with dimensionals in the center of the wreath of leaves.
6- Add the wreath to the sled wood paper in the center with dimensionals
7- With the Dark Pool Party Stampin Blend marker color the large white banner.
8- Cut the banner in half.
9- Add each half of the banner to both short sides of the wood / wreath element.
10- Add 30" of linen thread to the back of this element. Wrap it back and forth.
11- Add to the center of your card with dimensionals.
12- In Shaded Spruce - stamp Peace on the small Pool Party banner and add it to the center of the wreath with dimensionals.
13- Add sequins
All done!
I have also made a video walking you through each step. I hope you have enjoyed this tutorial.
To purchase any of the products you see in this video visit
https://www.stampinup.com/ECWeb/default.aspx?culture=en-us&dbwsdemoid=2042902
Have a creative day!
Chelsey


No comments:
Post a Comment